M1245 – Special Forces M-ATV
How to convert an M-ATV M1240, 1/35 scale,
into an M-ATV M1245 Special Forces variant,
using Priamide Models 3D printed parts
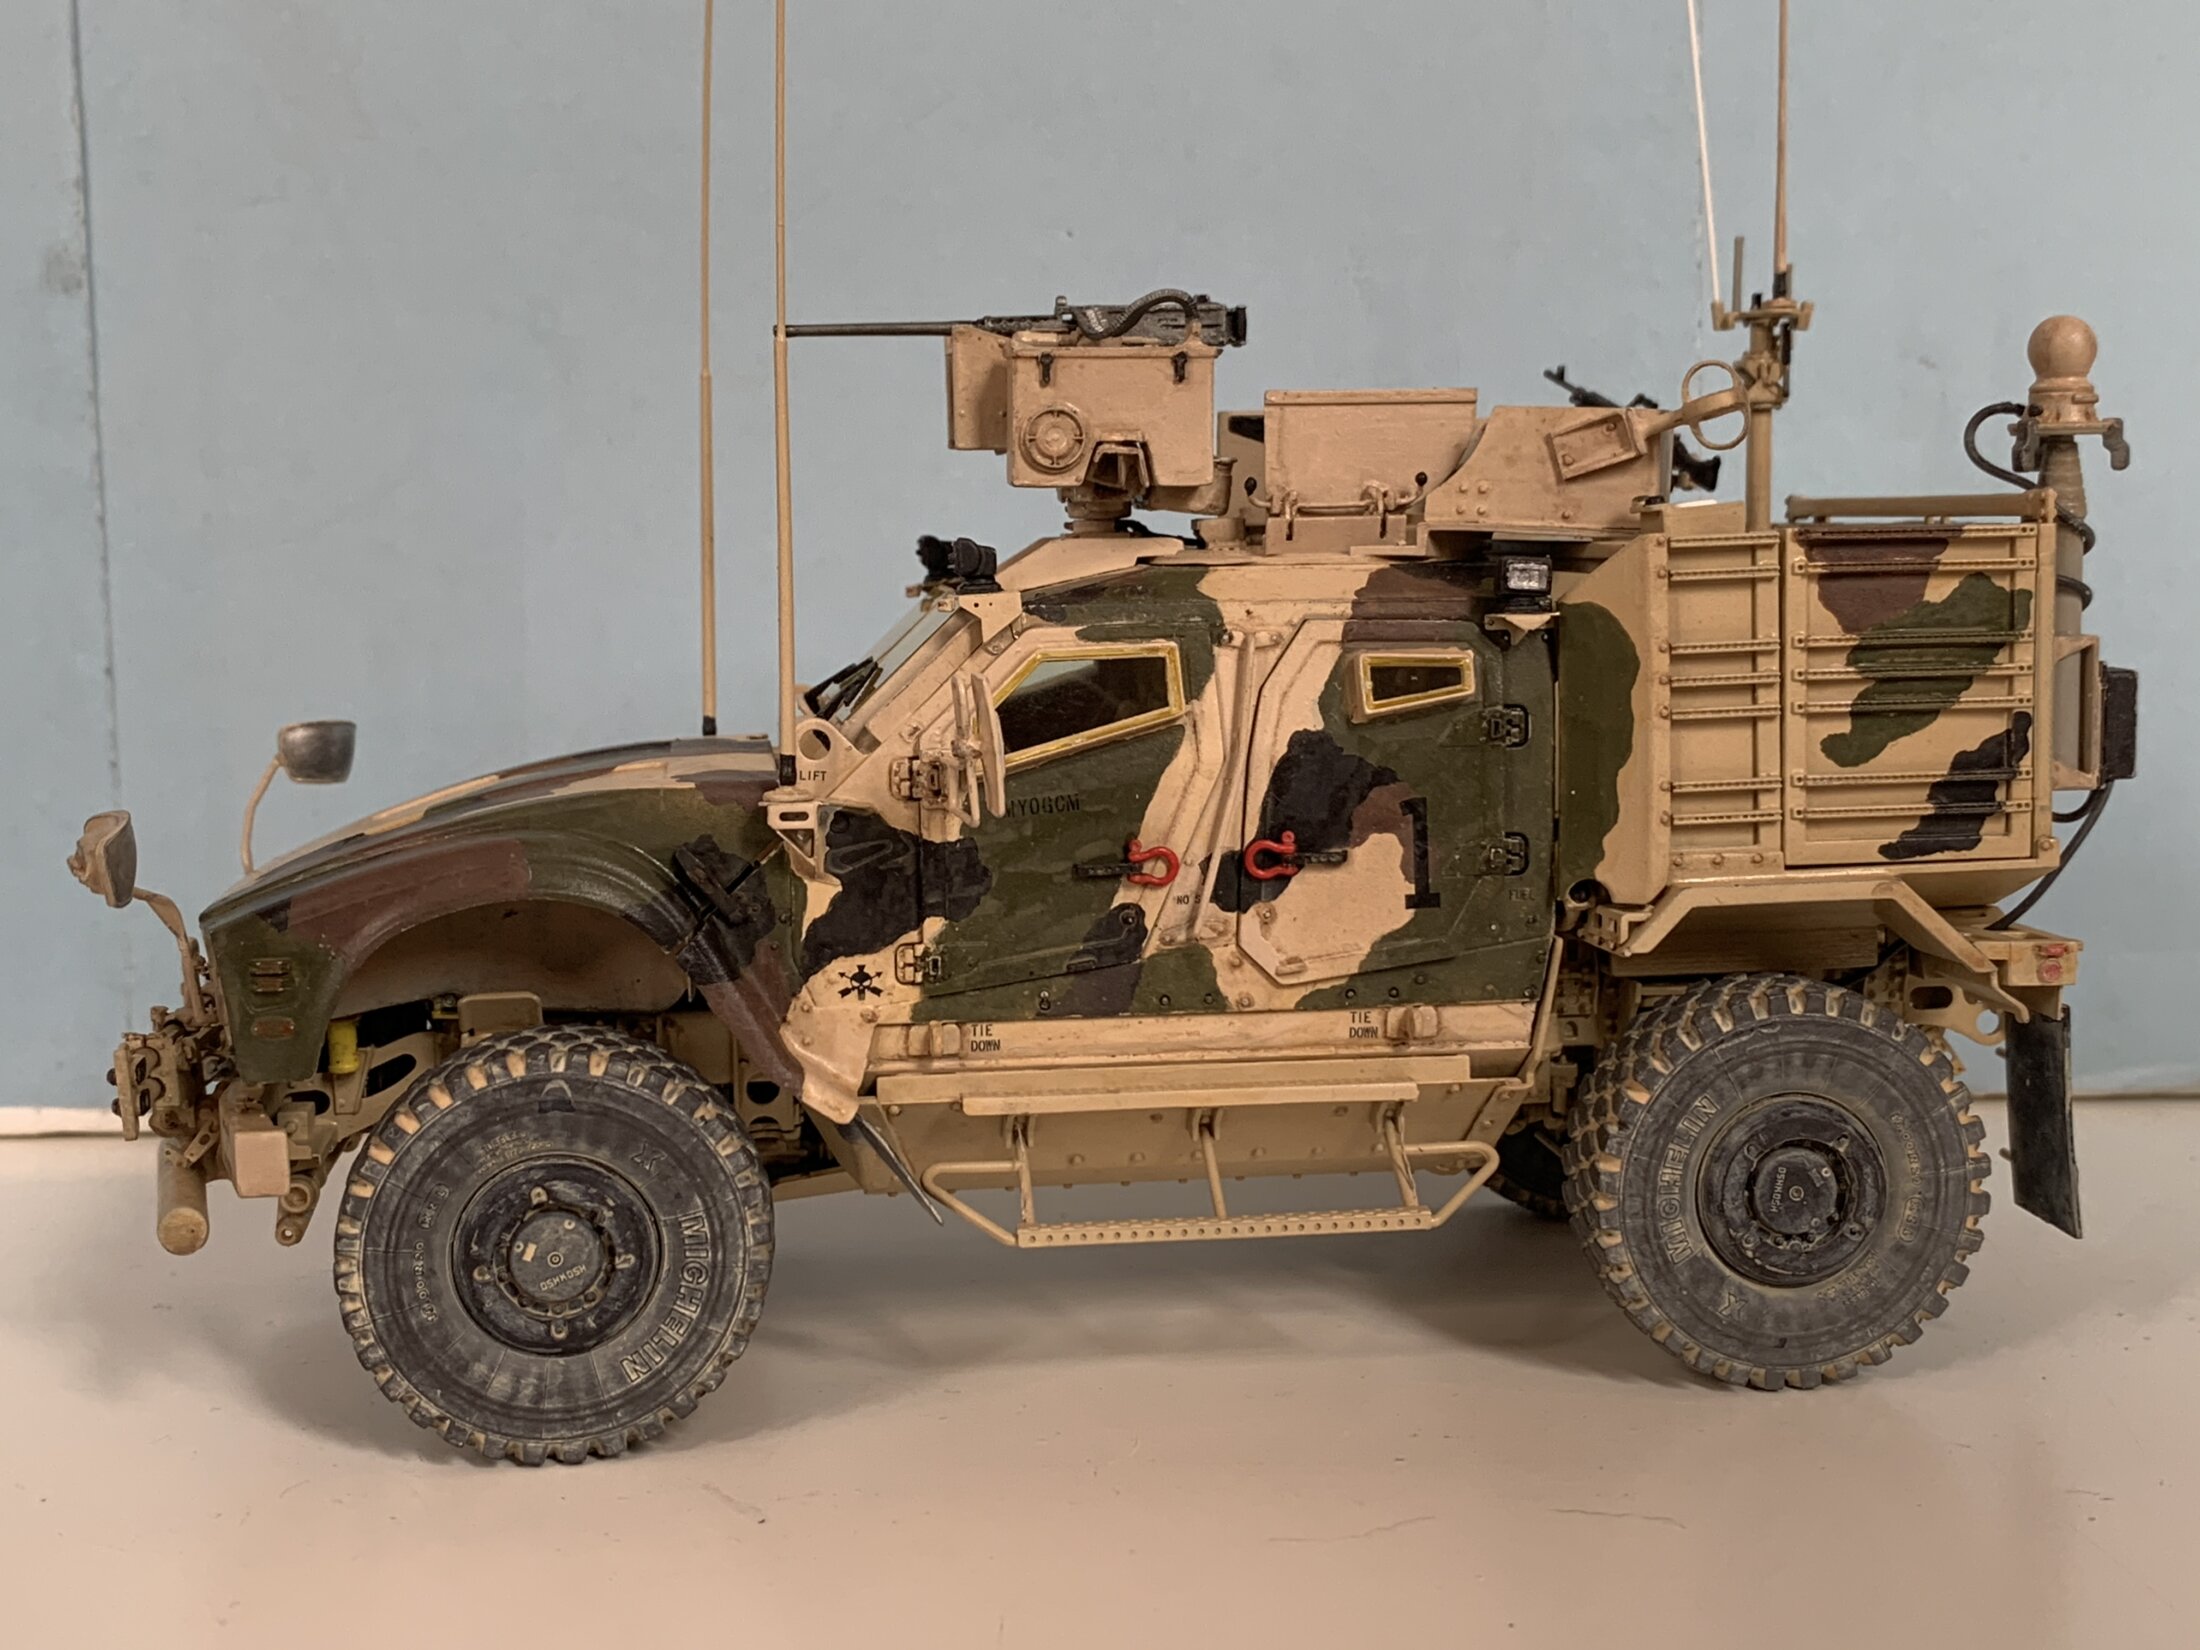
M1245 is the Special Forces variant of the M-ATV, a Mine Resistant Ambush Protected (MRAP) vehicle developed by Oshkosh Corporation.
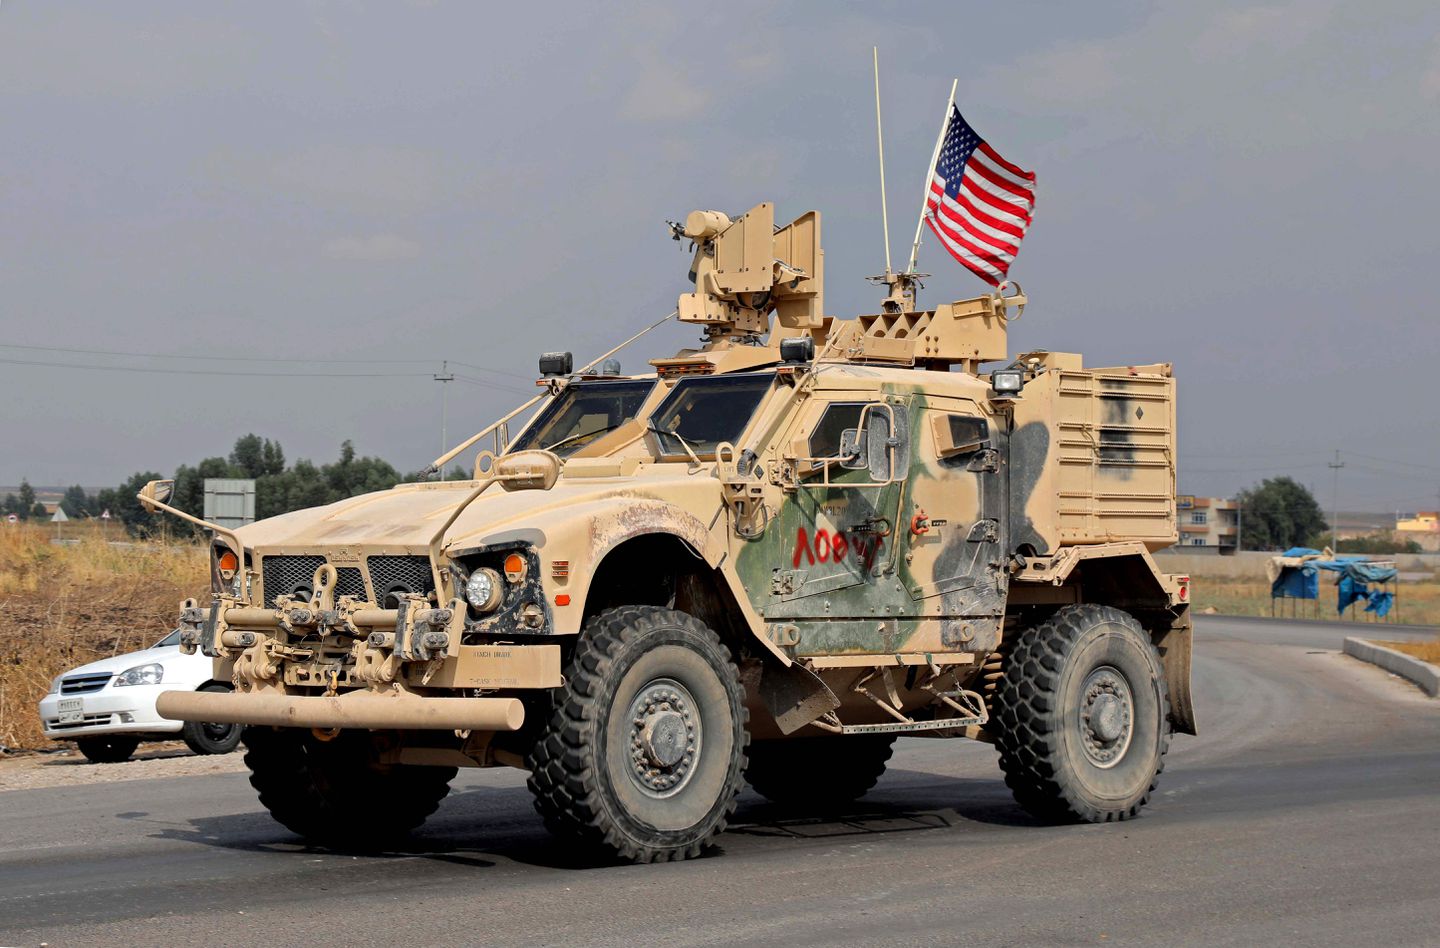
There is no M1245 scale model kit available, therefore, to build a model like the vehicle in the side picture, I had to plan for a very challenging conversion project.
As usual for any project I tried to get as much references as possible.
I searched the Internet for pictures and videos finding enough of the exterior but very little of the interior.
In addition, I obtained very useful pictures with close-up views of the vehicle by “18bravo“, a valued member of the KitMaker community.
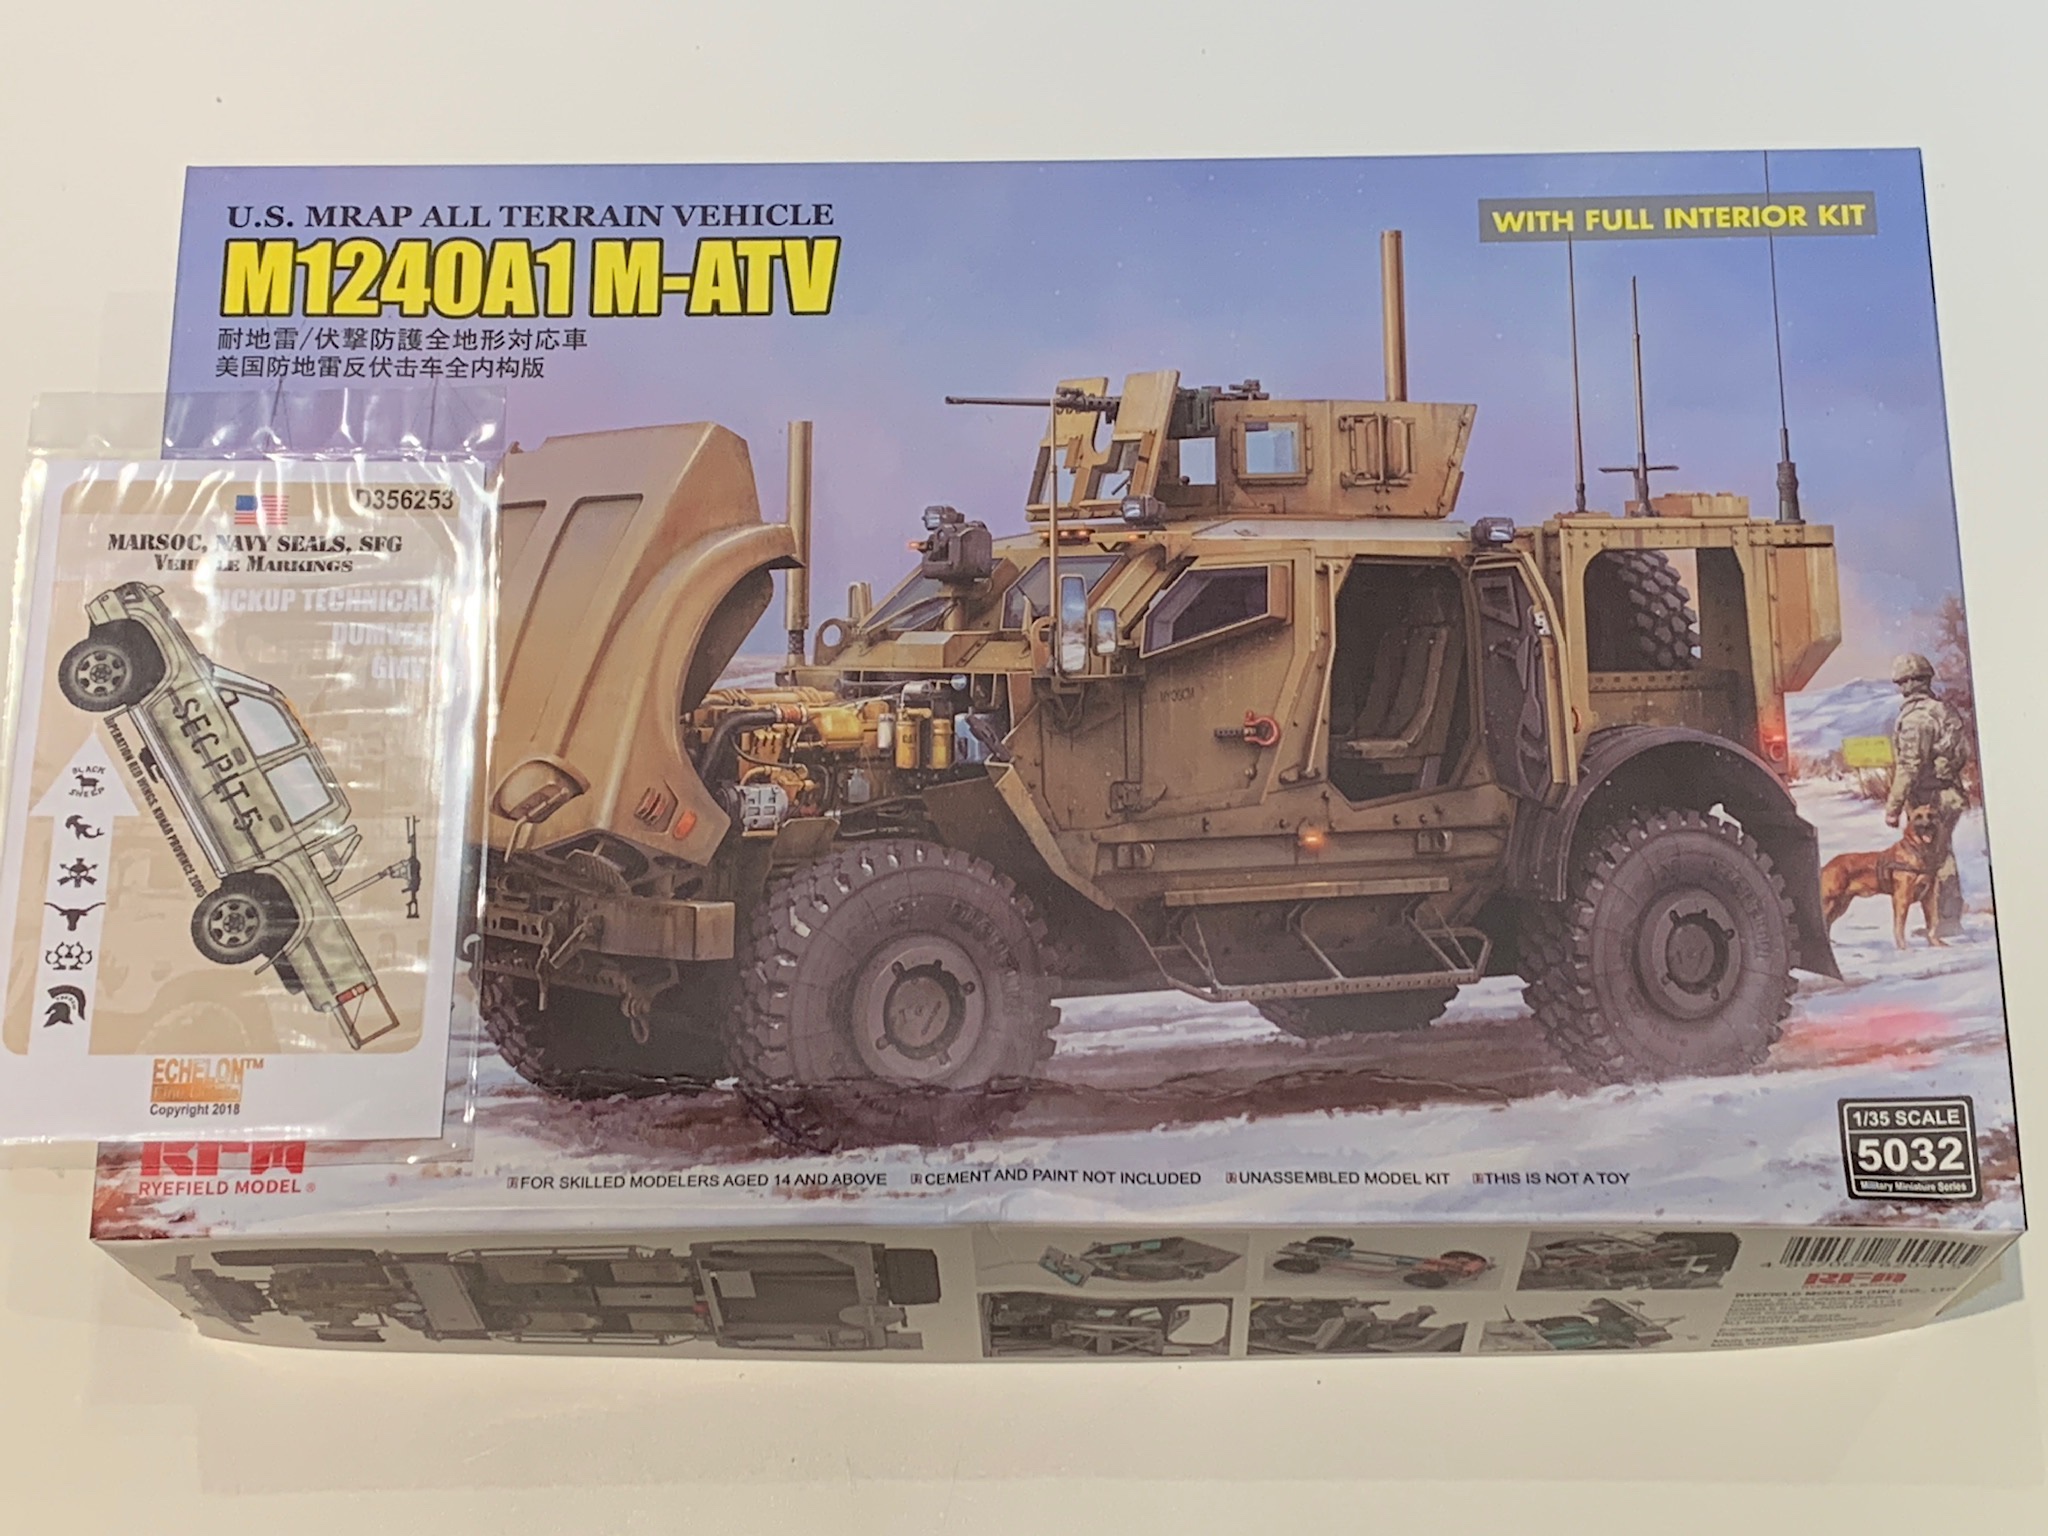
My conversion project started from a RyeField M1240A1 M-ATV model kit. This model is very well done, with good casting and nice details, pieces fit smoothly and it inludes a beautiful engine.
I have also purchased the Echelon decal set “Marsoc, Navy Seals, SFG vehicle Markings”.
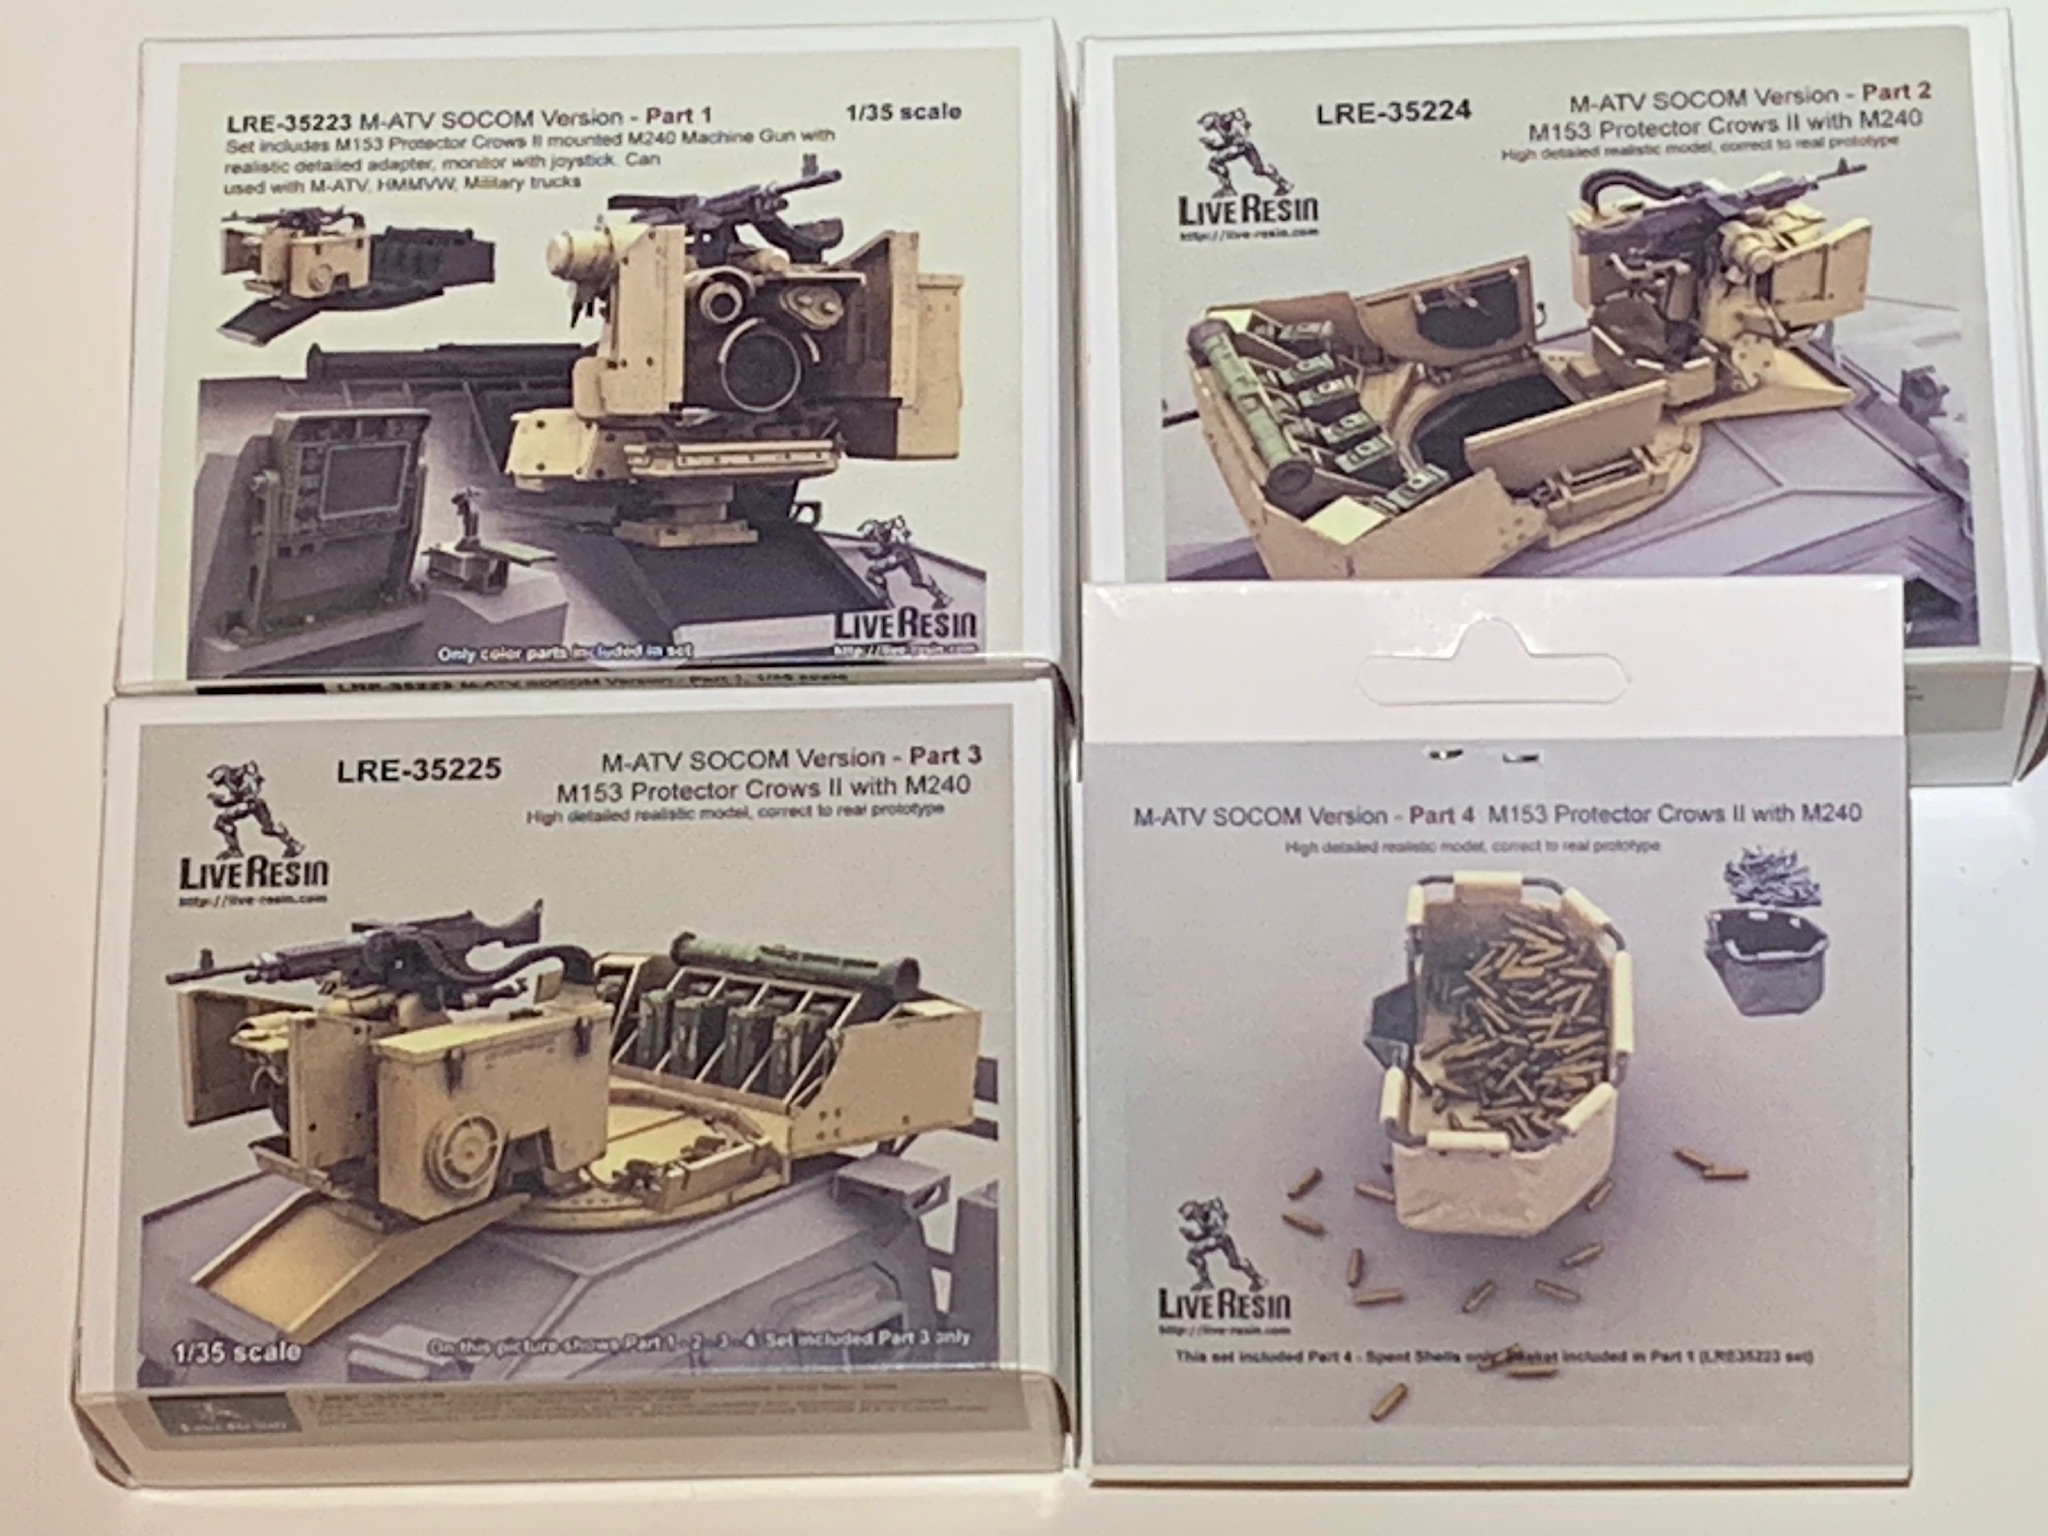
I replaced the RyeField turret and gun, not suitable for an M1245, with the “M153 Protector Crows II with M240″ by Live Resin, four kits that replicate the M1245 turrett if not for M240 machine gun that I replaced with an M2.
Scratch designed and built conversion parts
There are many differences in an M1245 from an M1240: front bumper, windshield glass frames, cargo bay base, rear fenders, rear bumper, cargo bay walls and spare tire support, just to name the most important and visible.
To address these differences I left the modelling workbench and used my 3D drawing software to create the parts I needed and then to get them printed by Shapeways.
I also 3D designed these accessories:
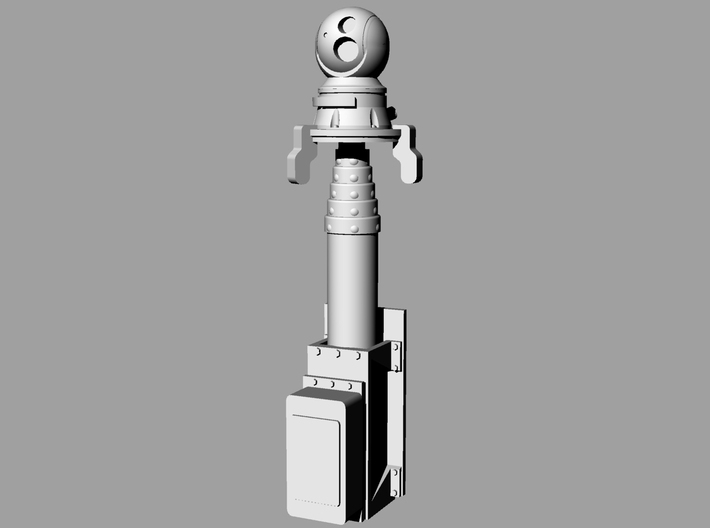
- the TAC FLIR unit, often present in these vehicles
- the WUNDERBAR, an articulating tow bar that I saw installed in most recent pictures of SOCOM M-ATVs
I then combined the parts I created into the following conversion sets that are now available for purchase in my Priamide Models shop page at Shapeways:
- M1245 SOCOM M-ATV conversion set – front
- M1245 SOCOM M-ATV conversion set – cargo base
- M1245 SOCOM M-ATV conversion set – cargo walls
- M1245 SOCOM M-ATV conversion set – miscellanea
There was also some scratch building with styrene, for example the cabinets for the radio equipments in the cargo bay and cabin interiors.
Important to note is that M1245 interiors are very different from the M1240, main differences being: 5 seats instead of 4 and a door from the cabin to the cargo bay.
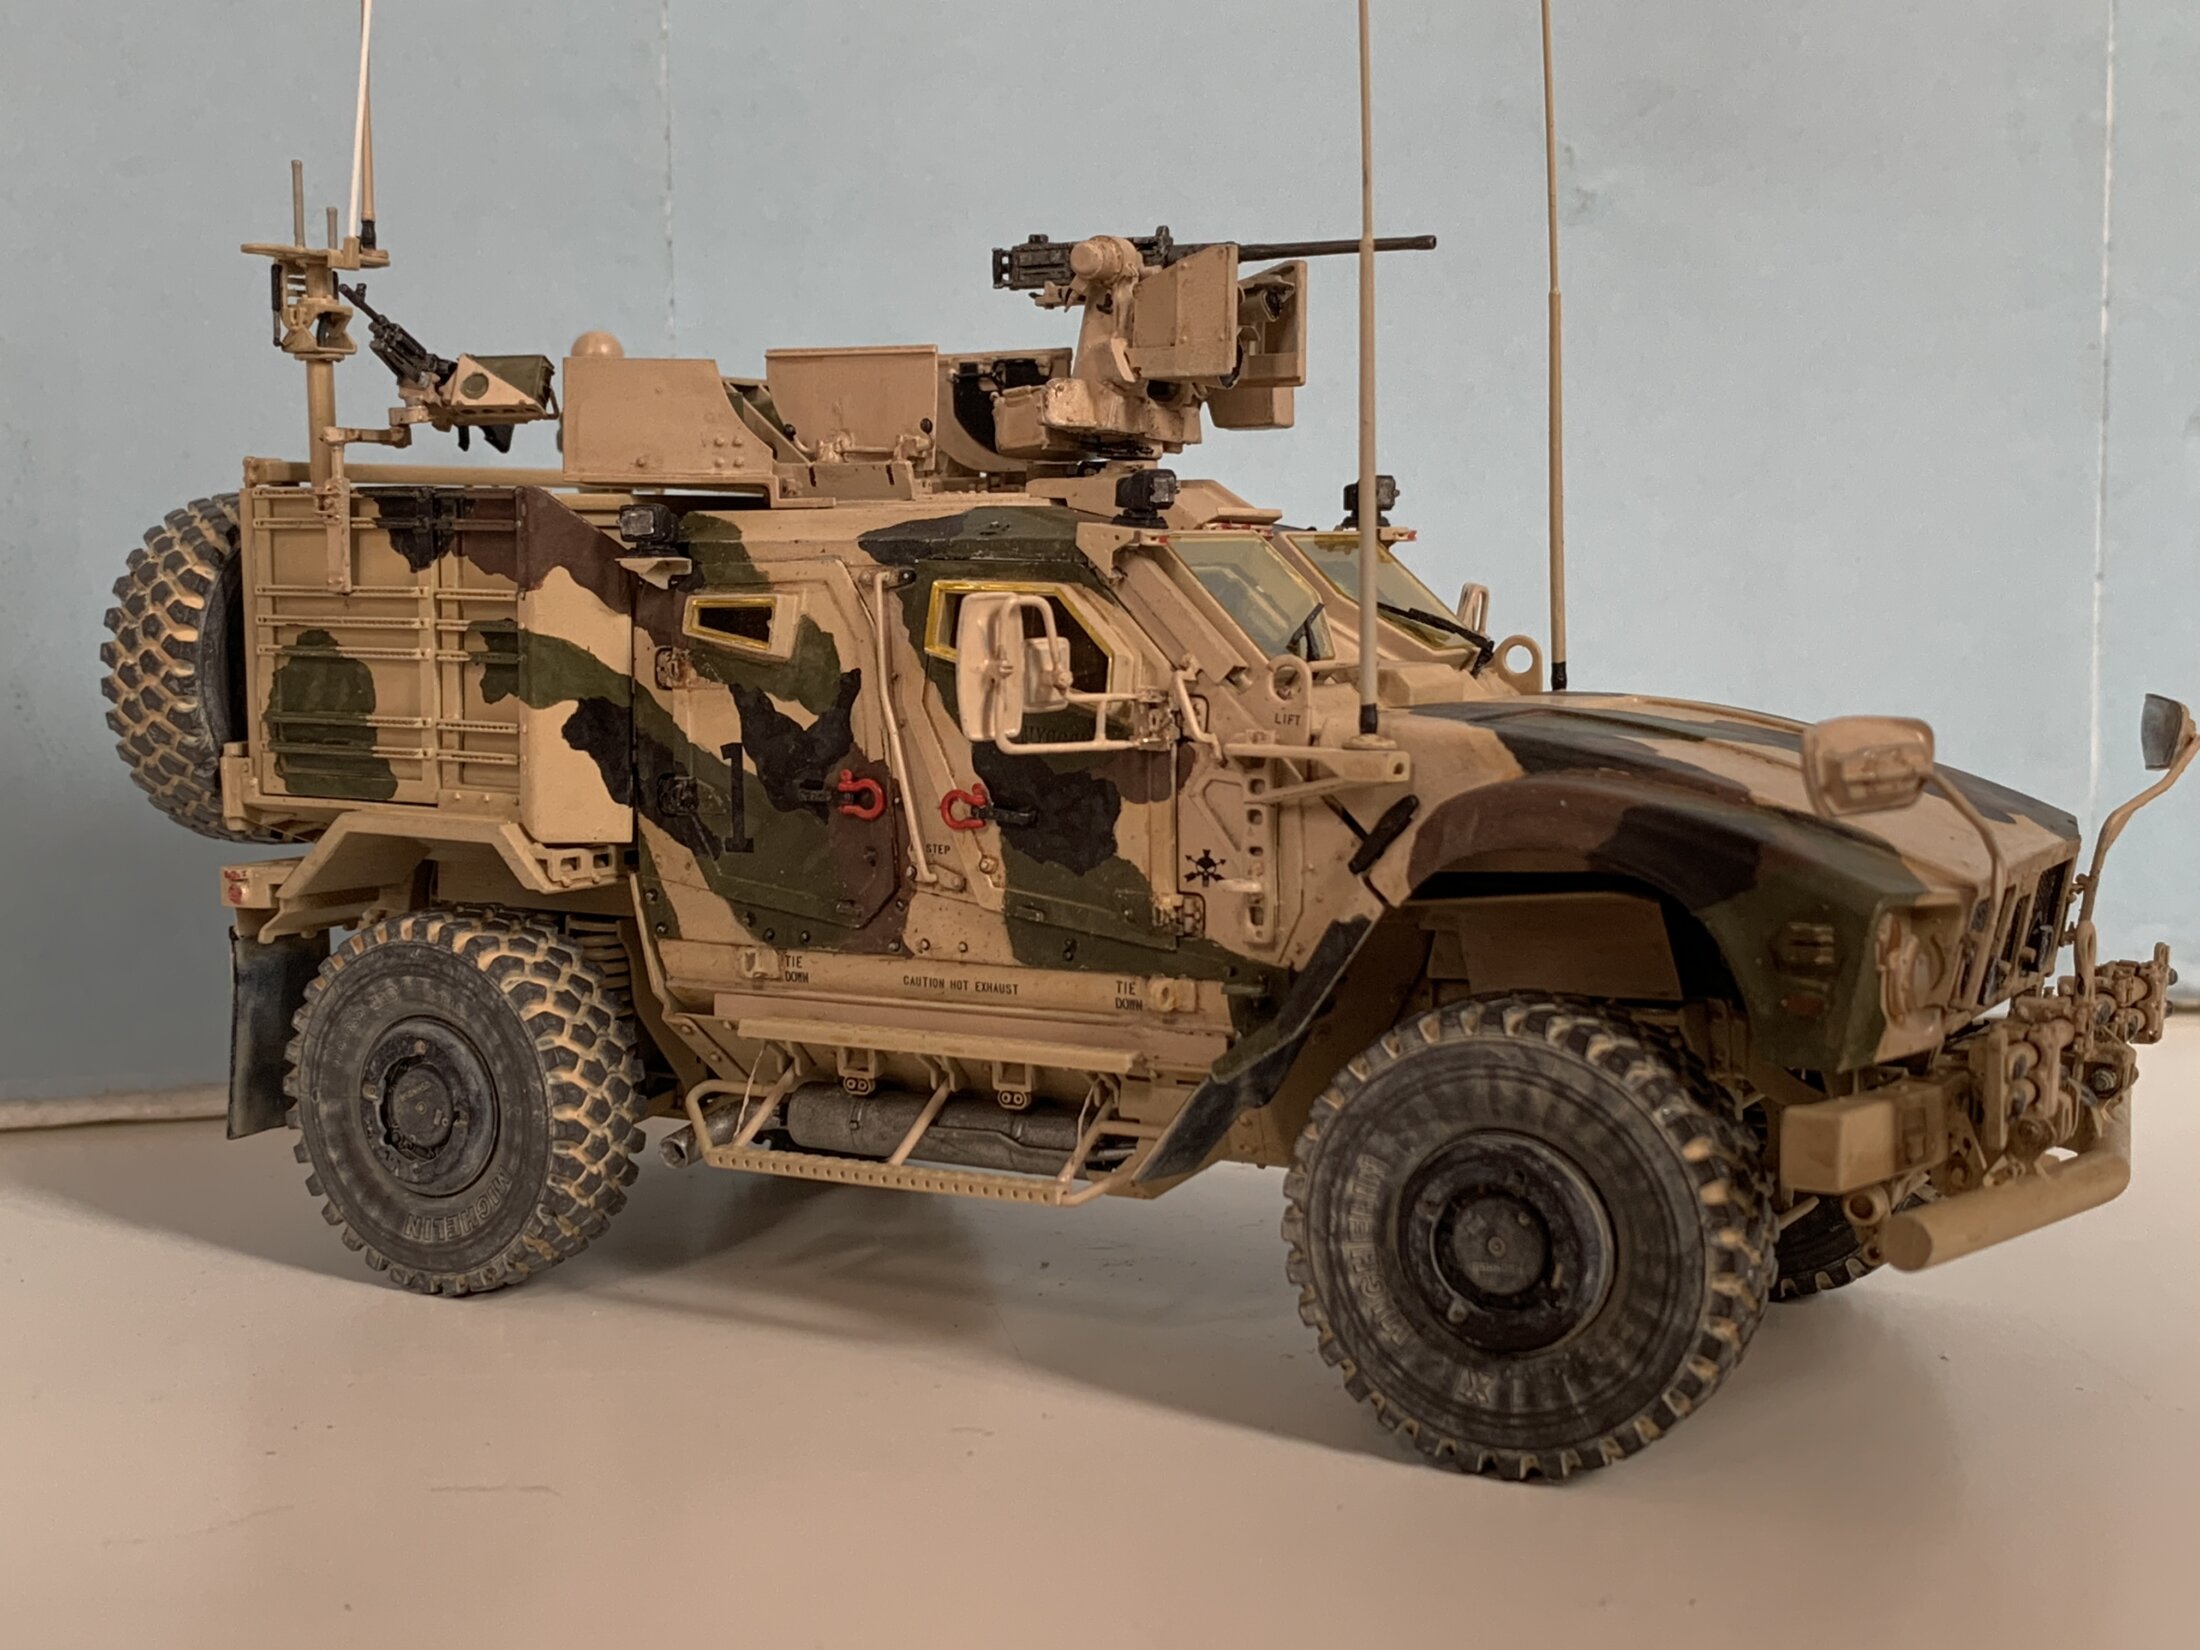
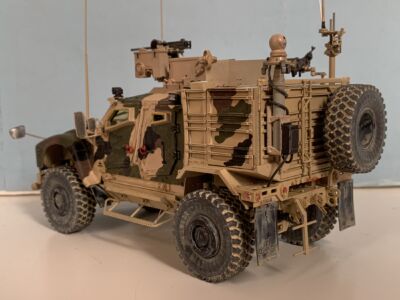
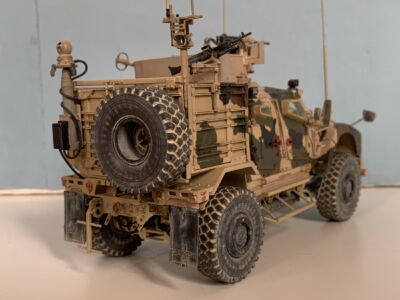
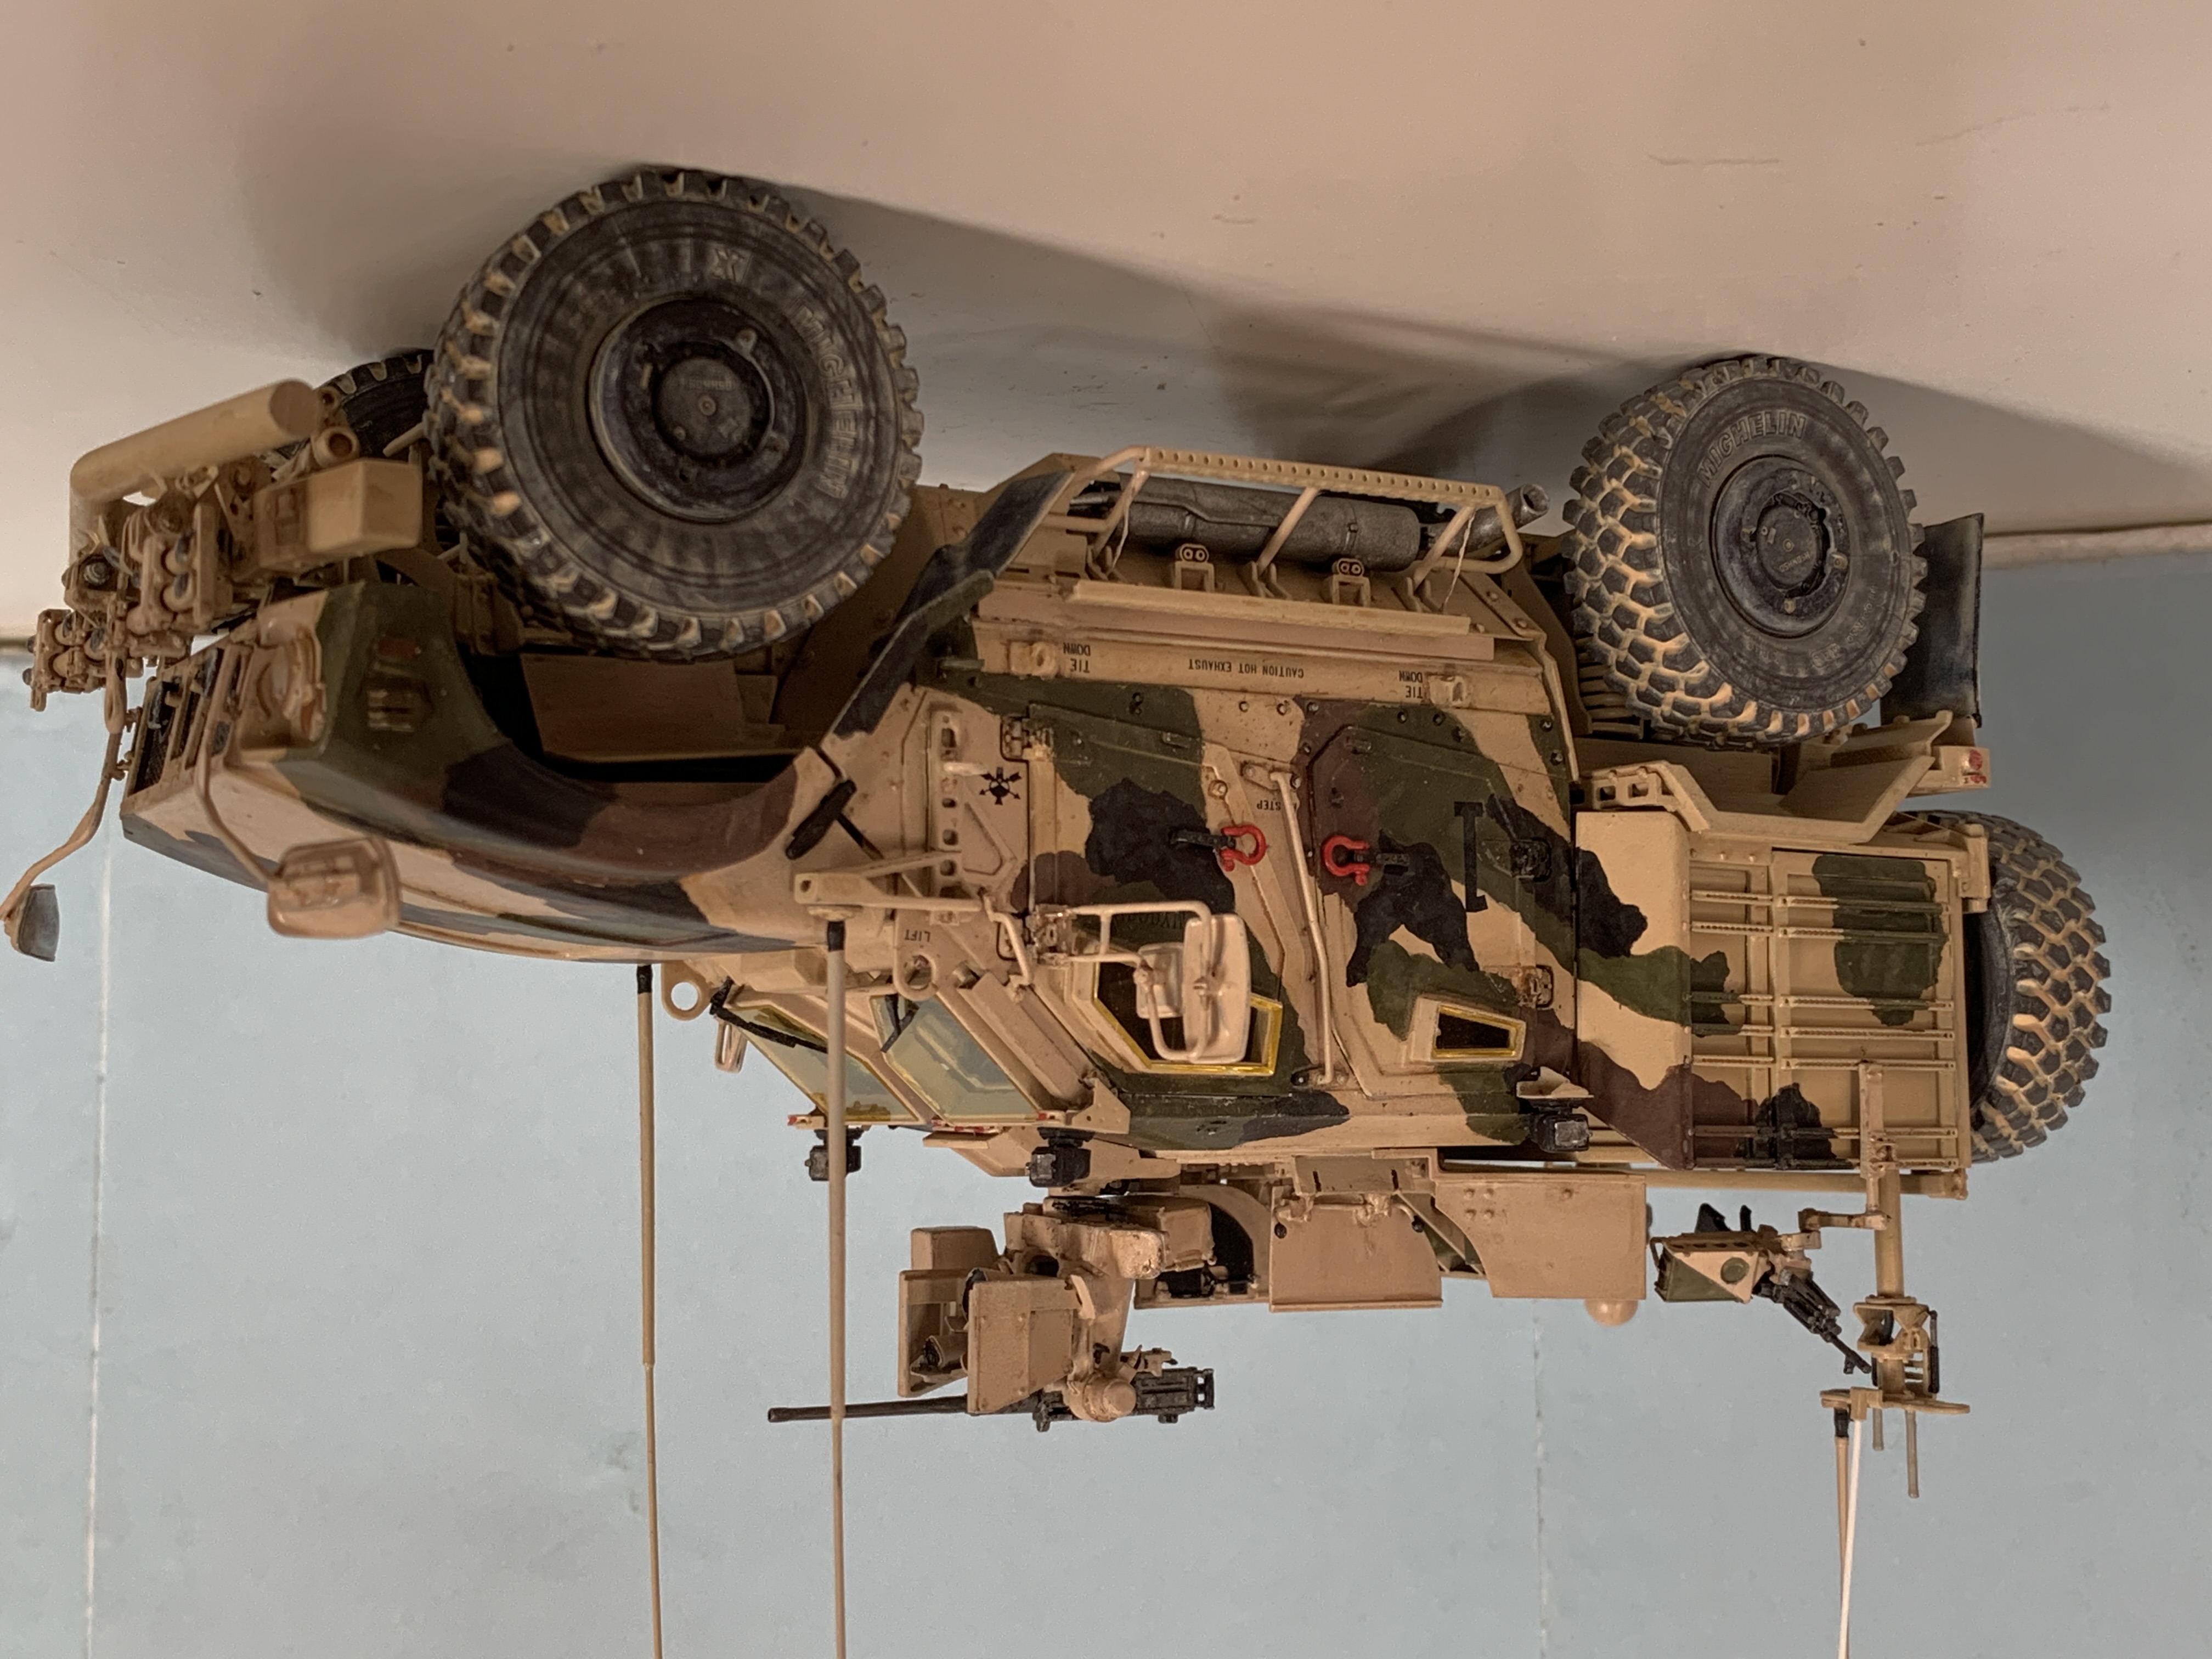
I start with pictures of the completed model, then I go into details of the conversion steps.


History of Construction
In the following, a few highlights of the construction steps of this M245 M-ATV.
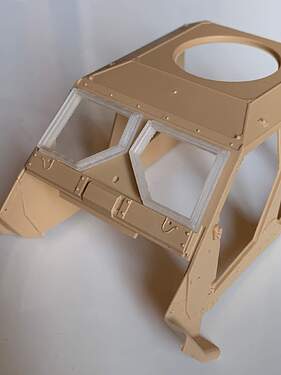
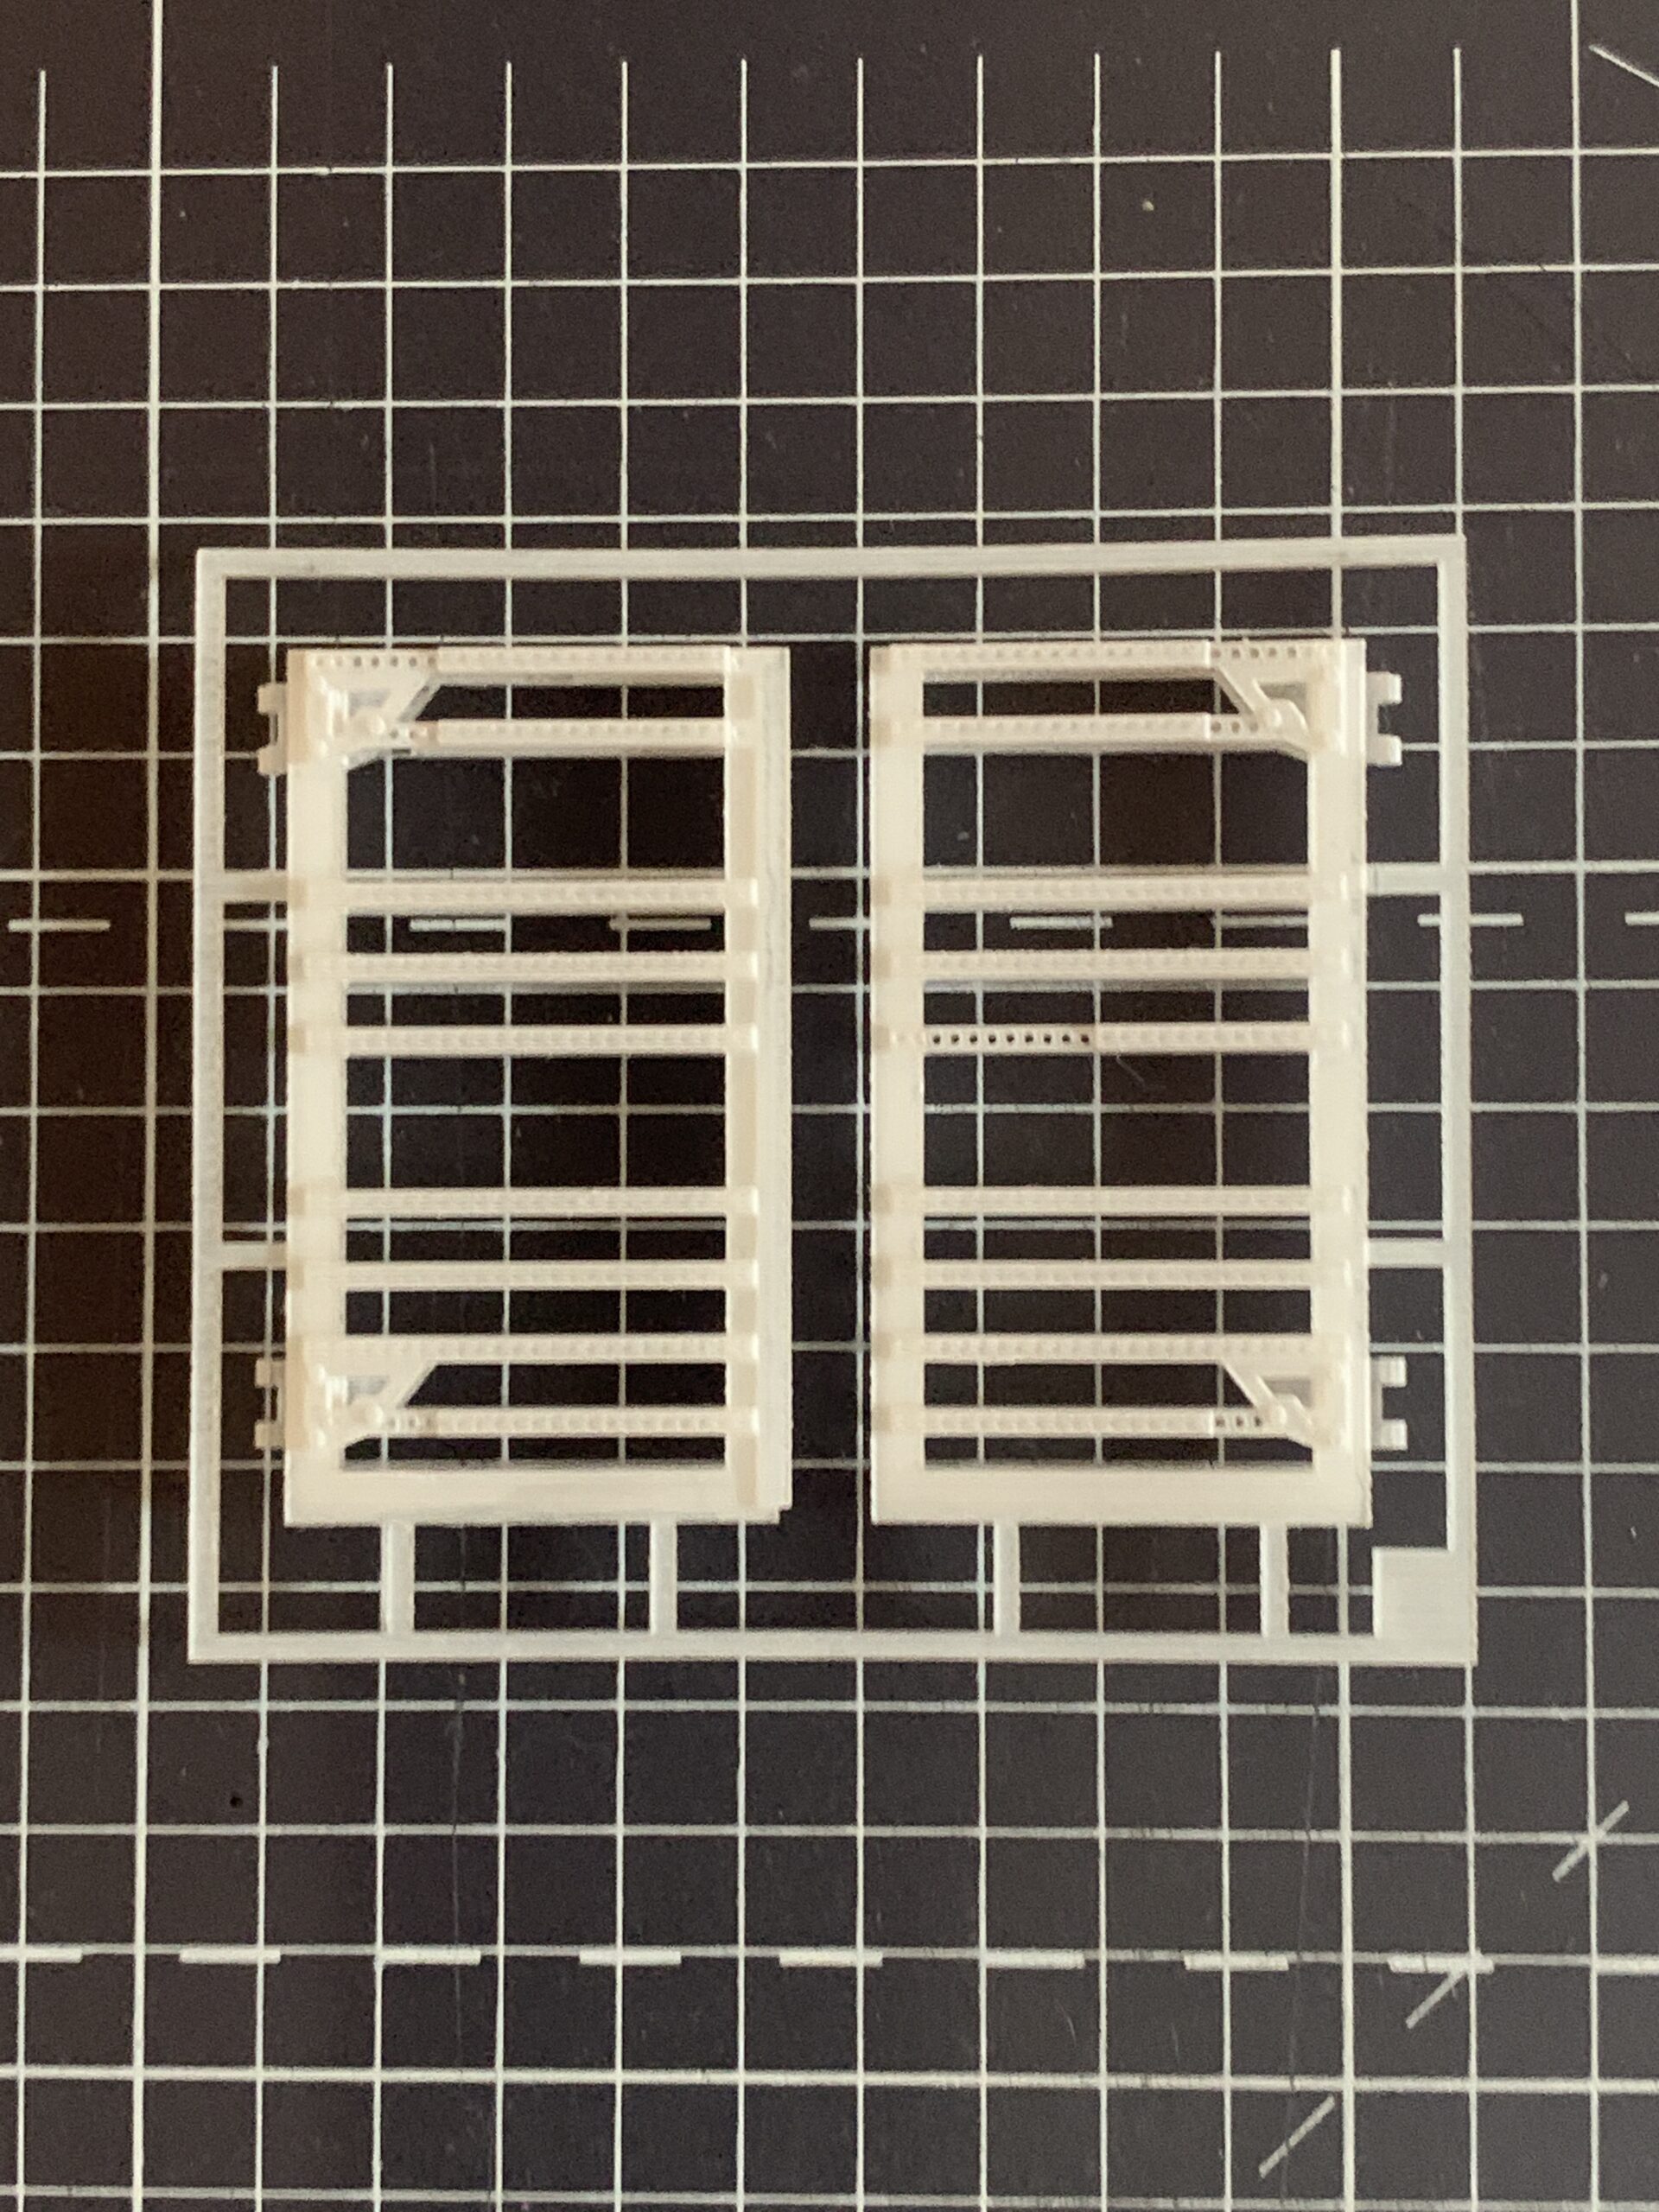
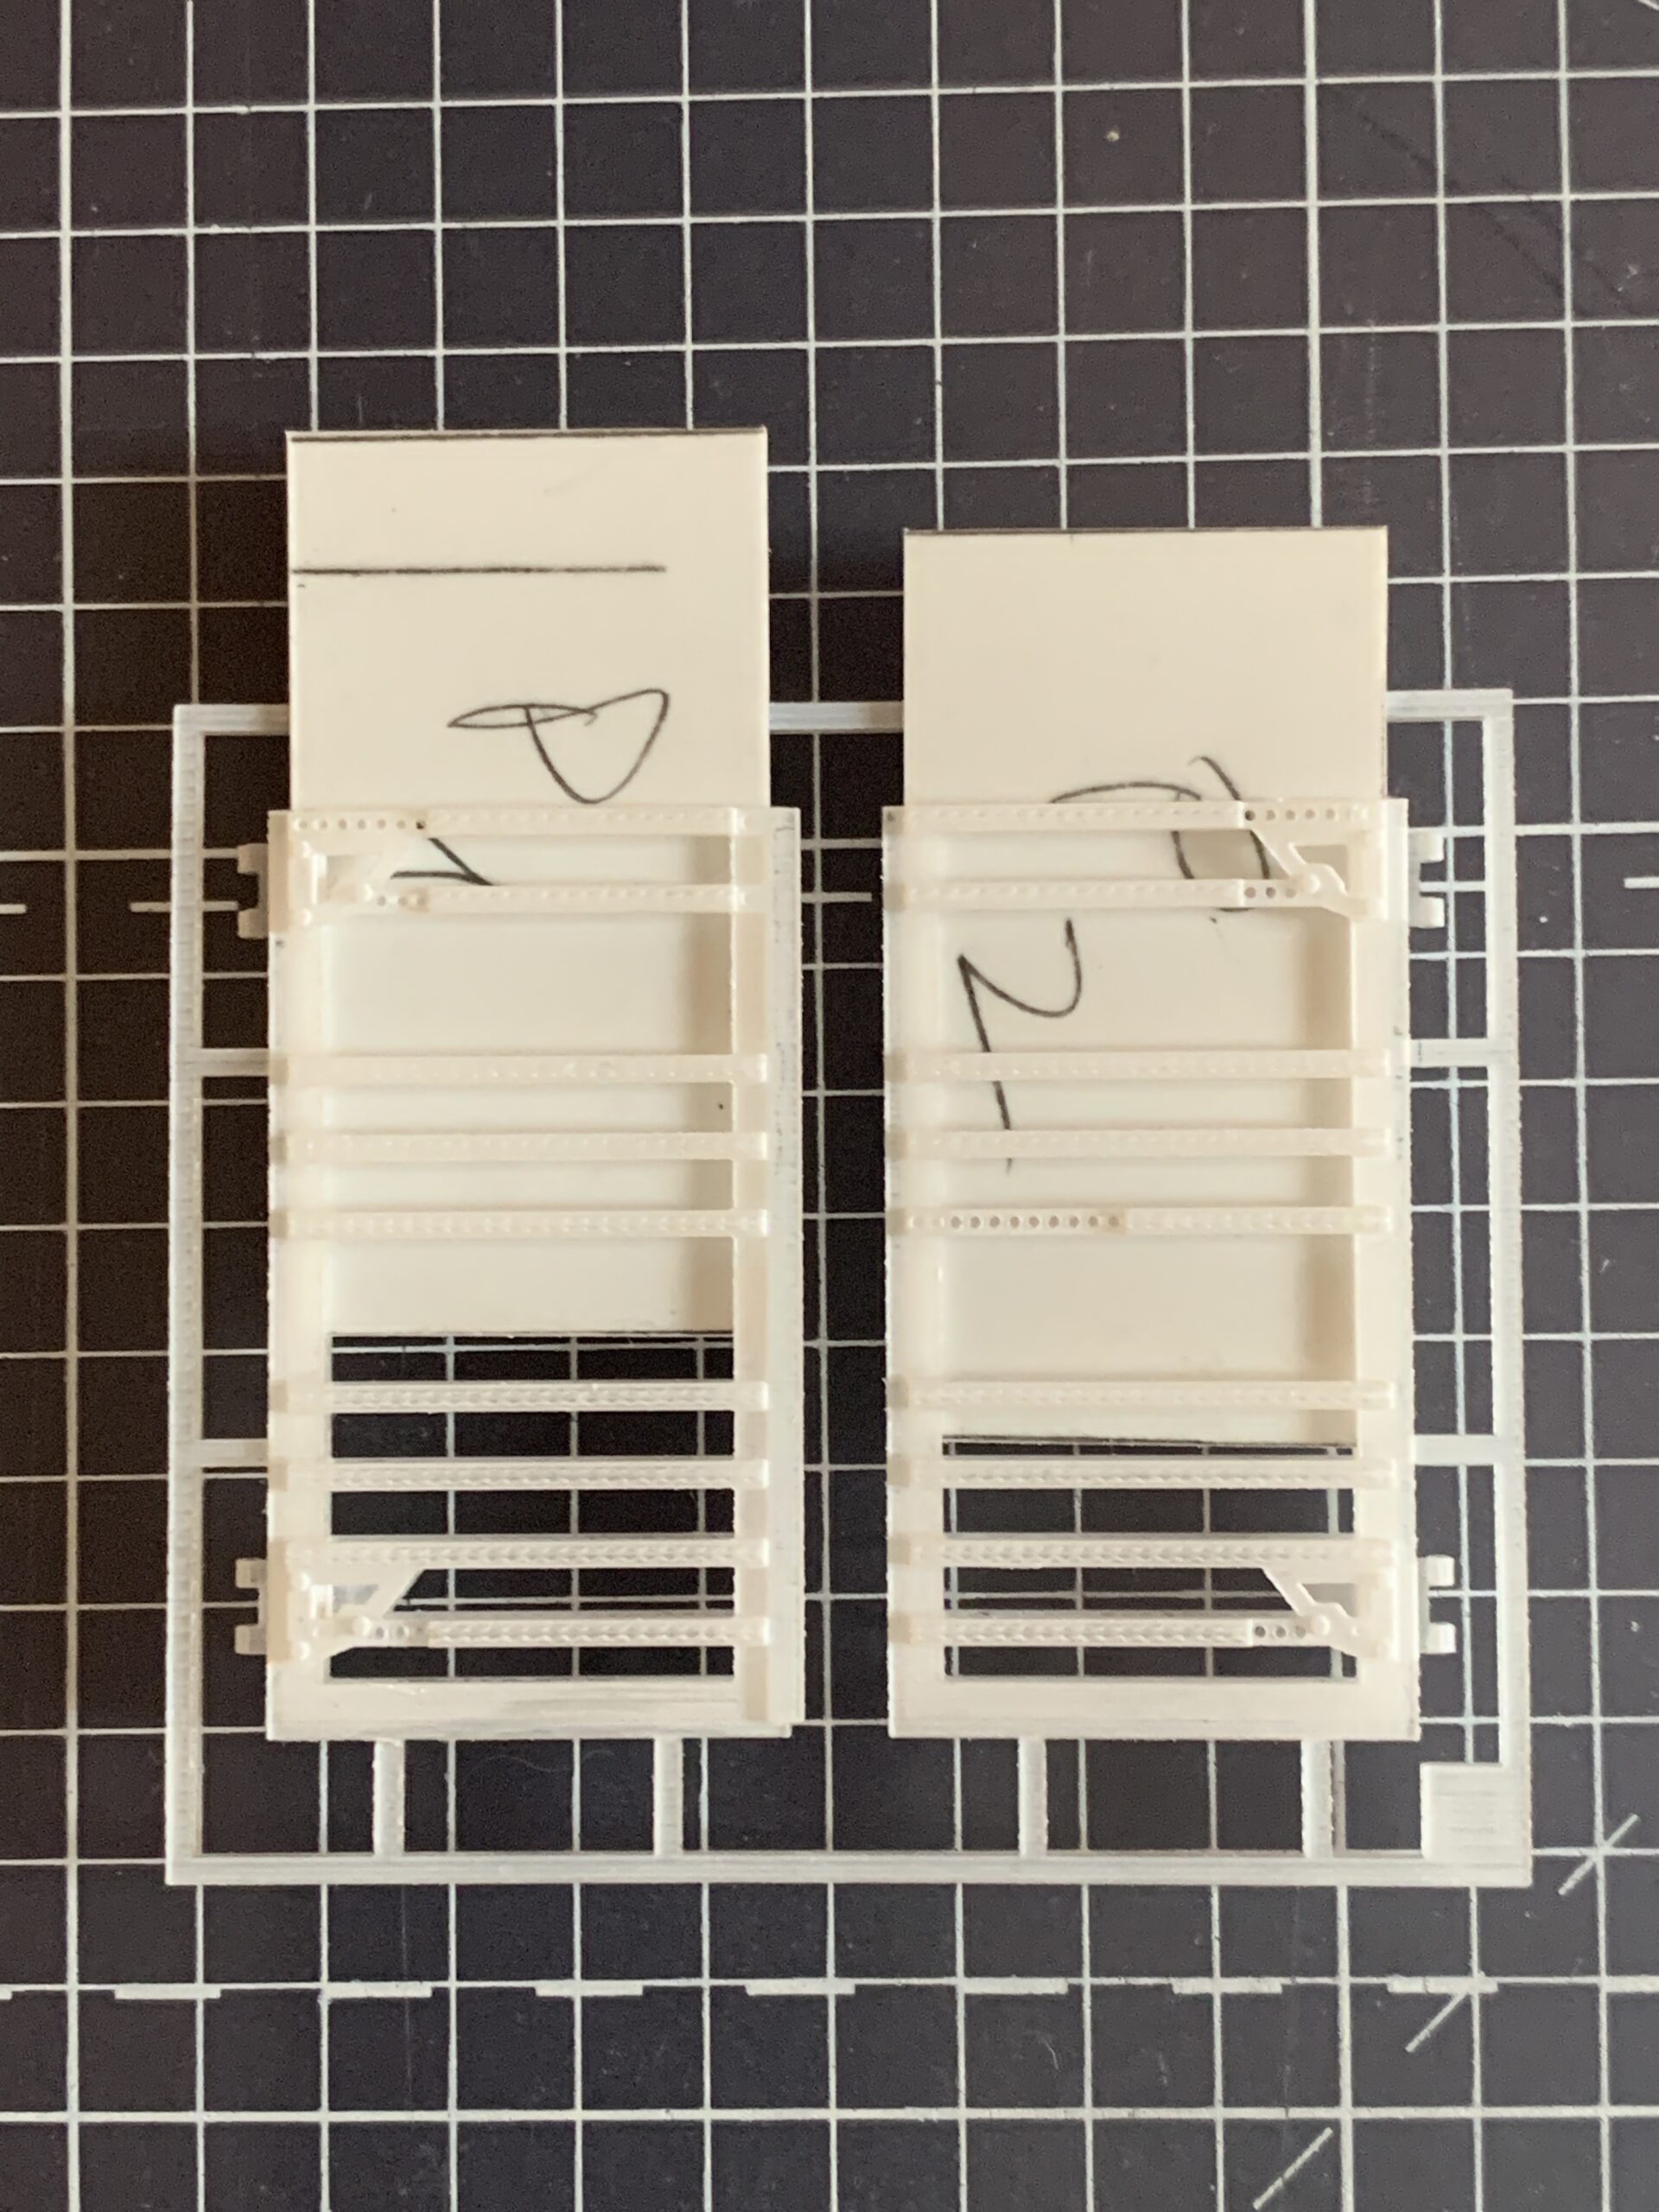
Windshield
In M1245 windshield glasses are larger than in M1240.
In the photo below you can see the difference after I carved the windshield (on the right in the photo) to accommodate the larger glass.
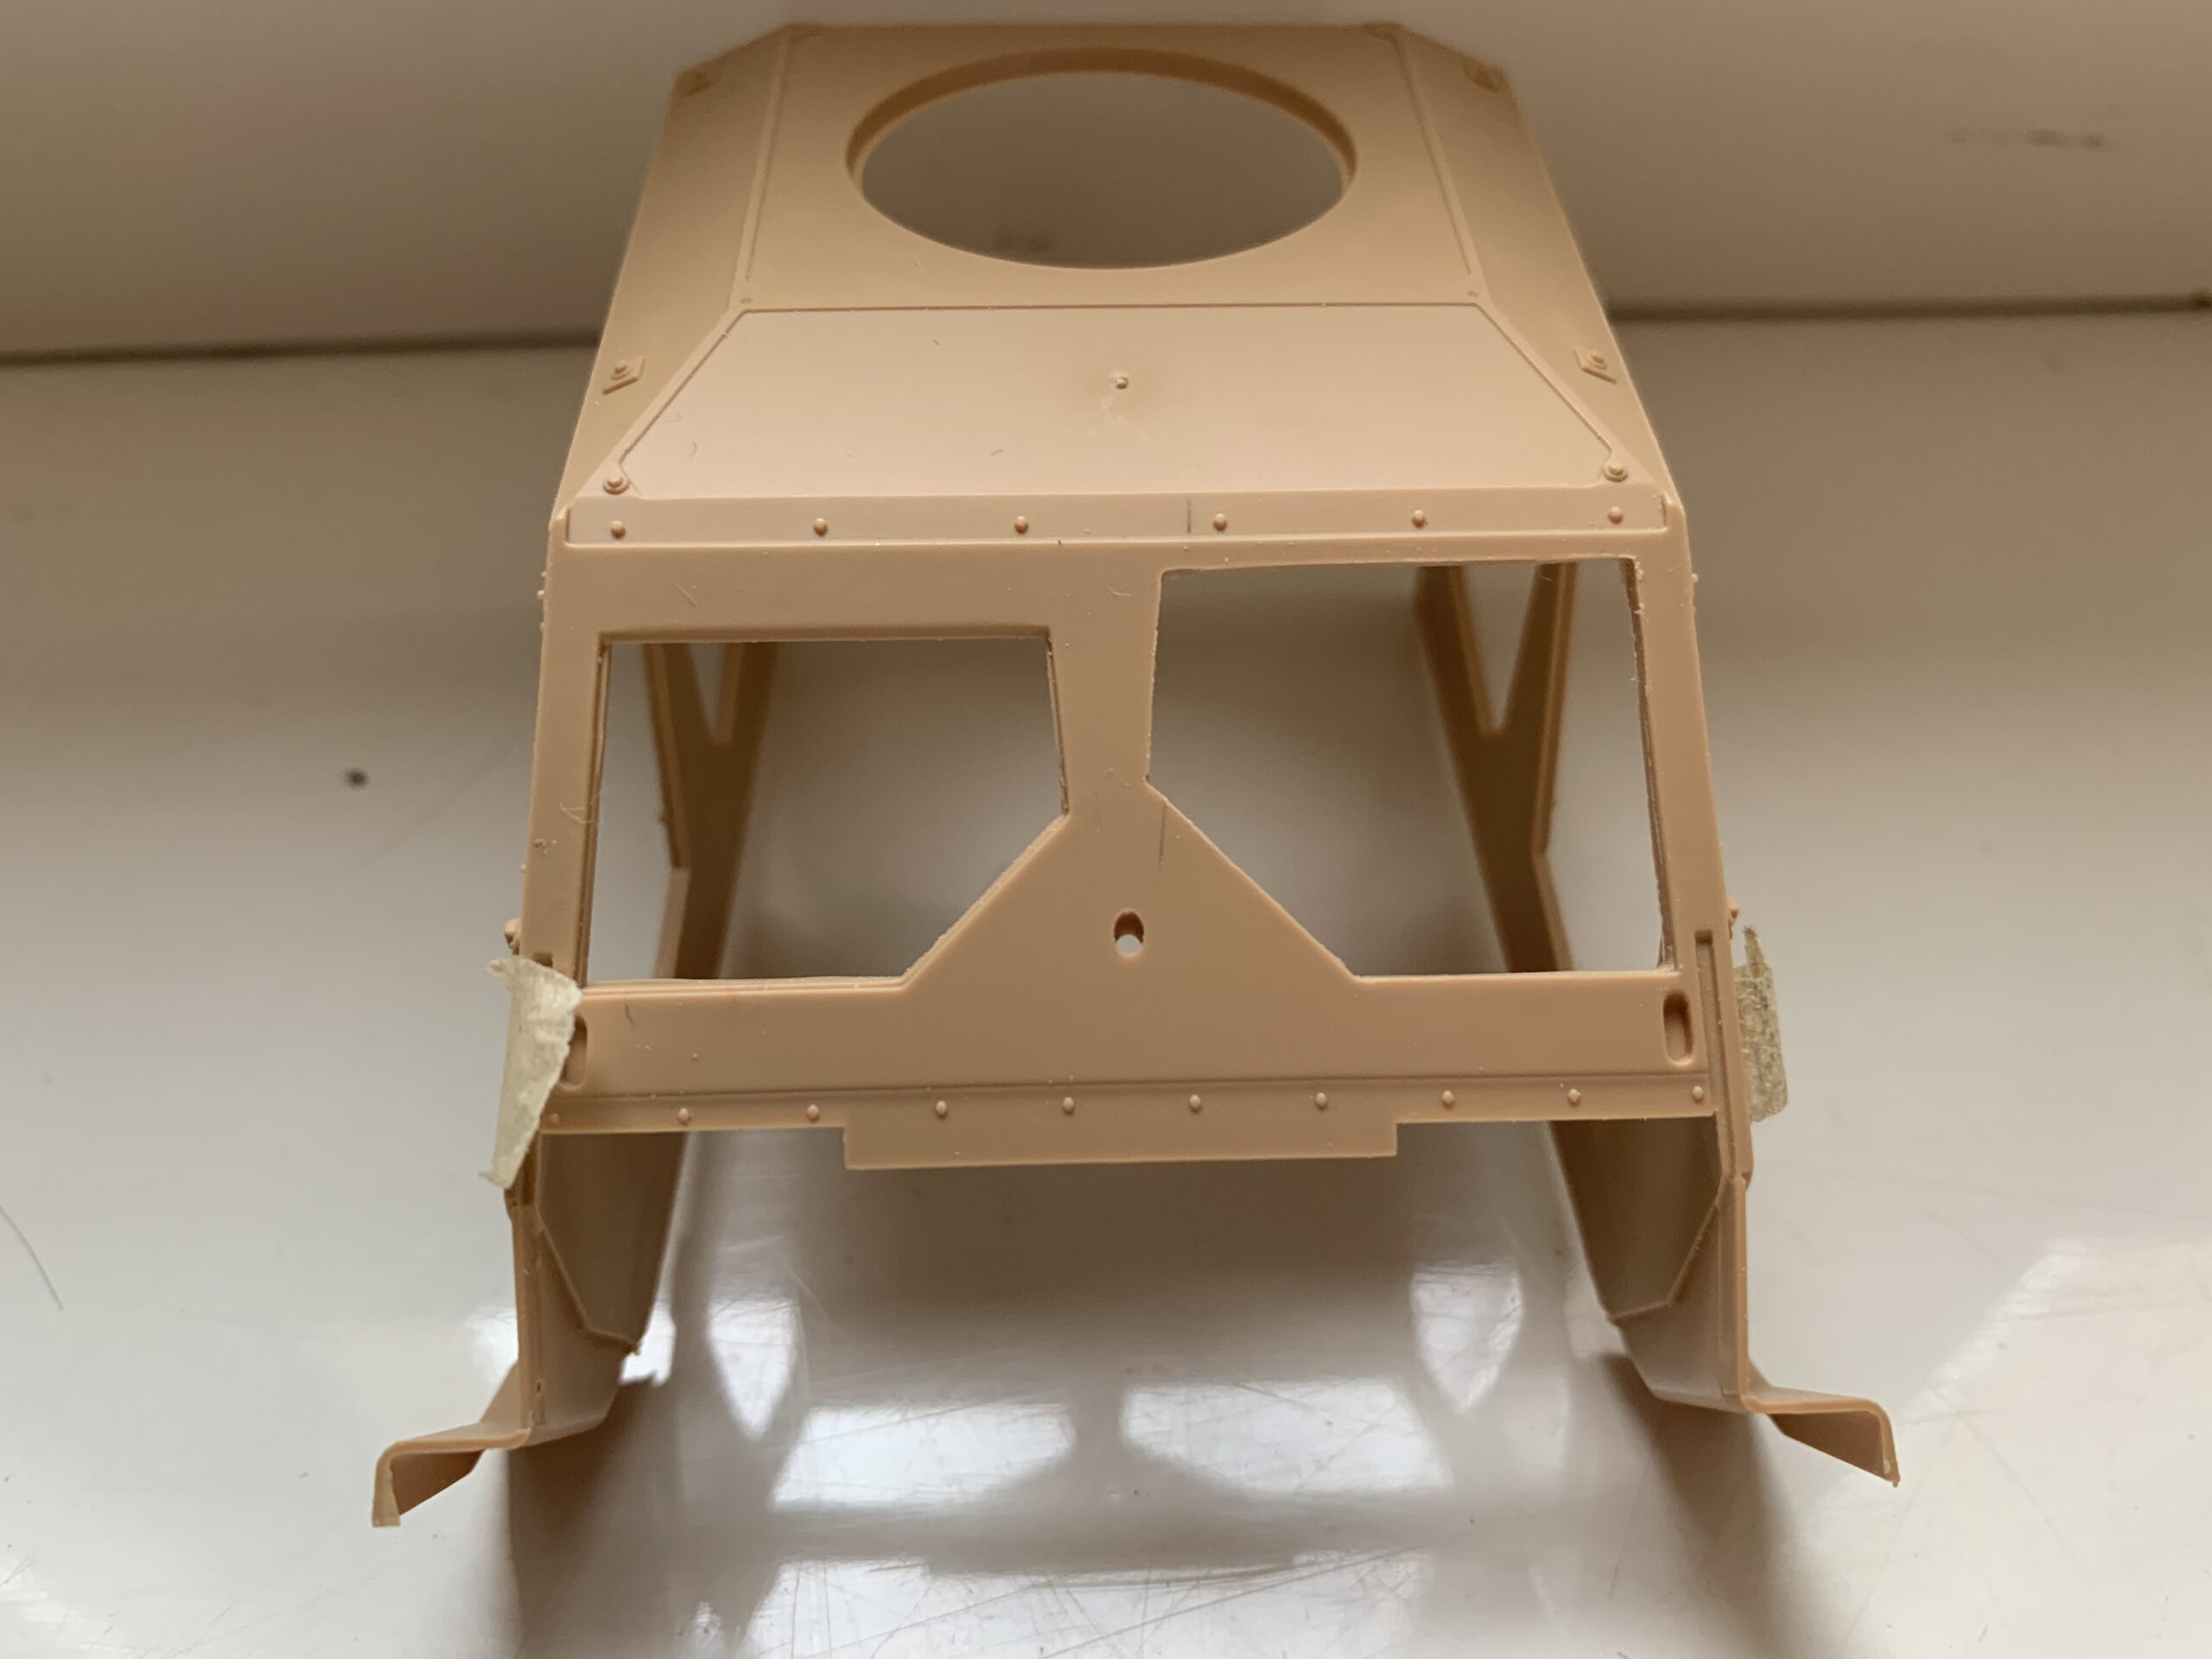
I then mounted on the cabin the 3D printed new glass frames that I designed.

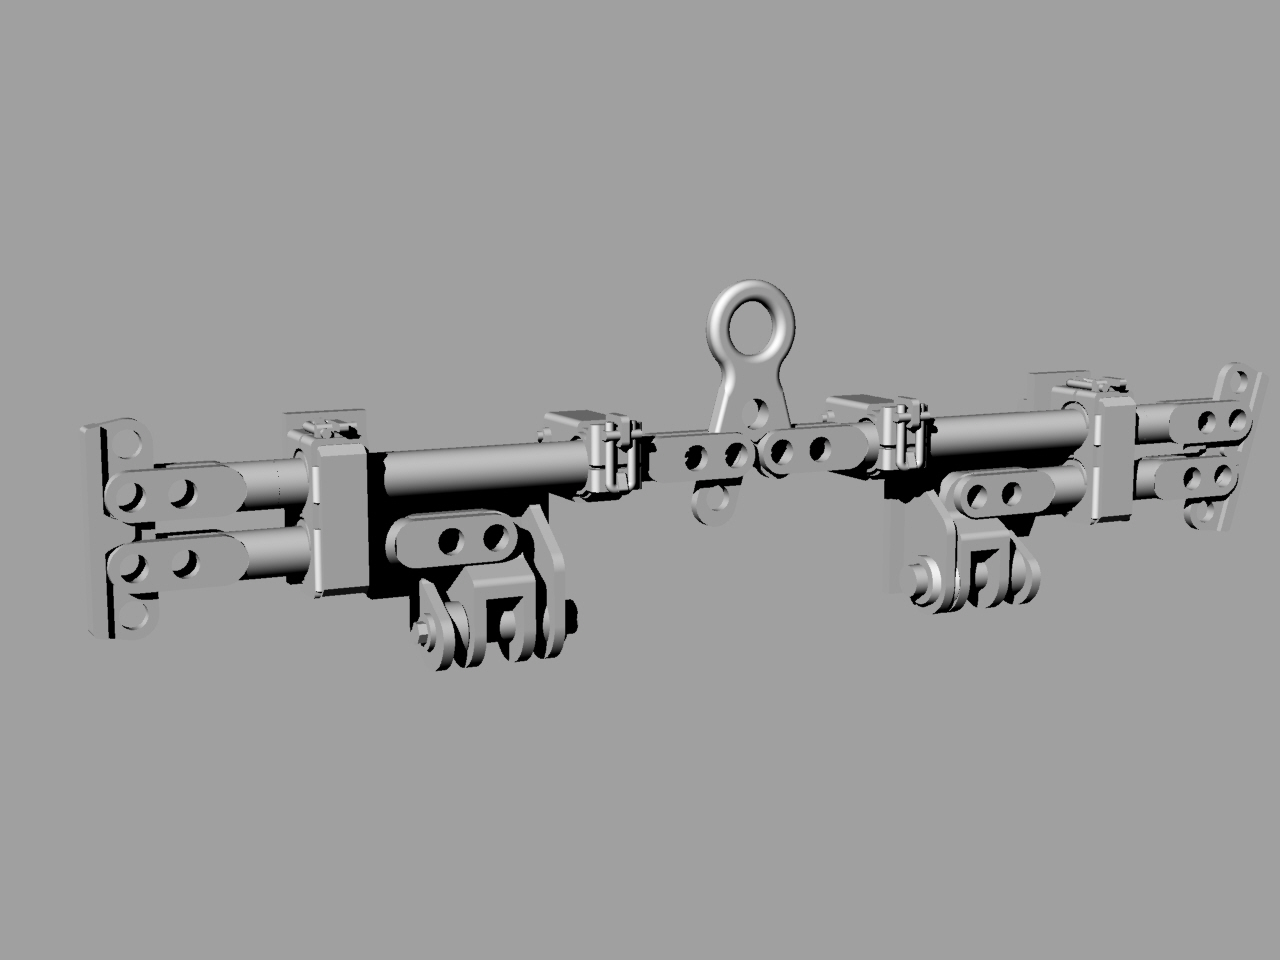
Front Bumper and Wunderbar
I designed and 3D printed the additional front bumper.
I also designed and 3D printed the foldable tow bar (called “wunderbar”) that I have seen in many pictures of Special Forces M-ATVs.
This is a very complex item made up with 16 parts and 10 pins that is attached to the additional front bumper.
In the tow bar sprue I also included the two additional lights integrated in the front grill of the M1245 (another diiference from the M1240). I’ll use these lights in a later construction step.

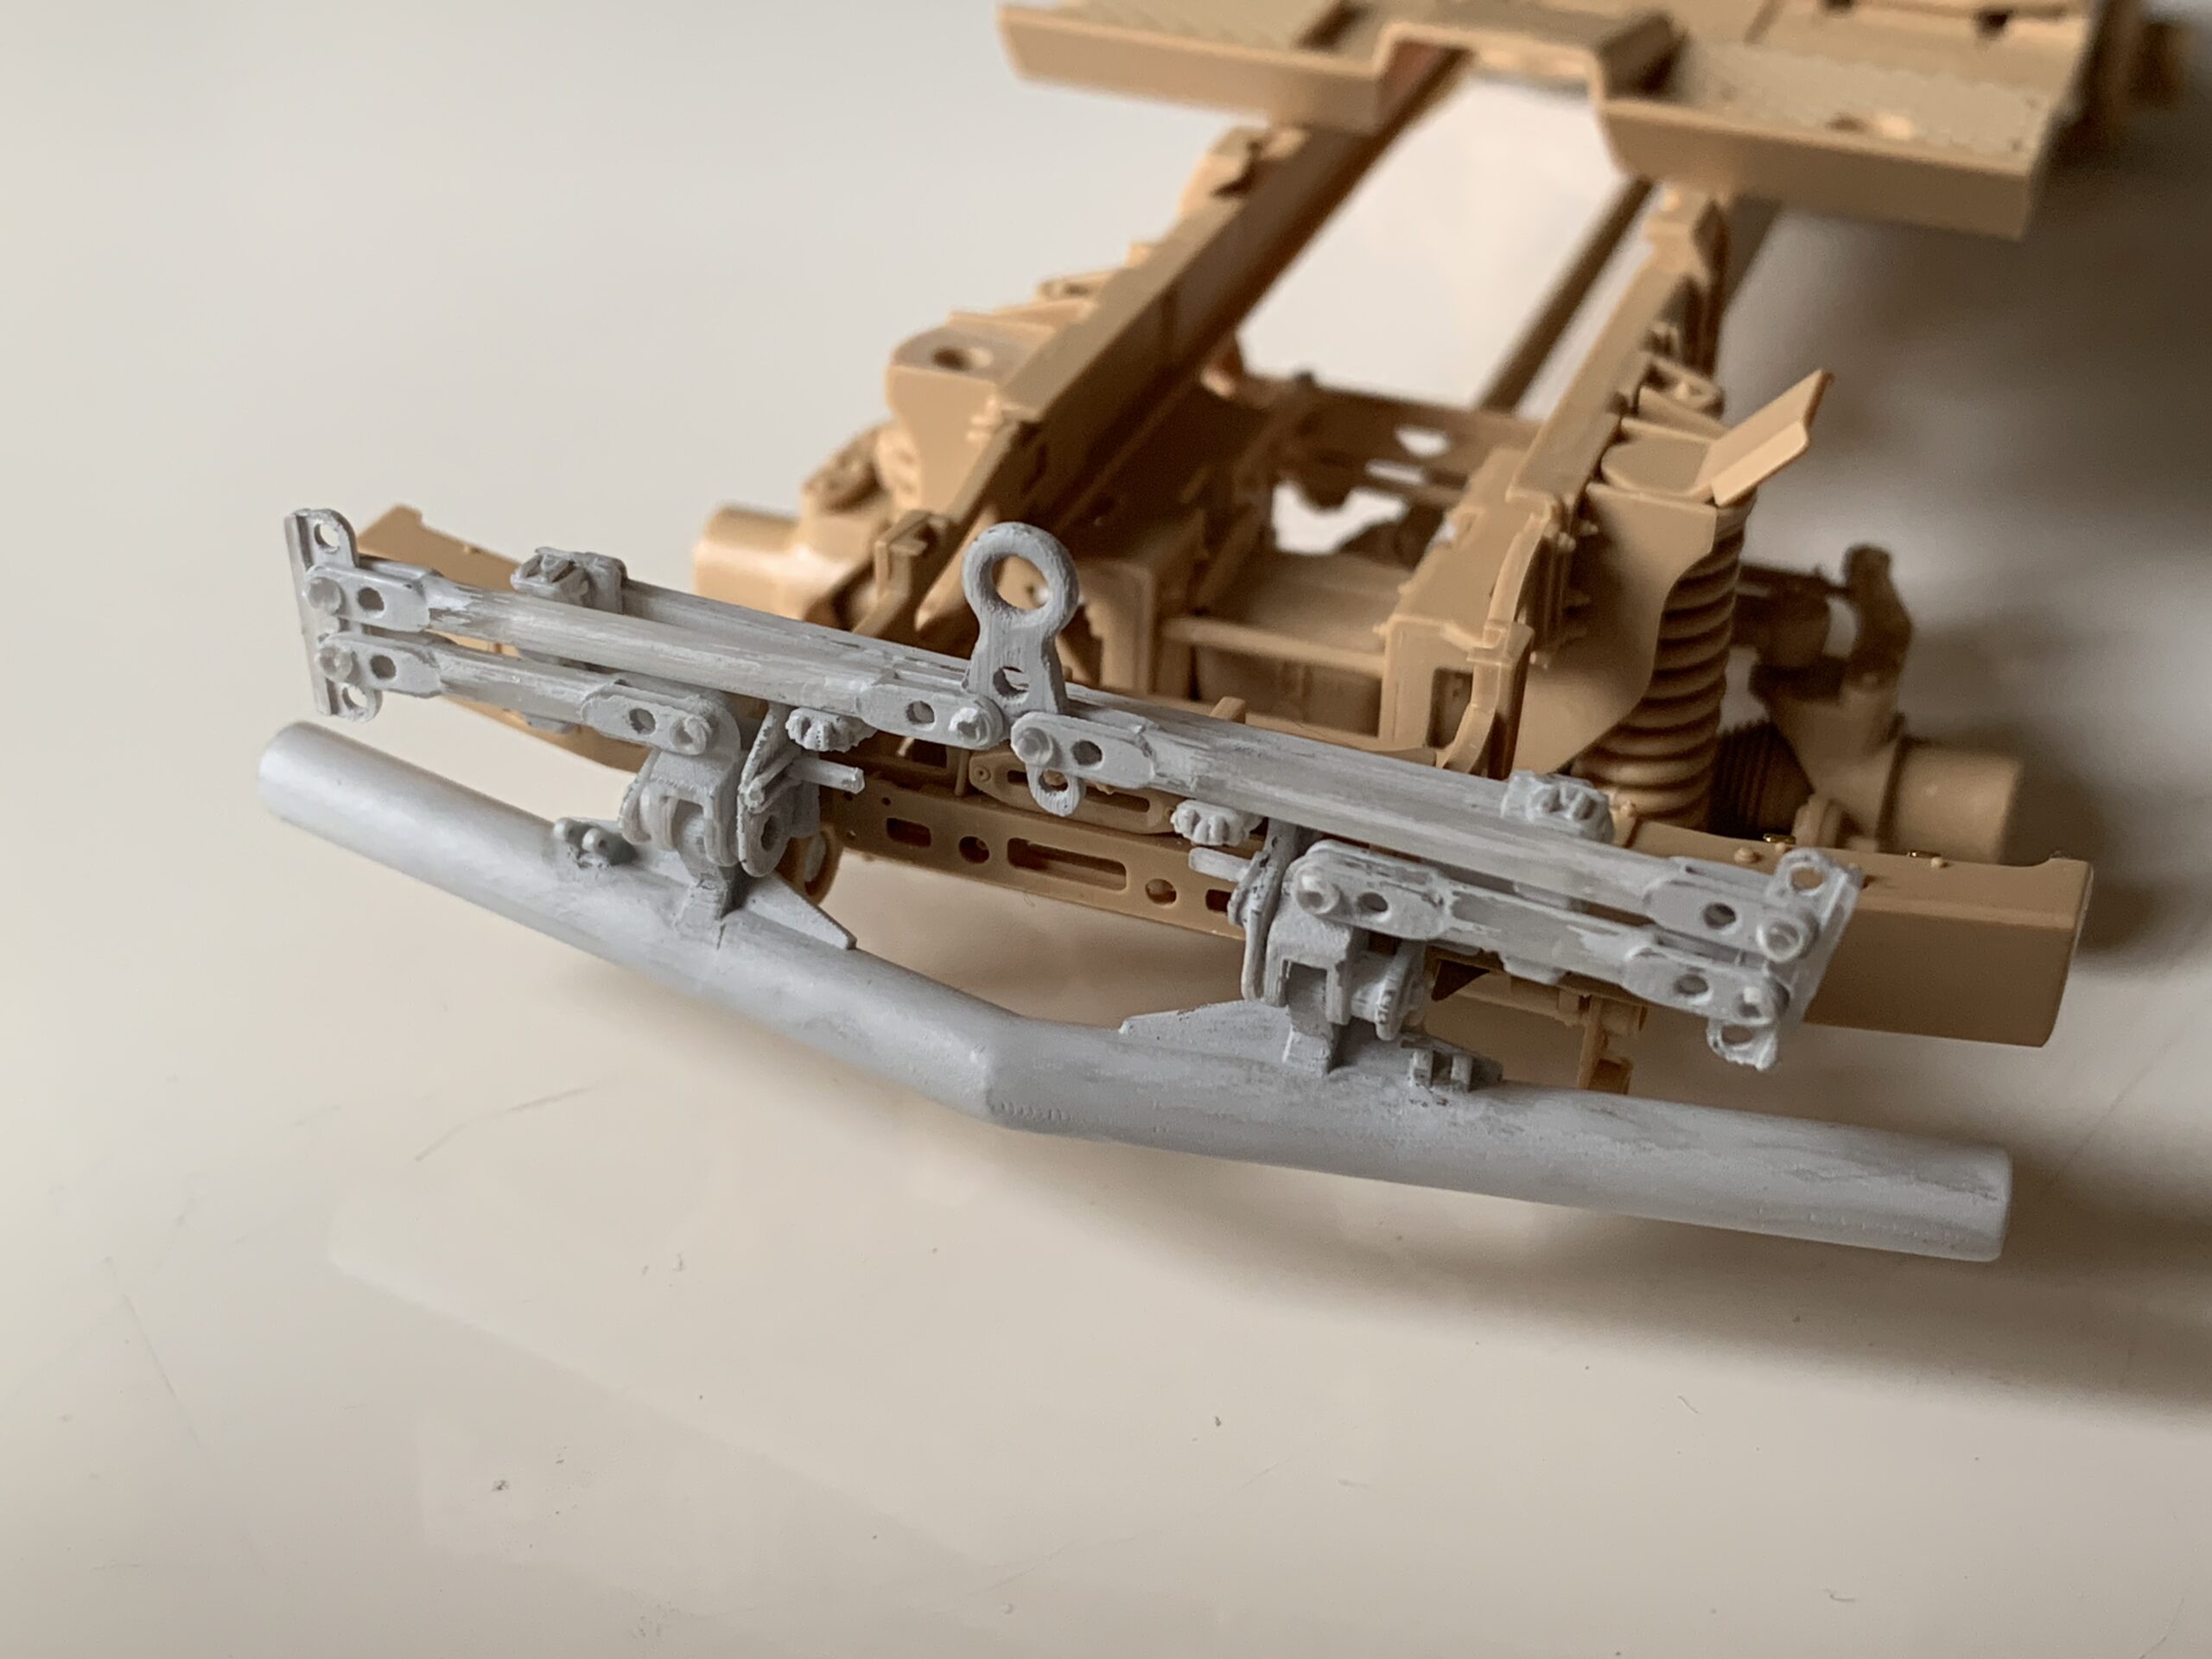
The following is a picture displaying bumper and tow bar attached to the vehicle chassis.
It’s a temporary mount that doesn’t include the upper half of the bars stoppers.
There is also more cleaning of some parts to be done; I’ll do it at a later stage, before the final assembly and painting.
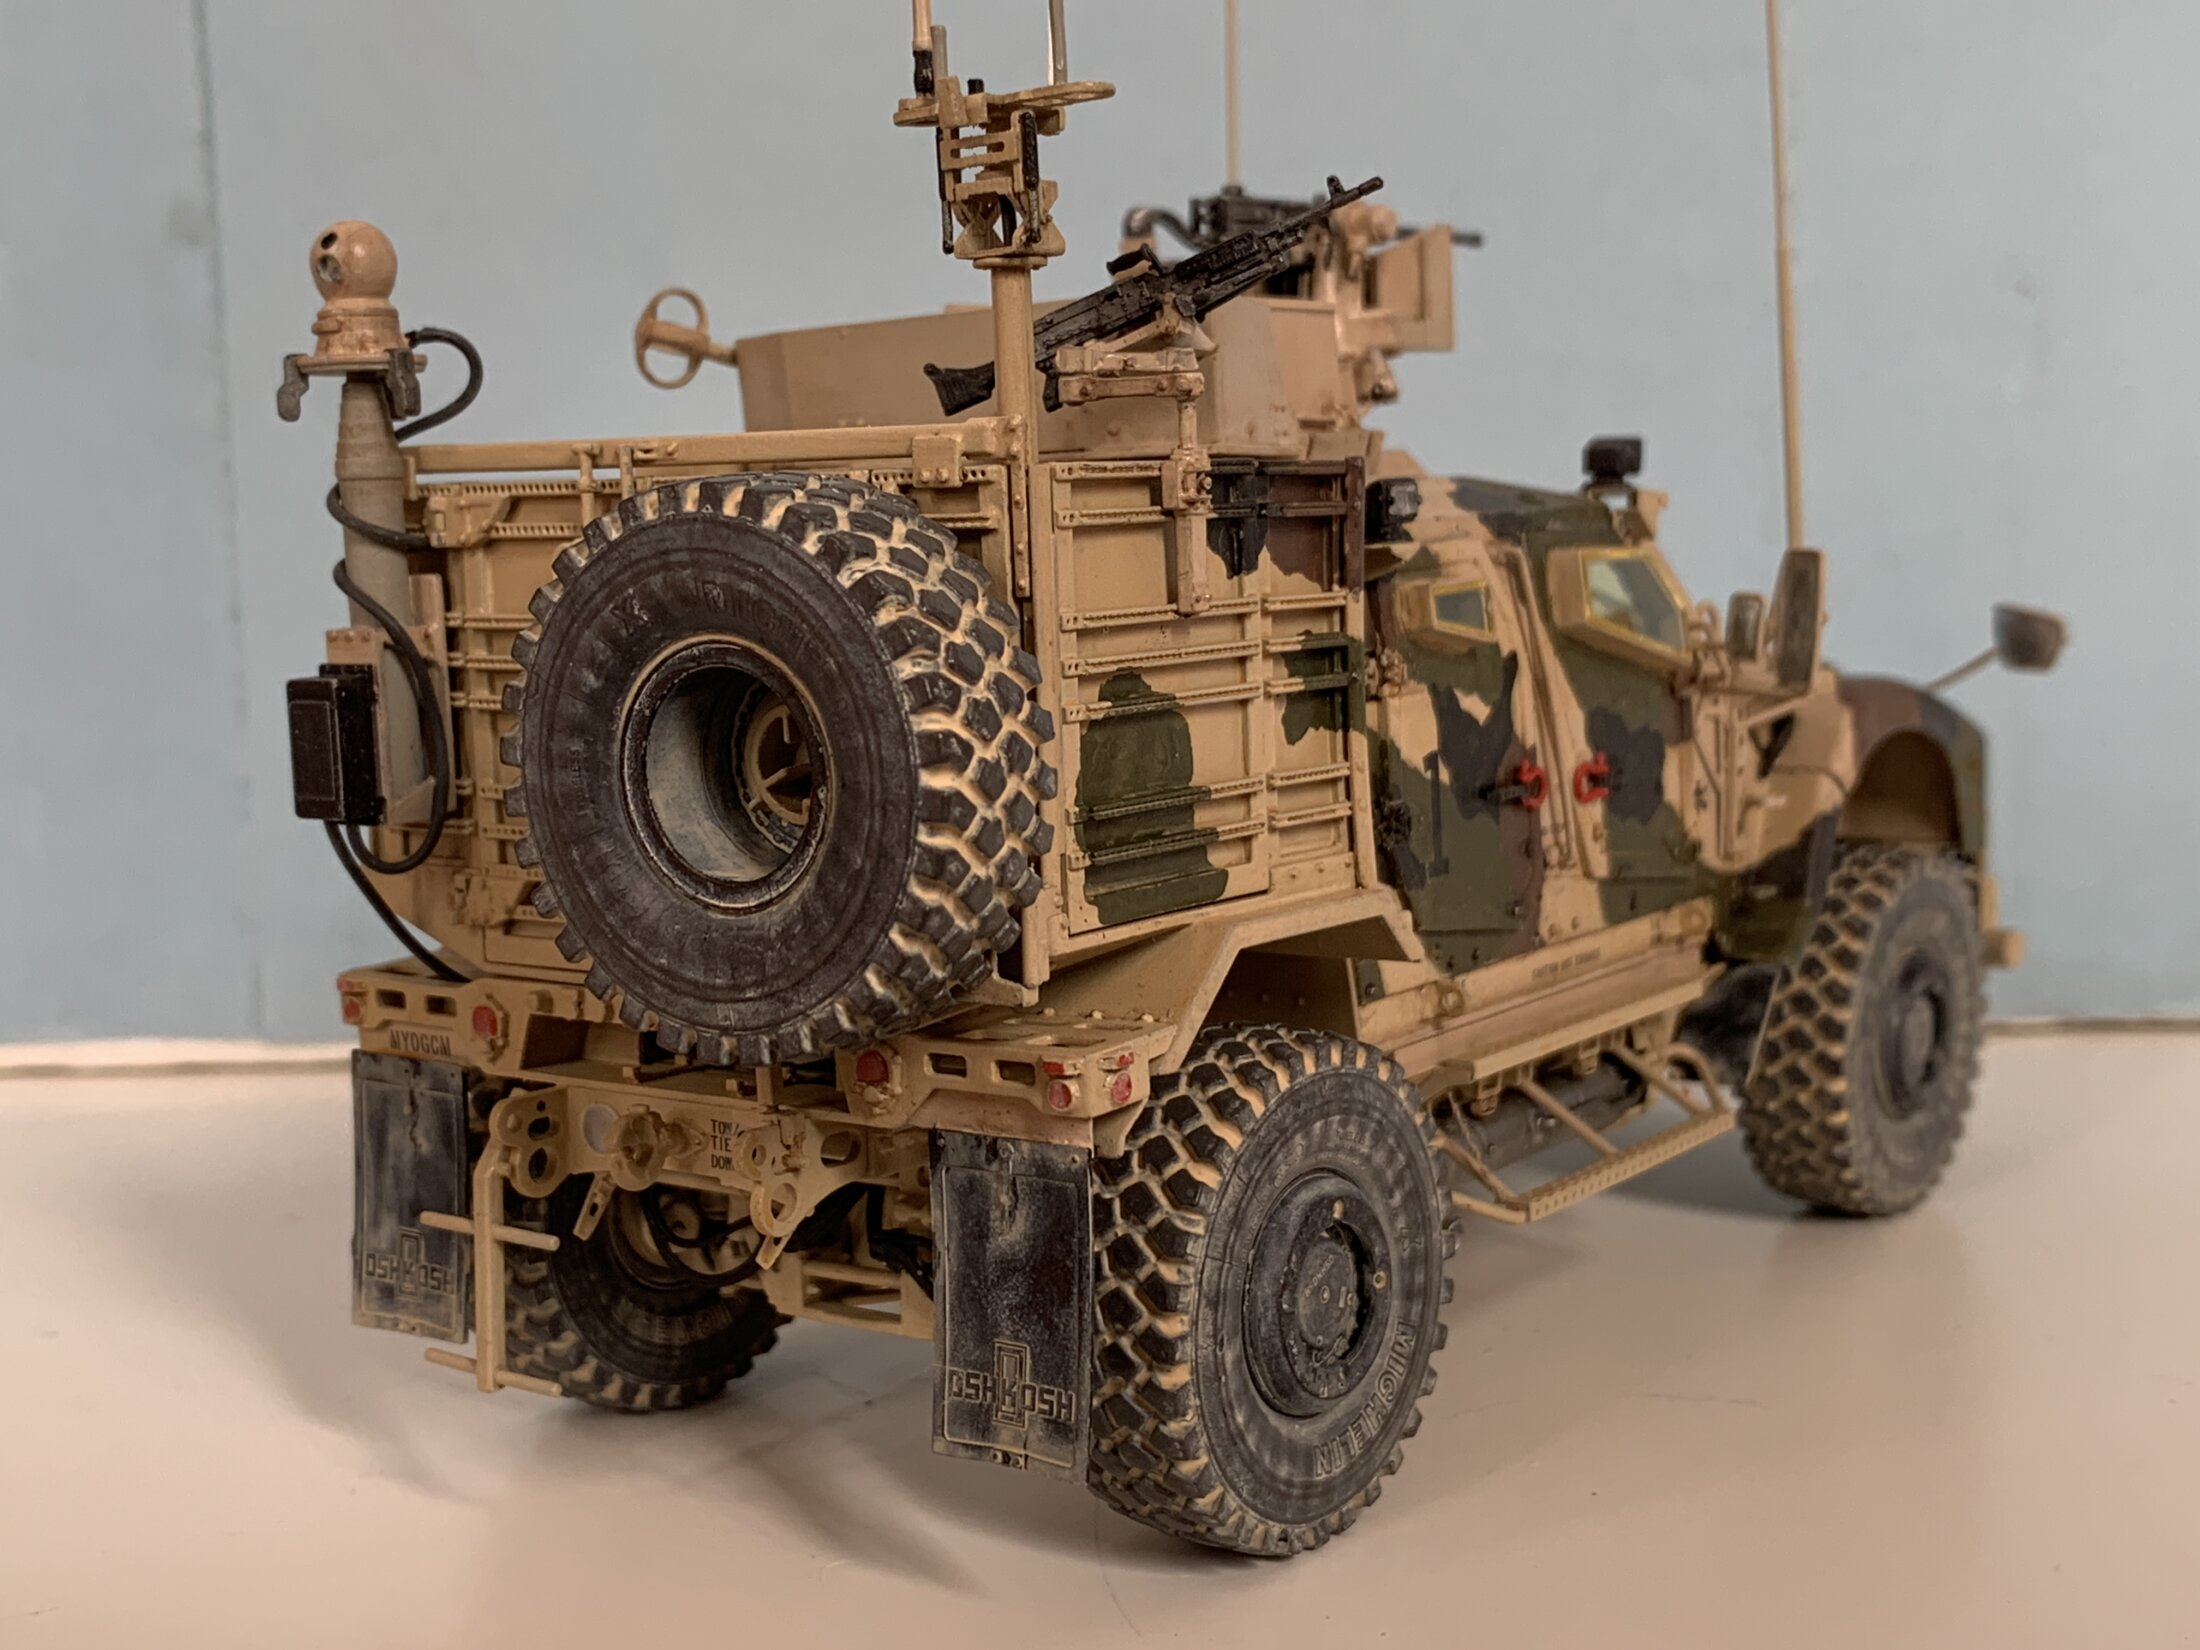
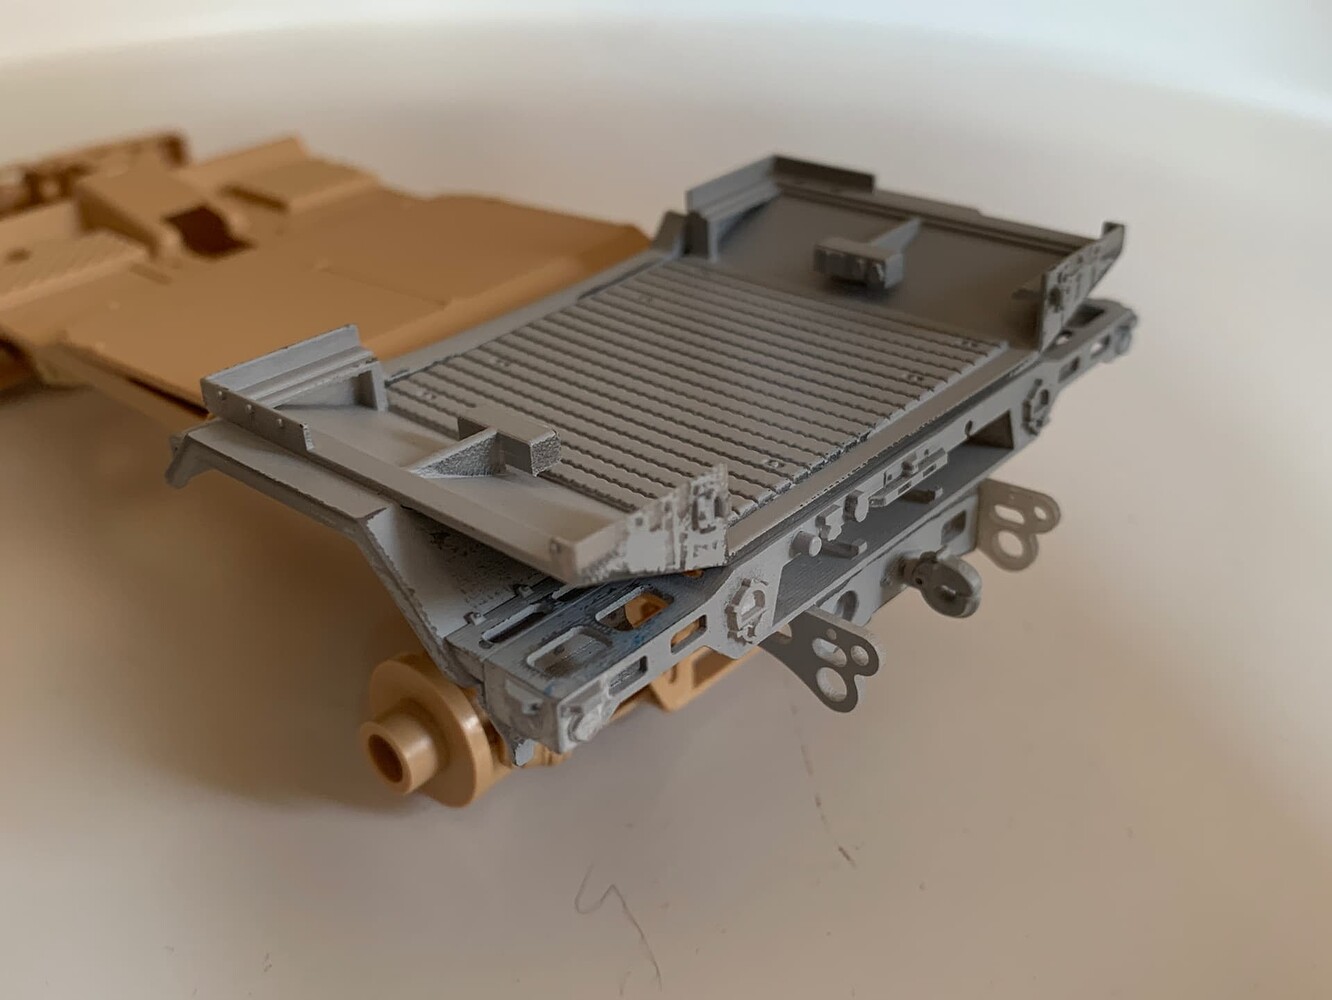
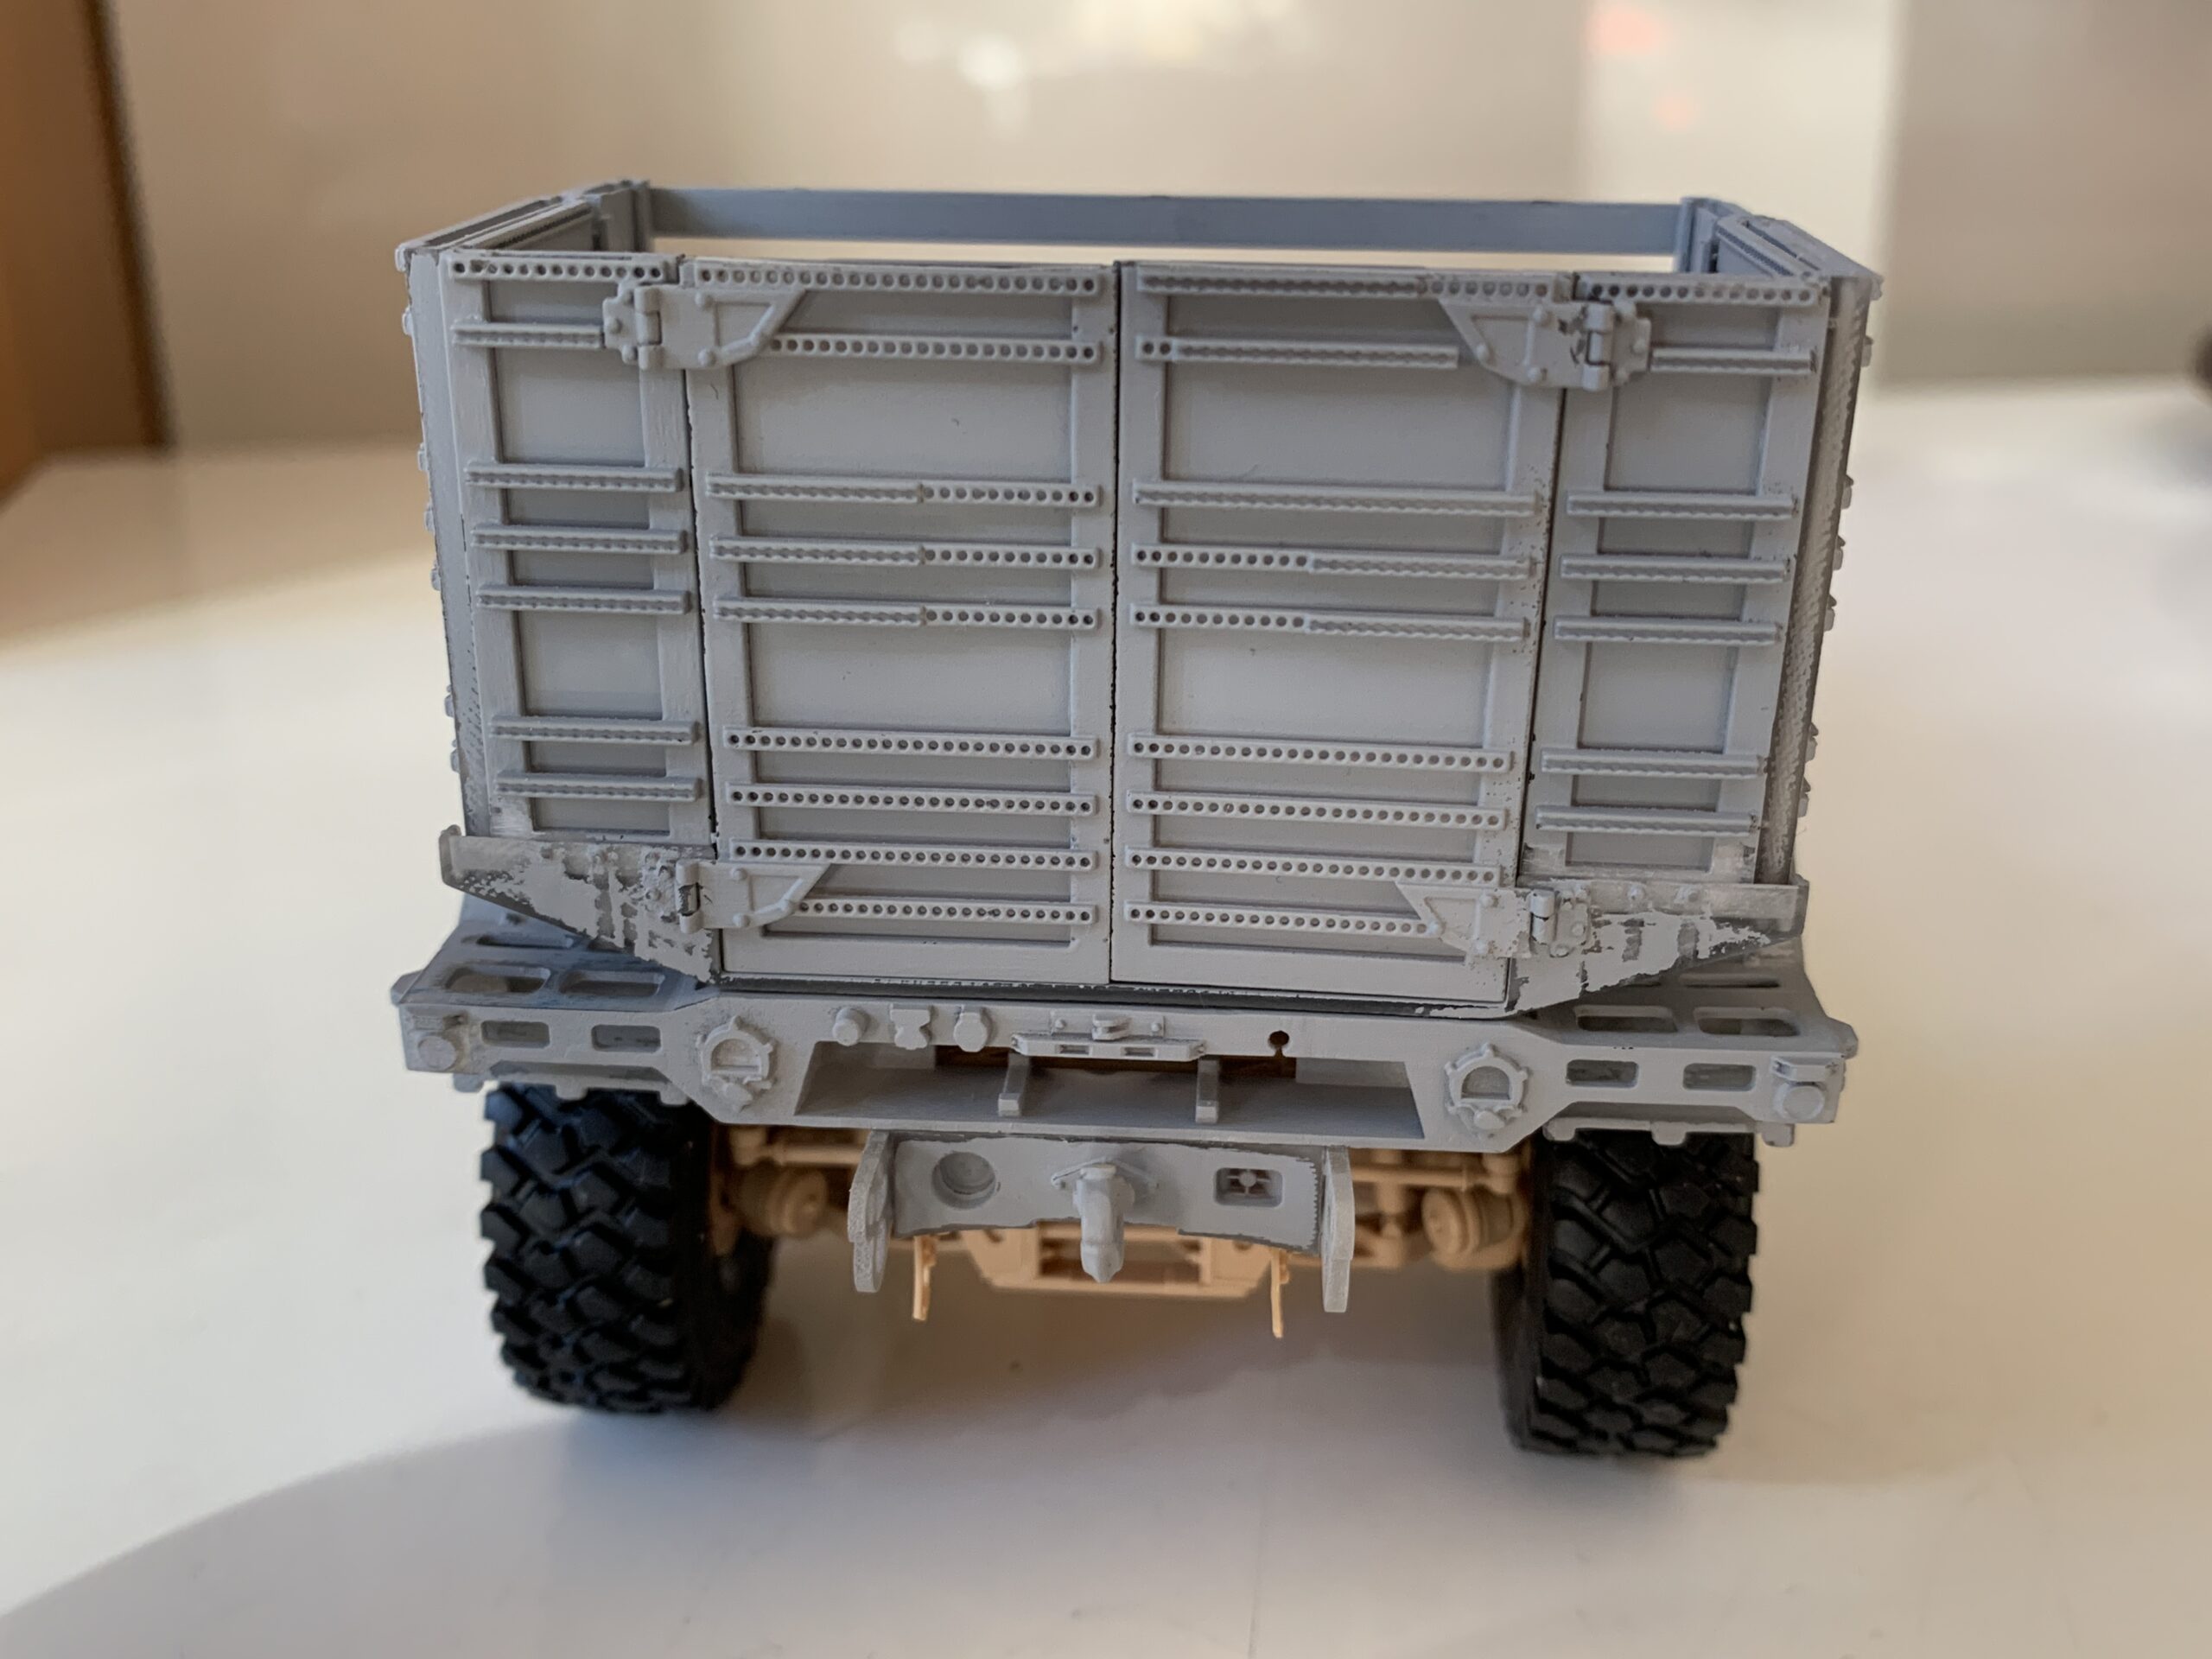
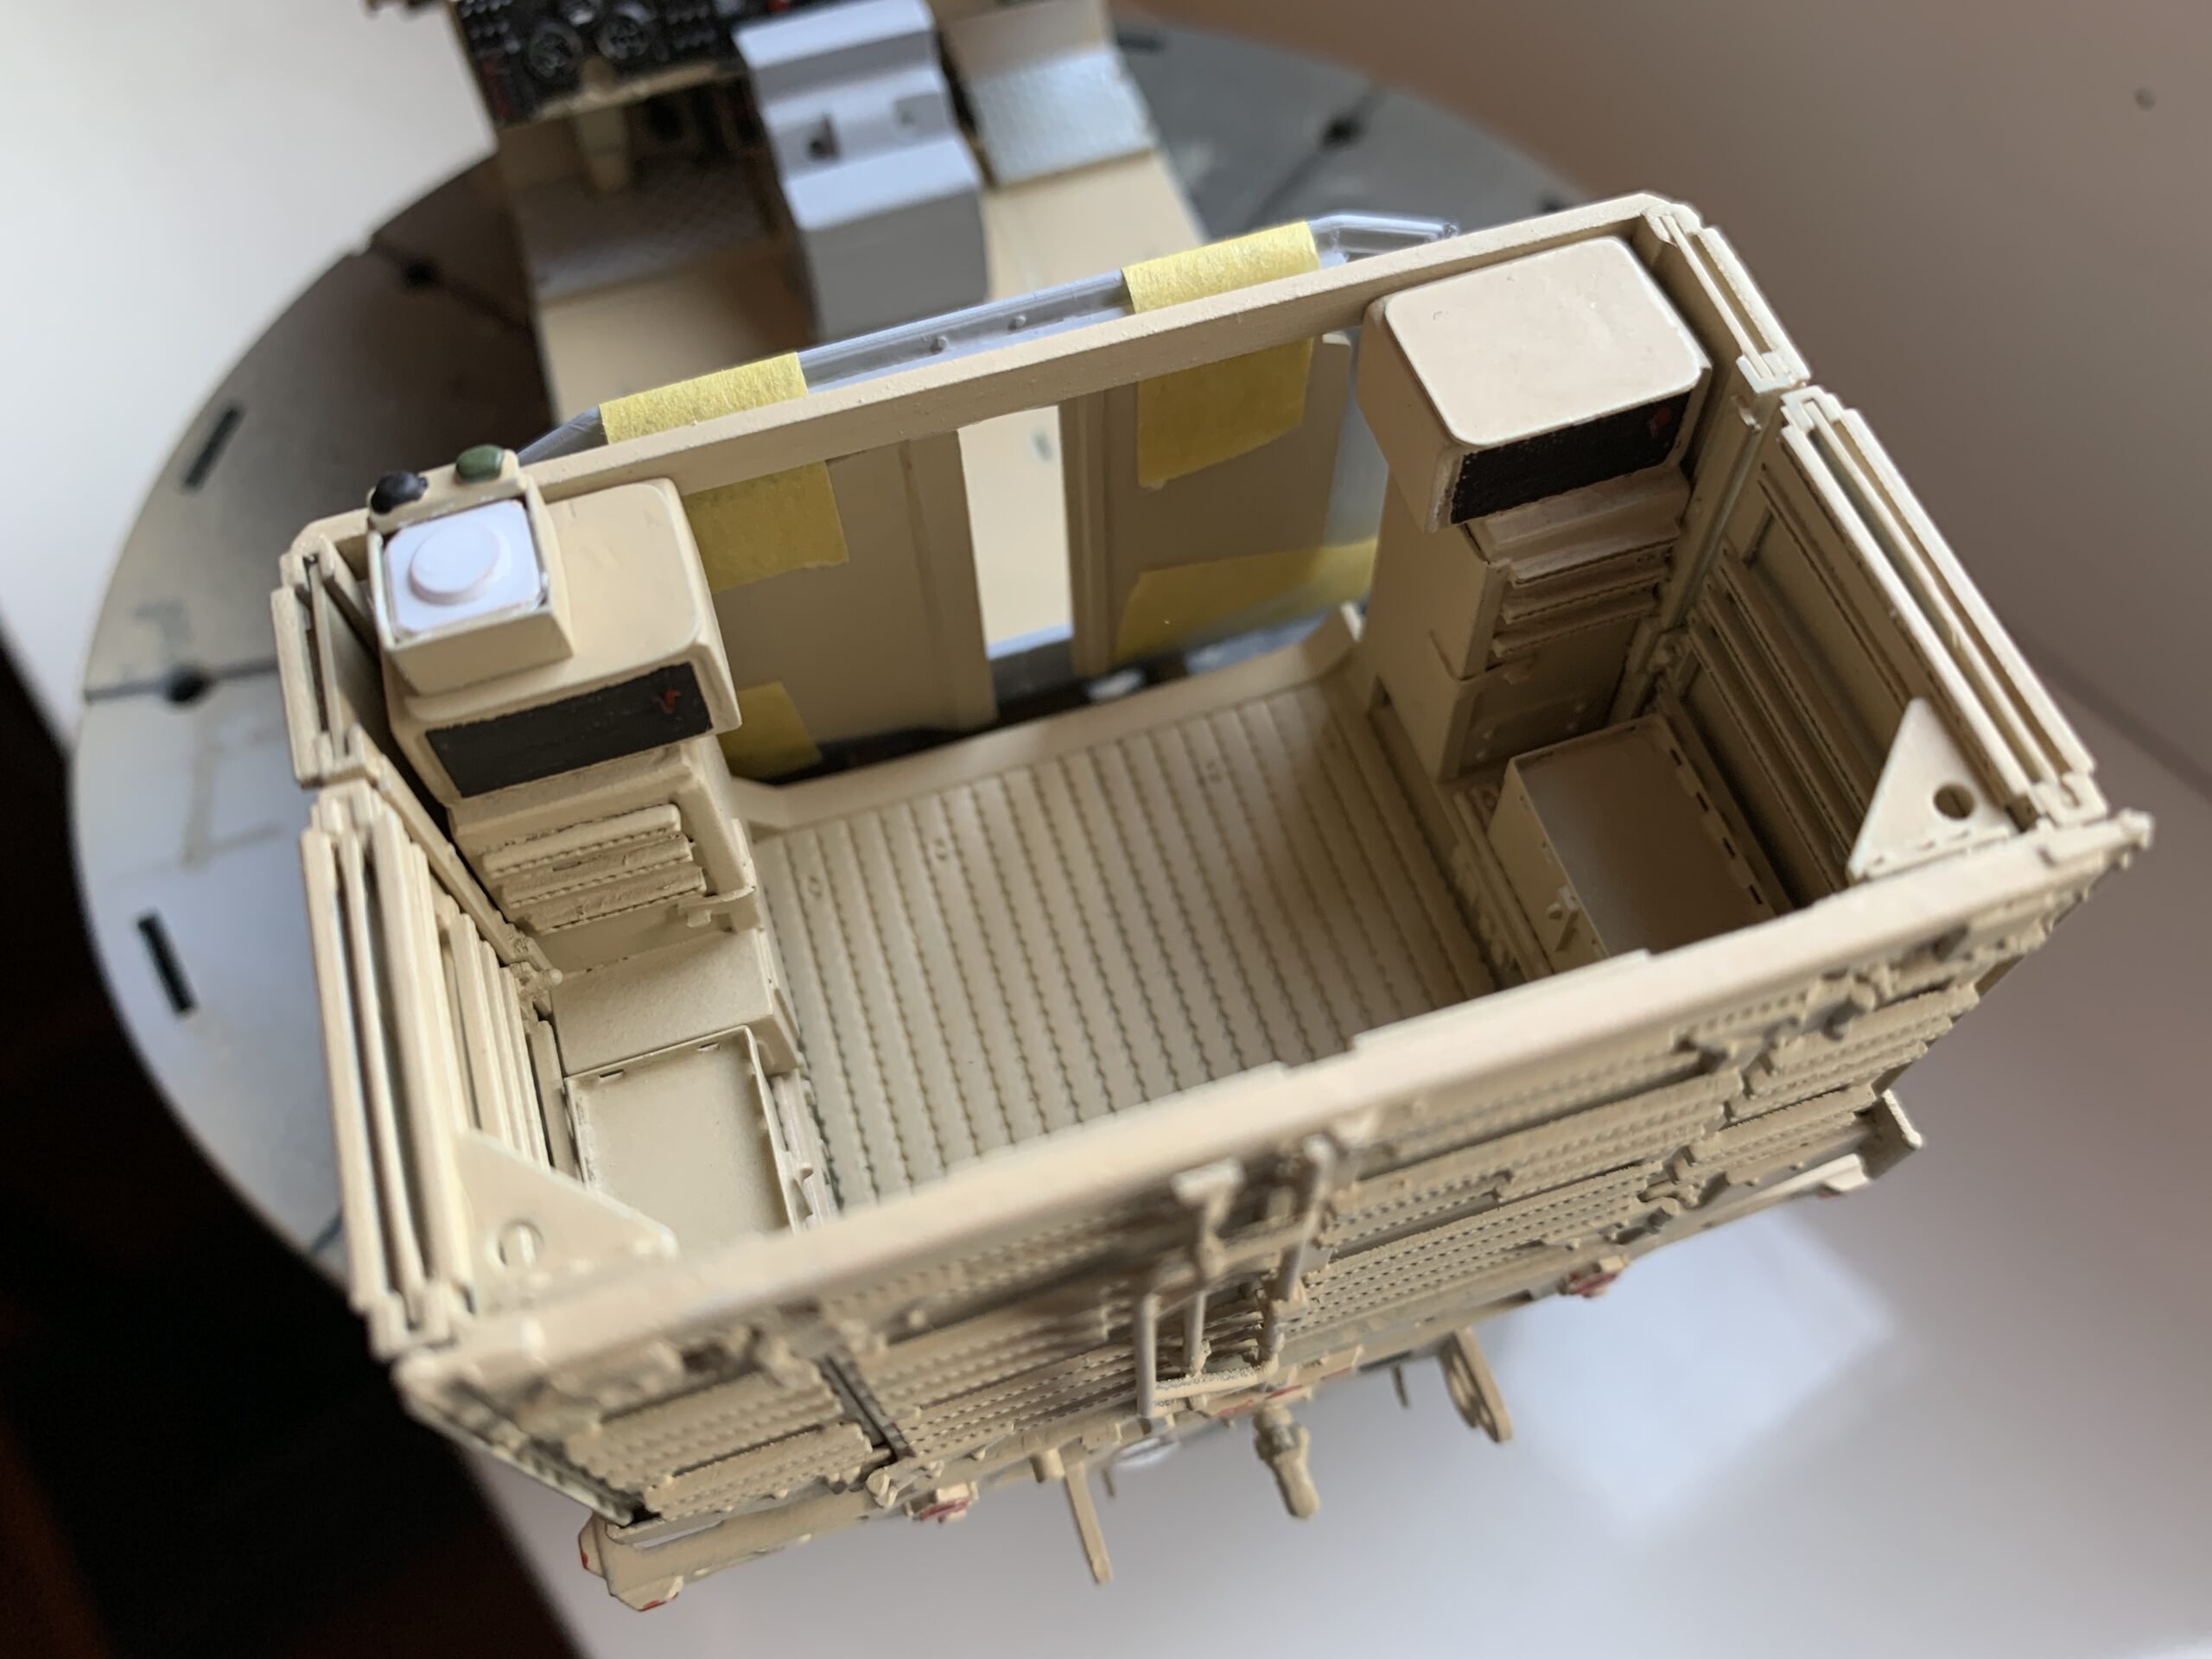
Cargo Bay and Rear Bumper
Here is the cargo bay floor, with new fenders and bumper.
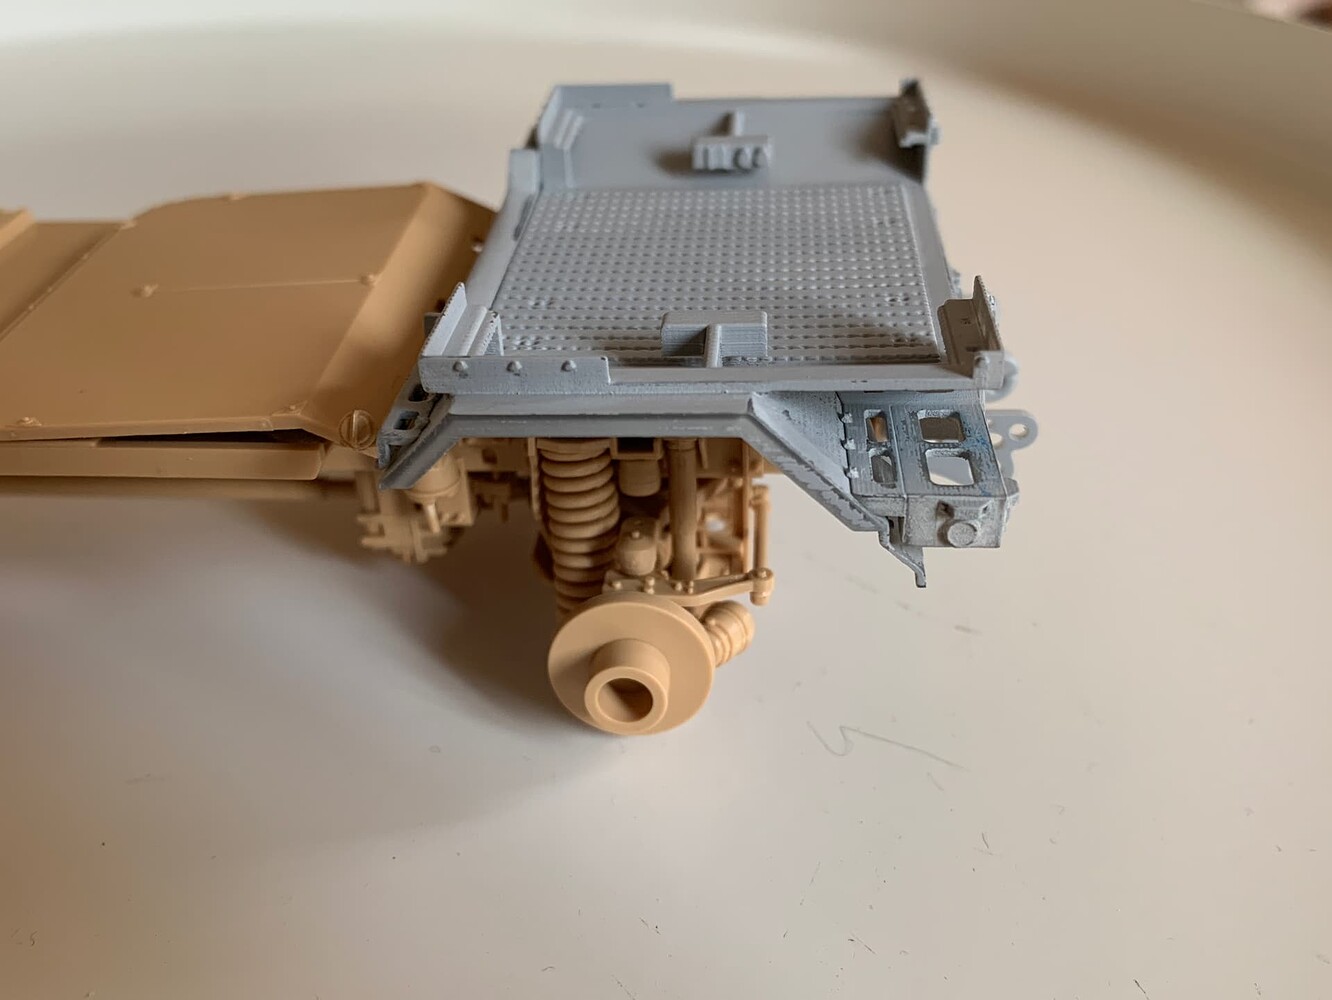
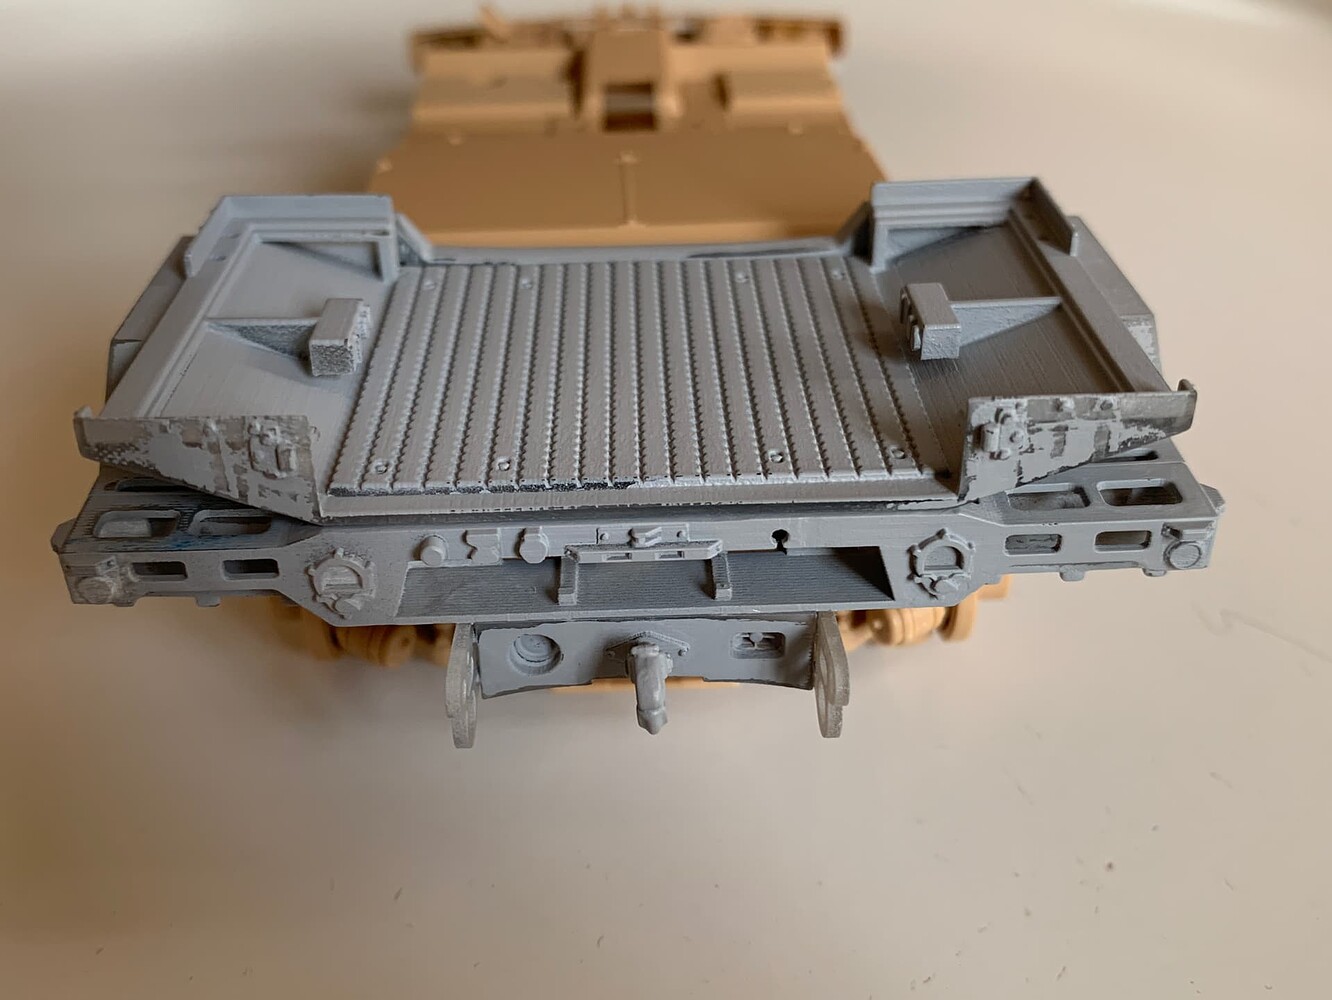
M1245 has longer frame side members than M1240.
I cut the rear end part and installed a new and longer one, as long as a new cross member (parts in grey at the bottom of the rear bumper).
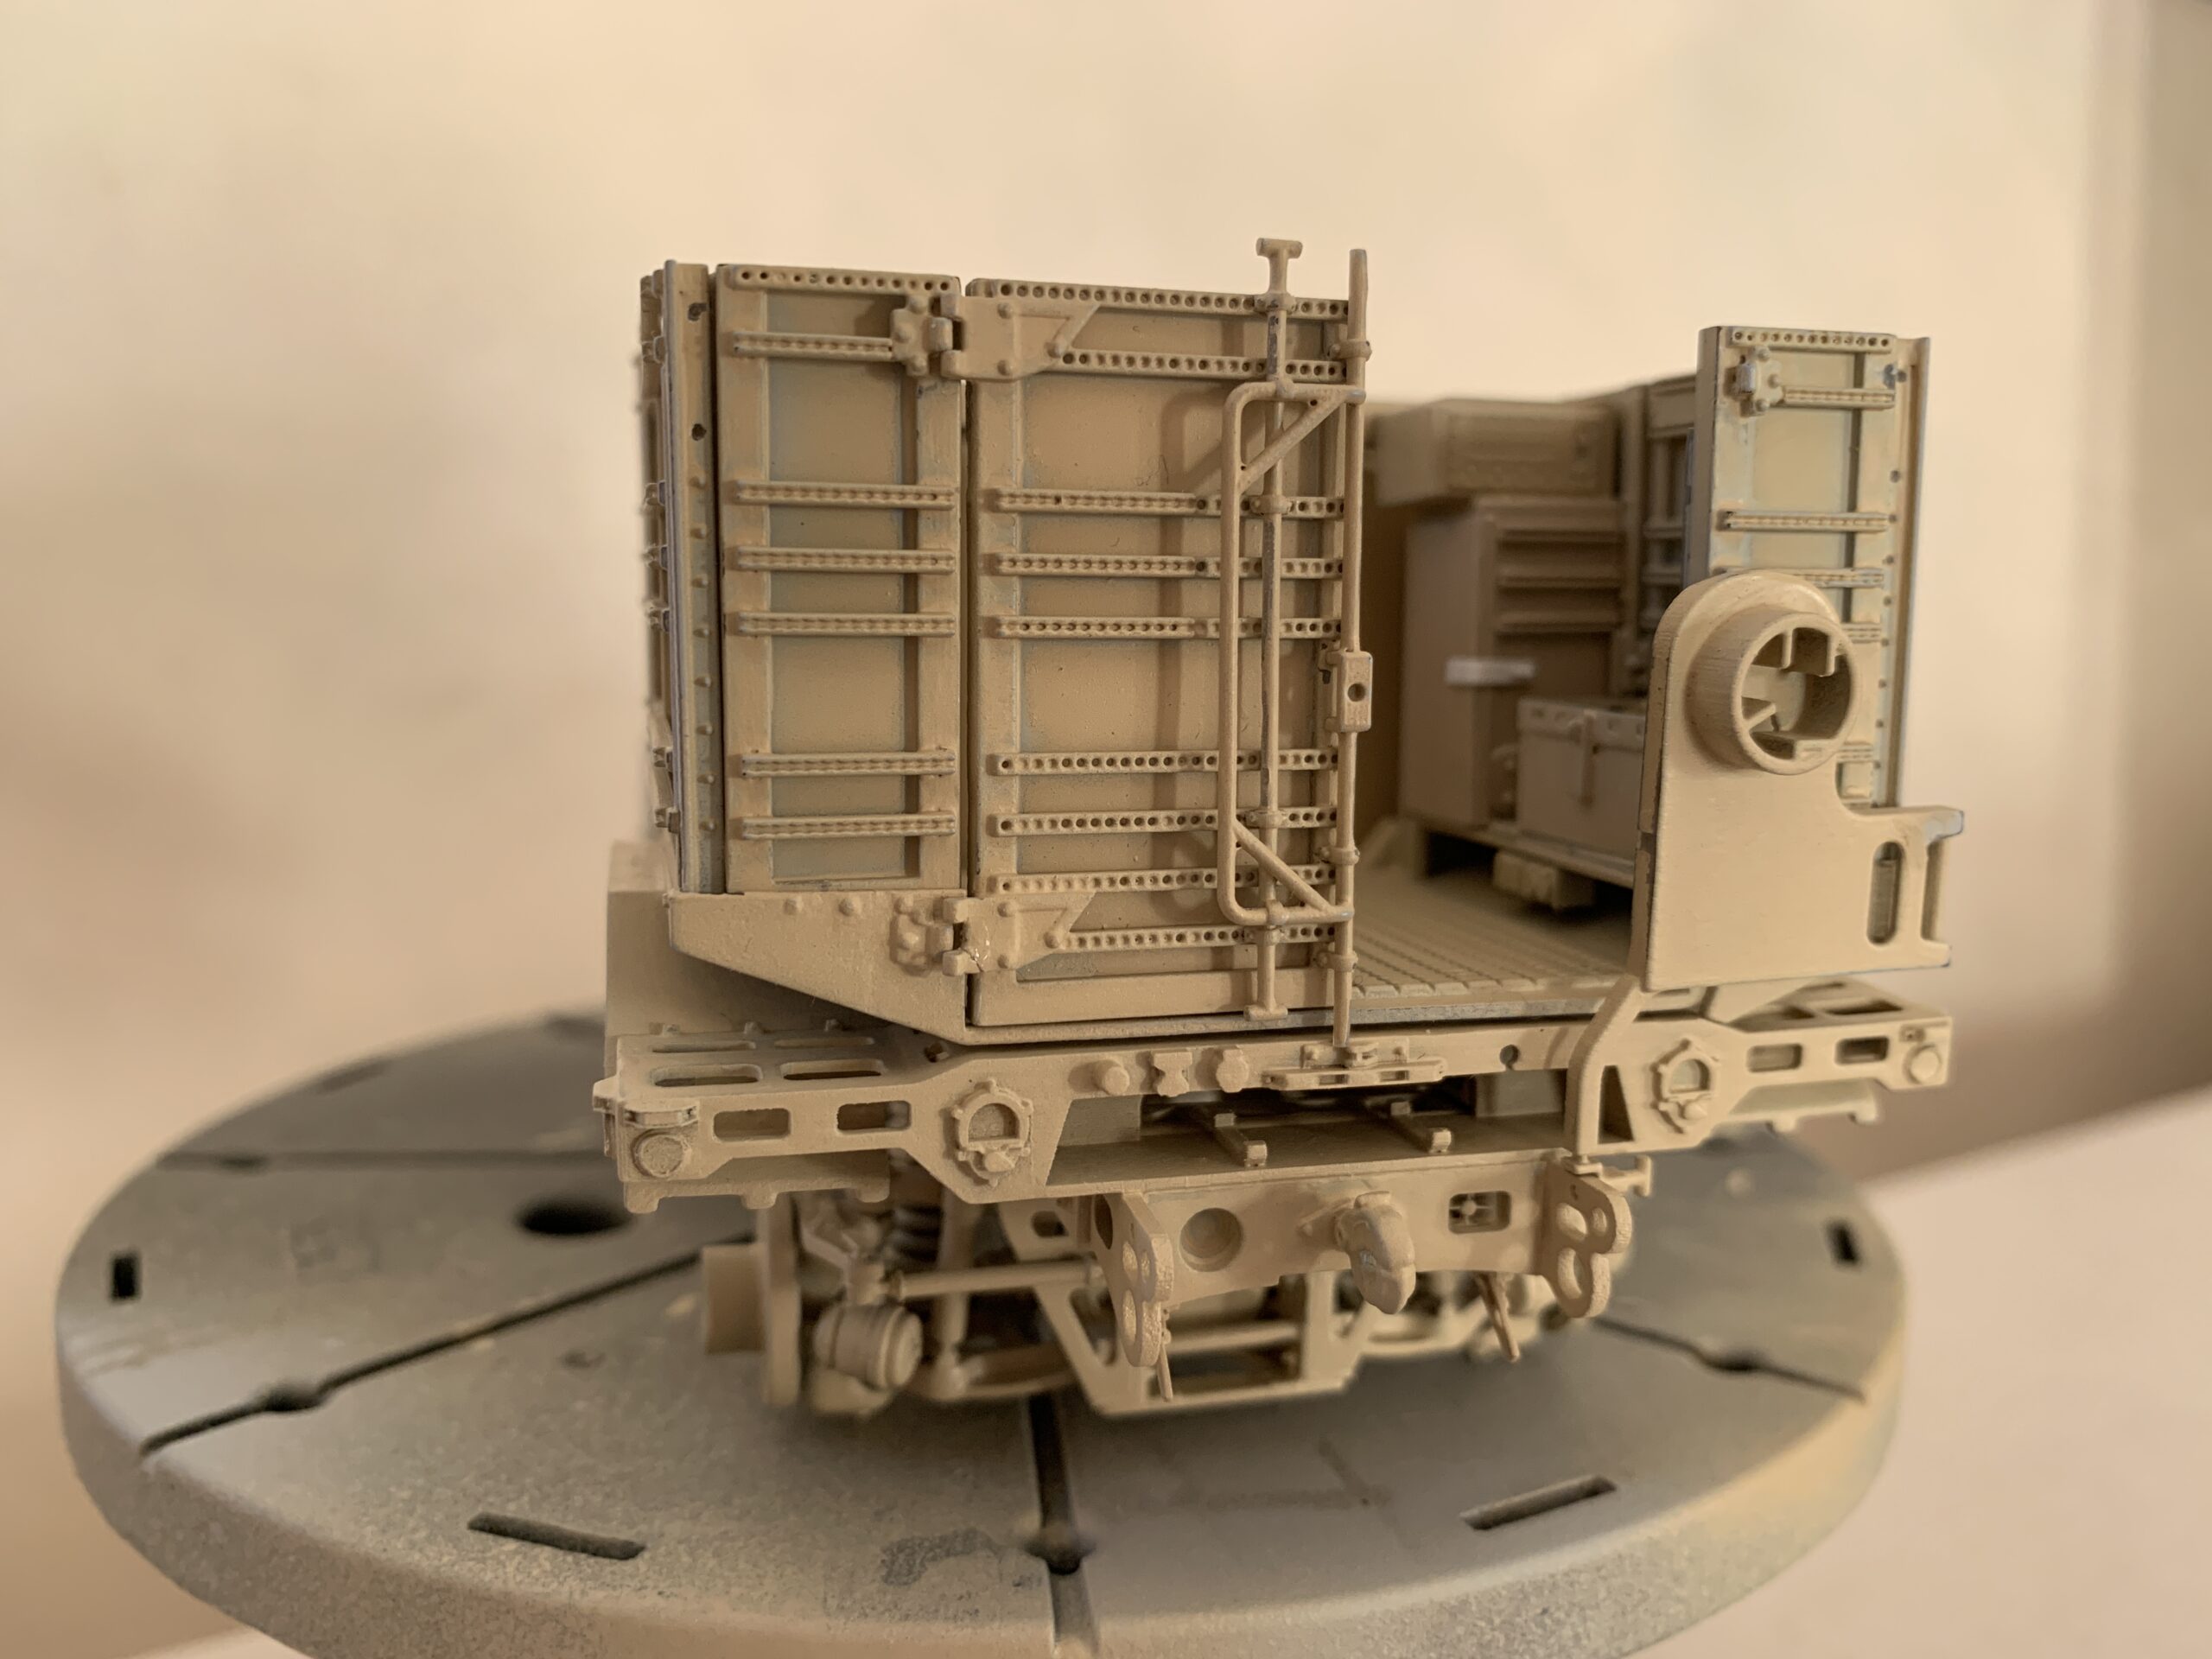
I designed and 3D printed the wall frames, then I have inserted in each wall part a plasticard sheet.
and now, walls are up

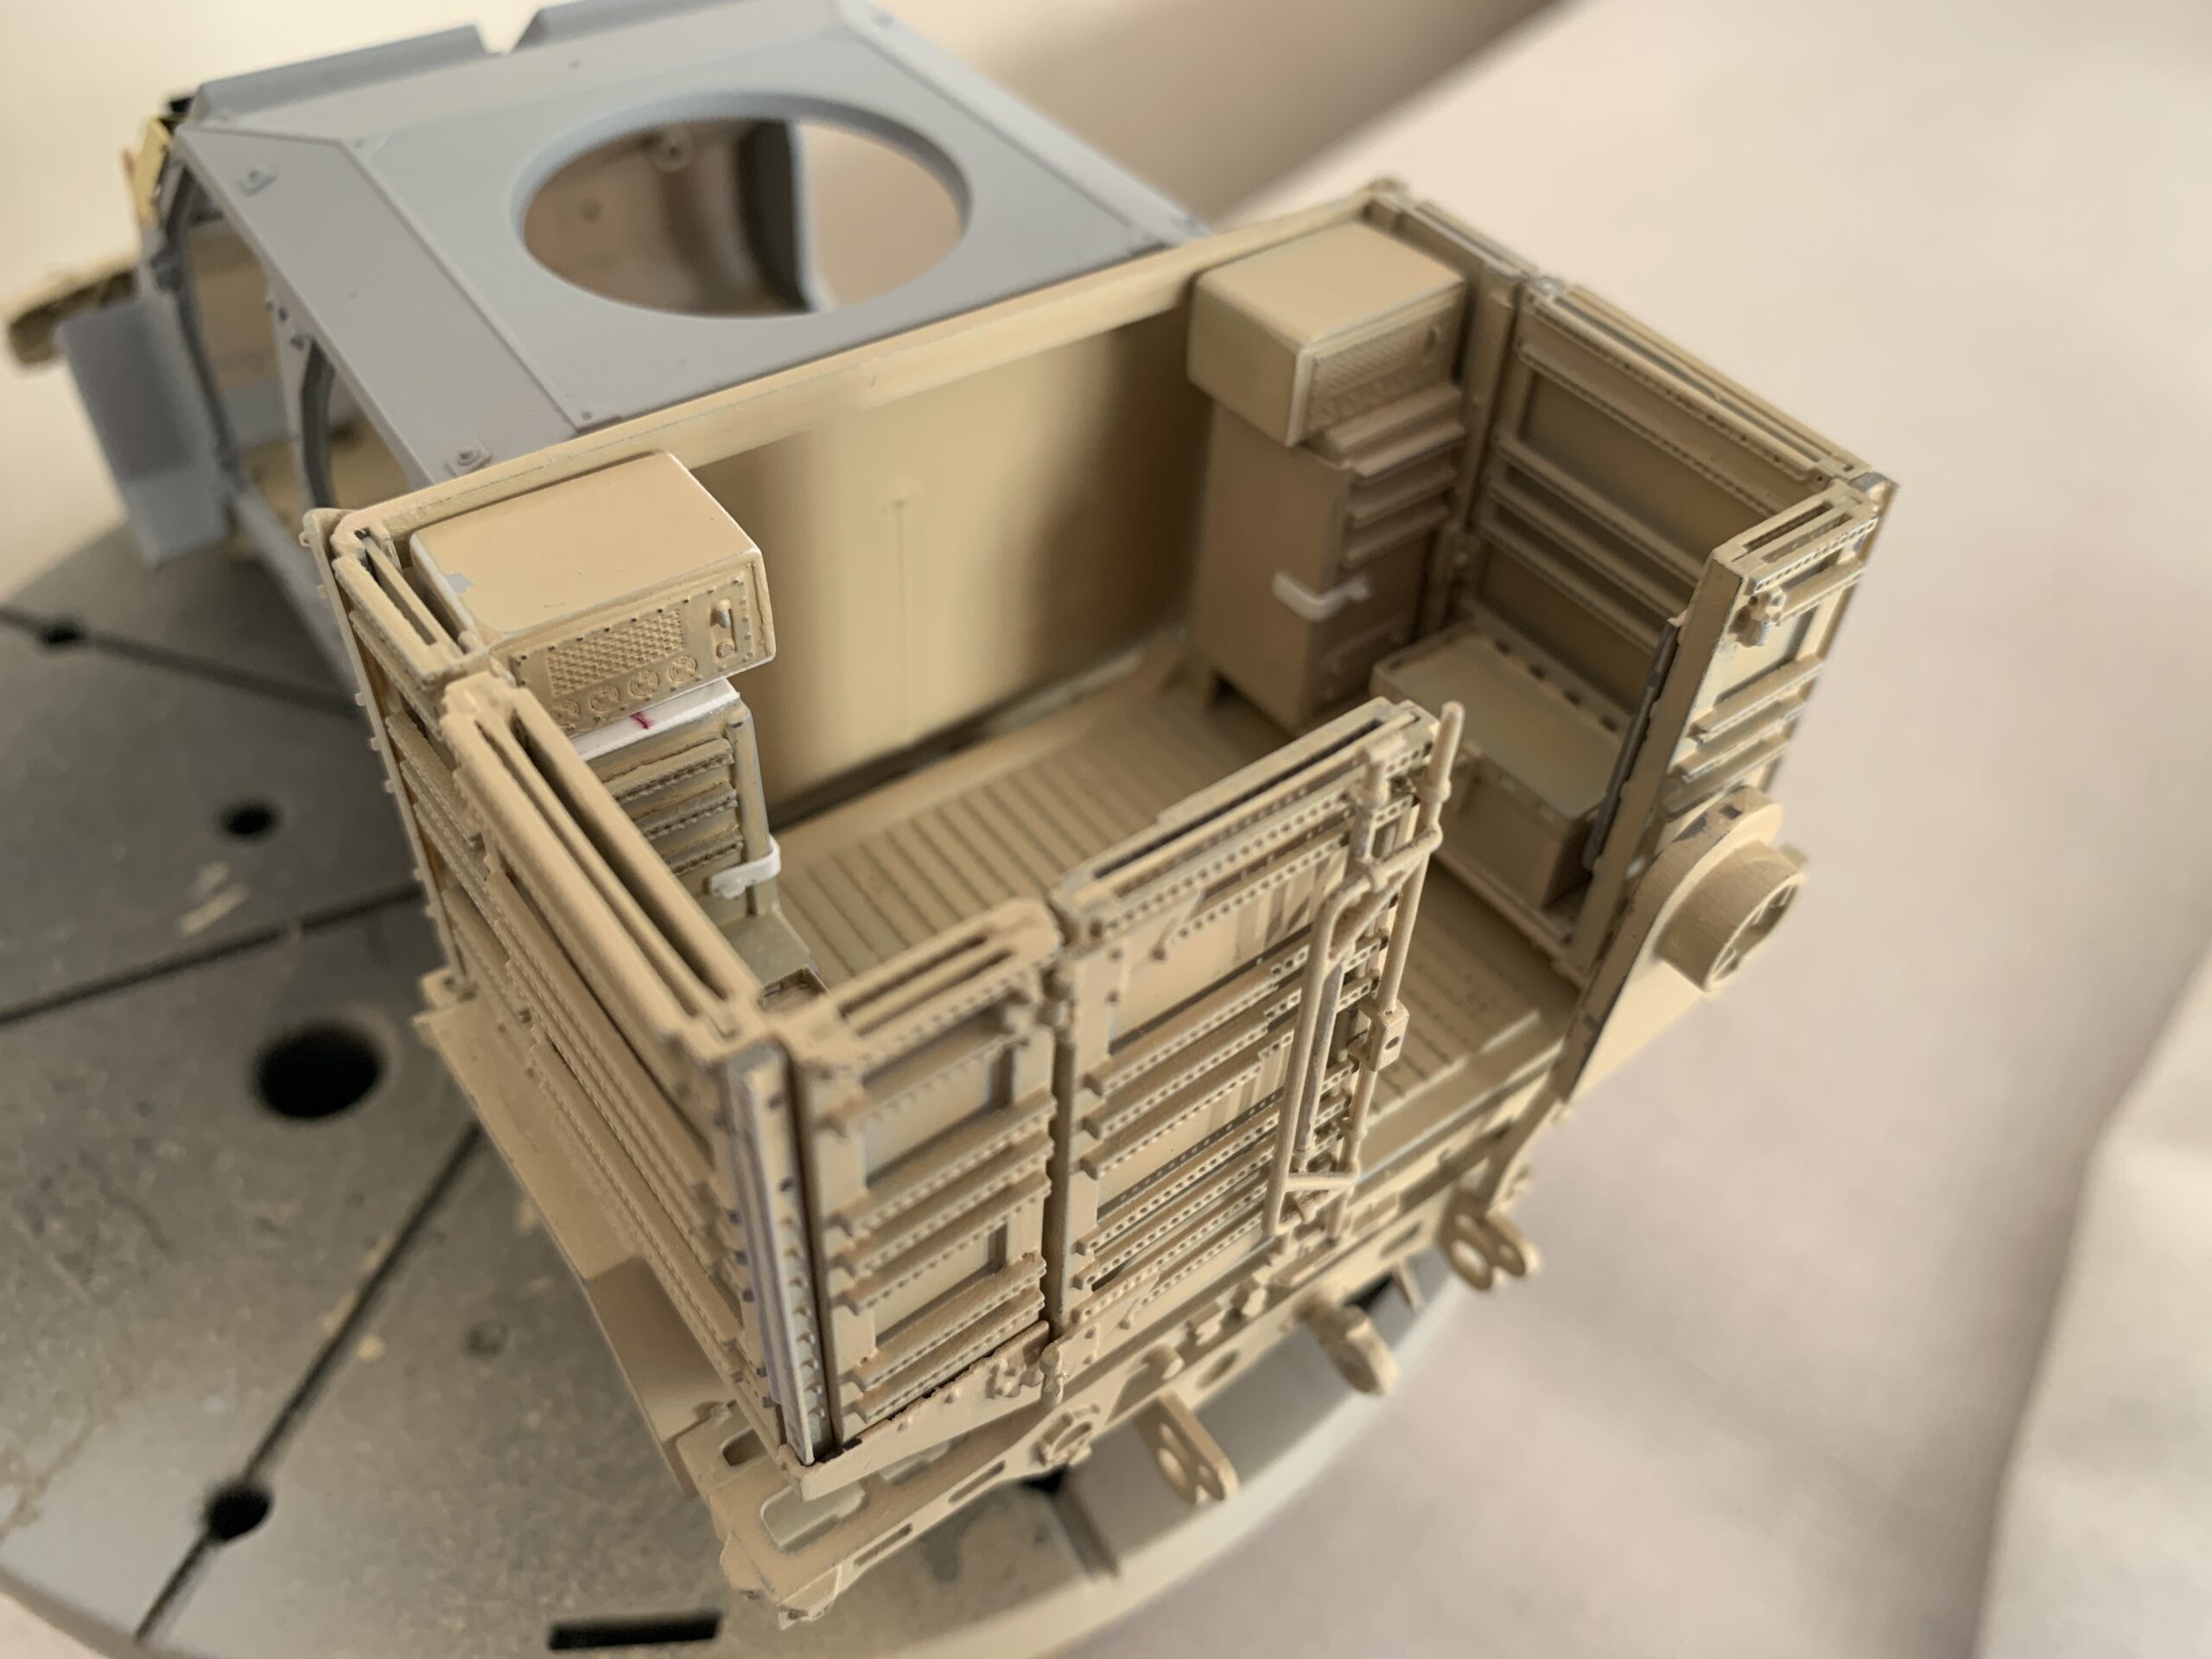
I have assembled all the 3D printed parts for the cargo area.
I have also made cabinets and storage boxes with plasticard; front panels of the two boxes at the top of the electronic equipment cabinets are 3D printed.
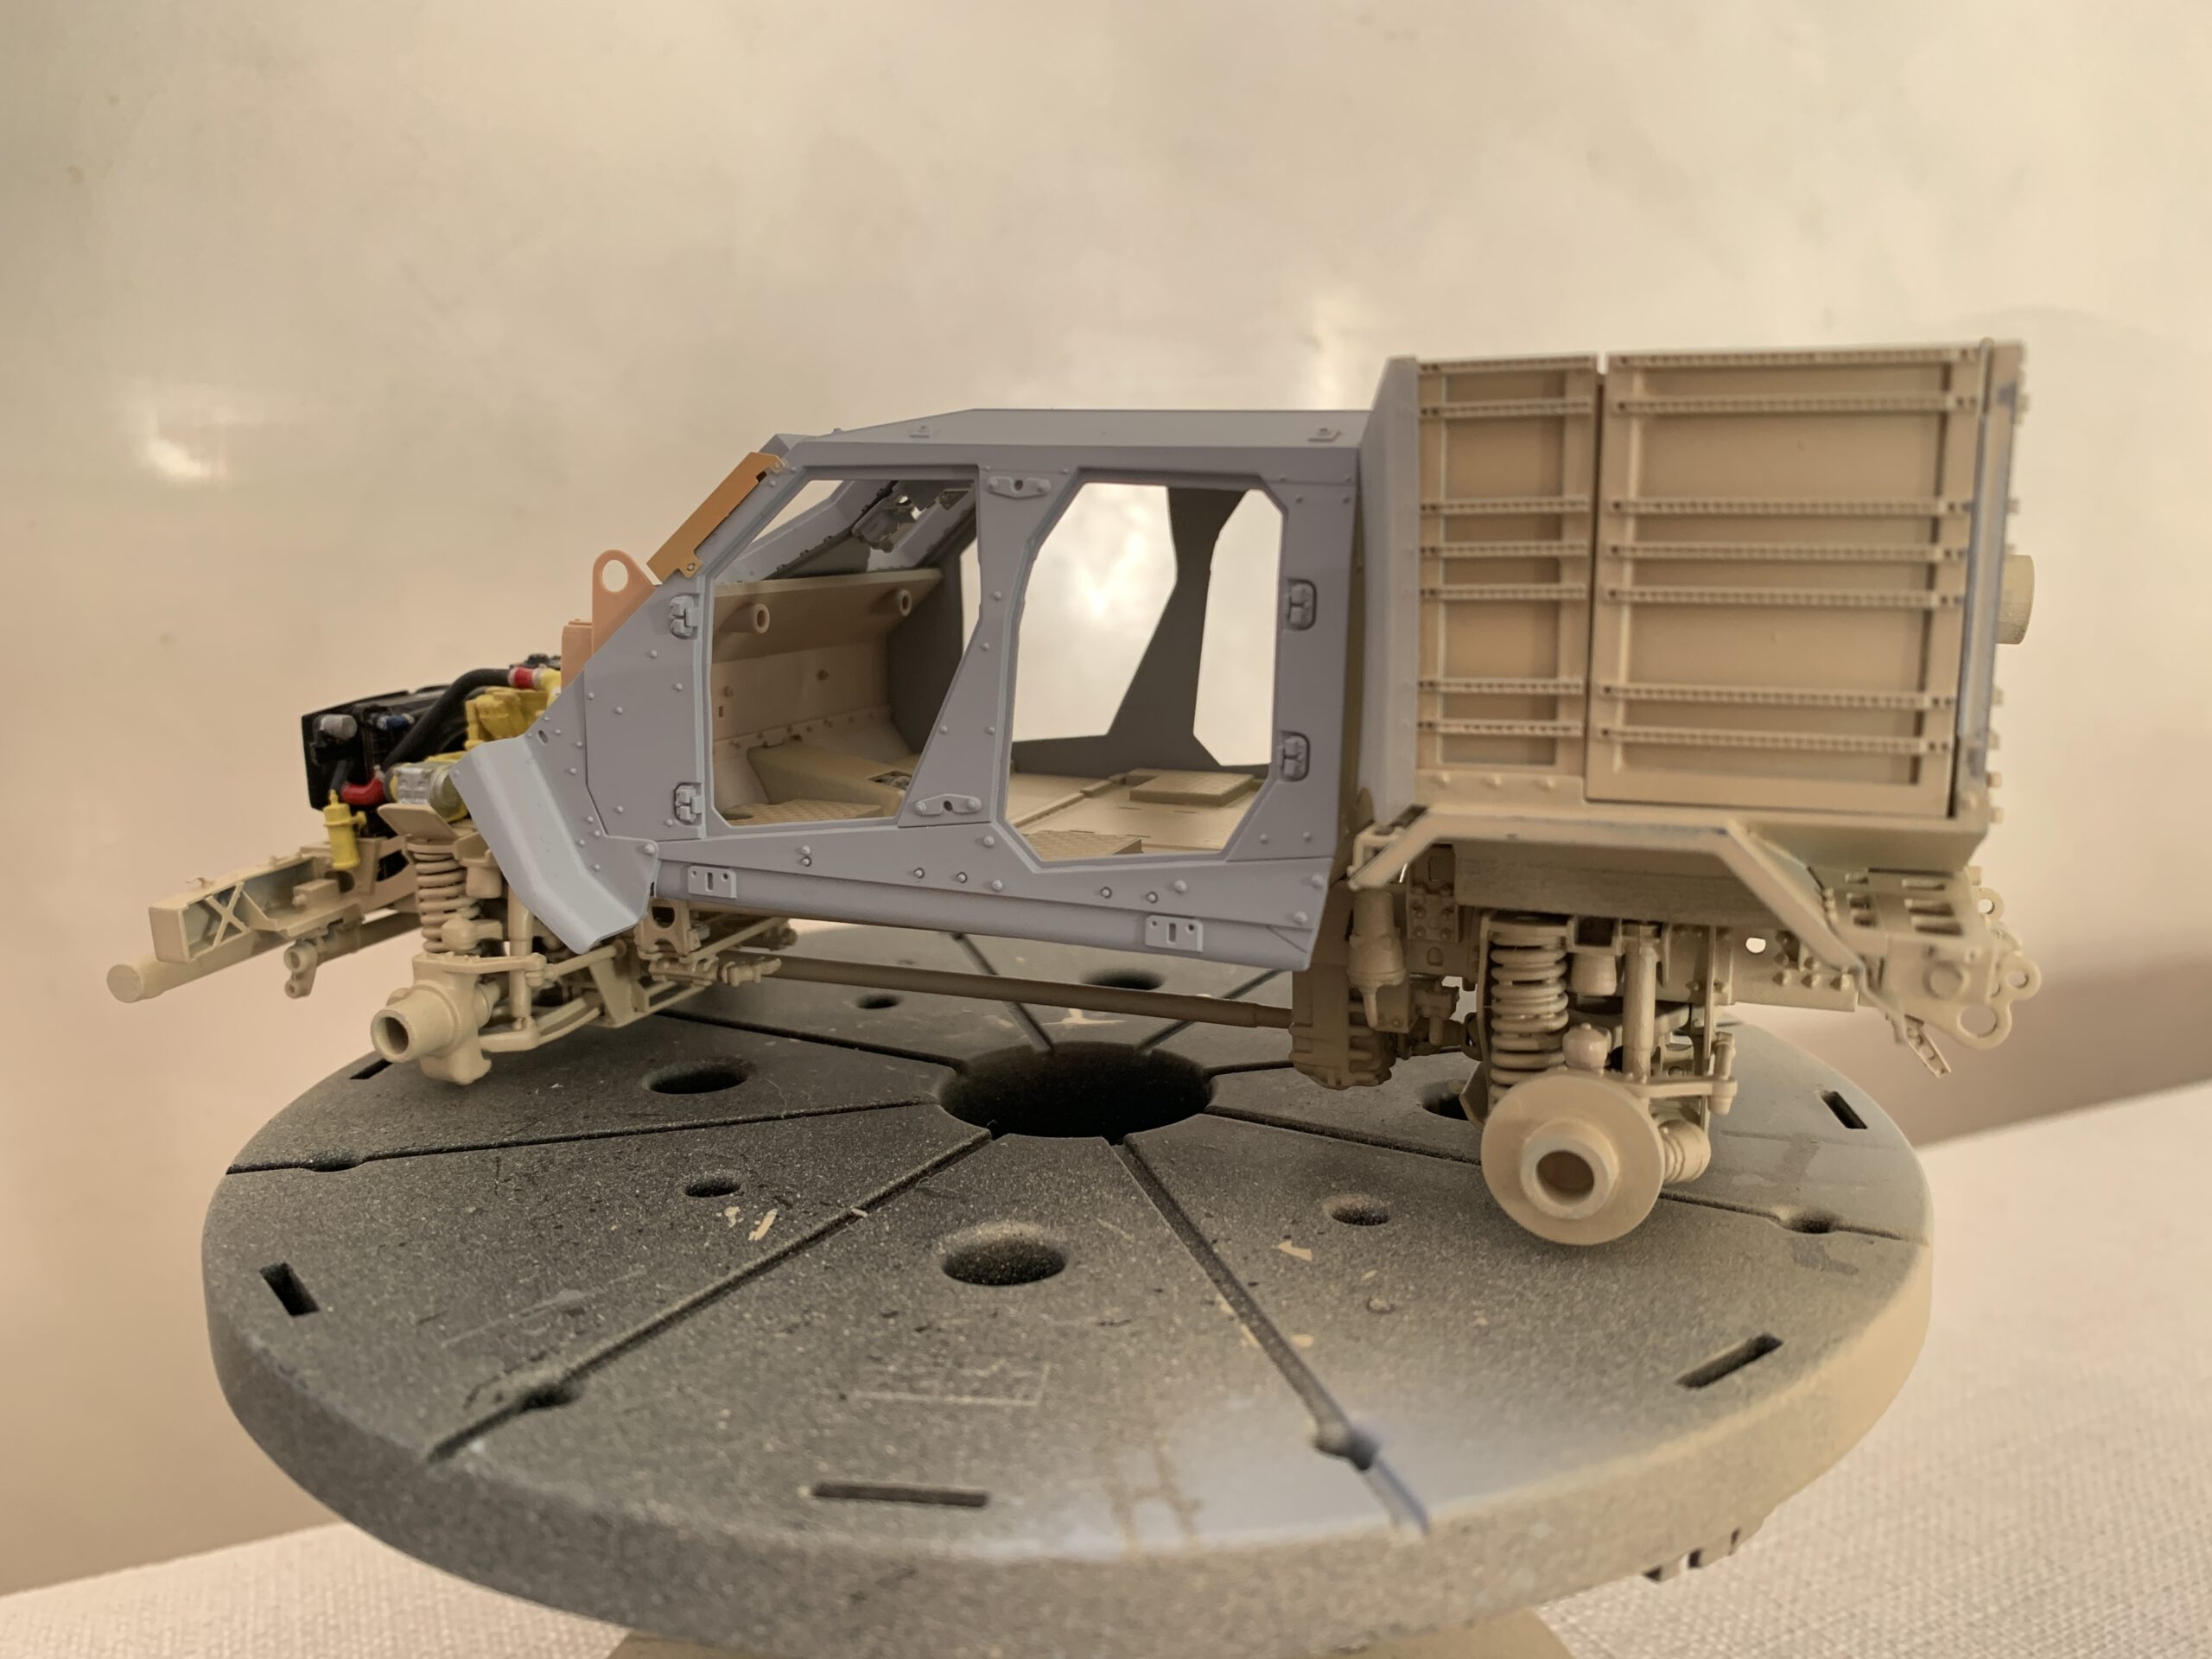
Cabin and interiors
As I have said earlier, M1245 interiors are very different from the M1240, main differences being: 5 seats instead of 4 and a door from the cabin to the cargo bay.
I cut the cabin rear wall and and added sliding doors.
I also made a try to detail interiors correctly, building a new rack between the front seats, different from the one in the M1240.
As for the 5th seat, I couldn’t find pictures with a clear and full view of this additional seat, therefore I made some guesses.


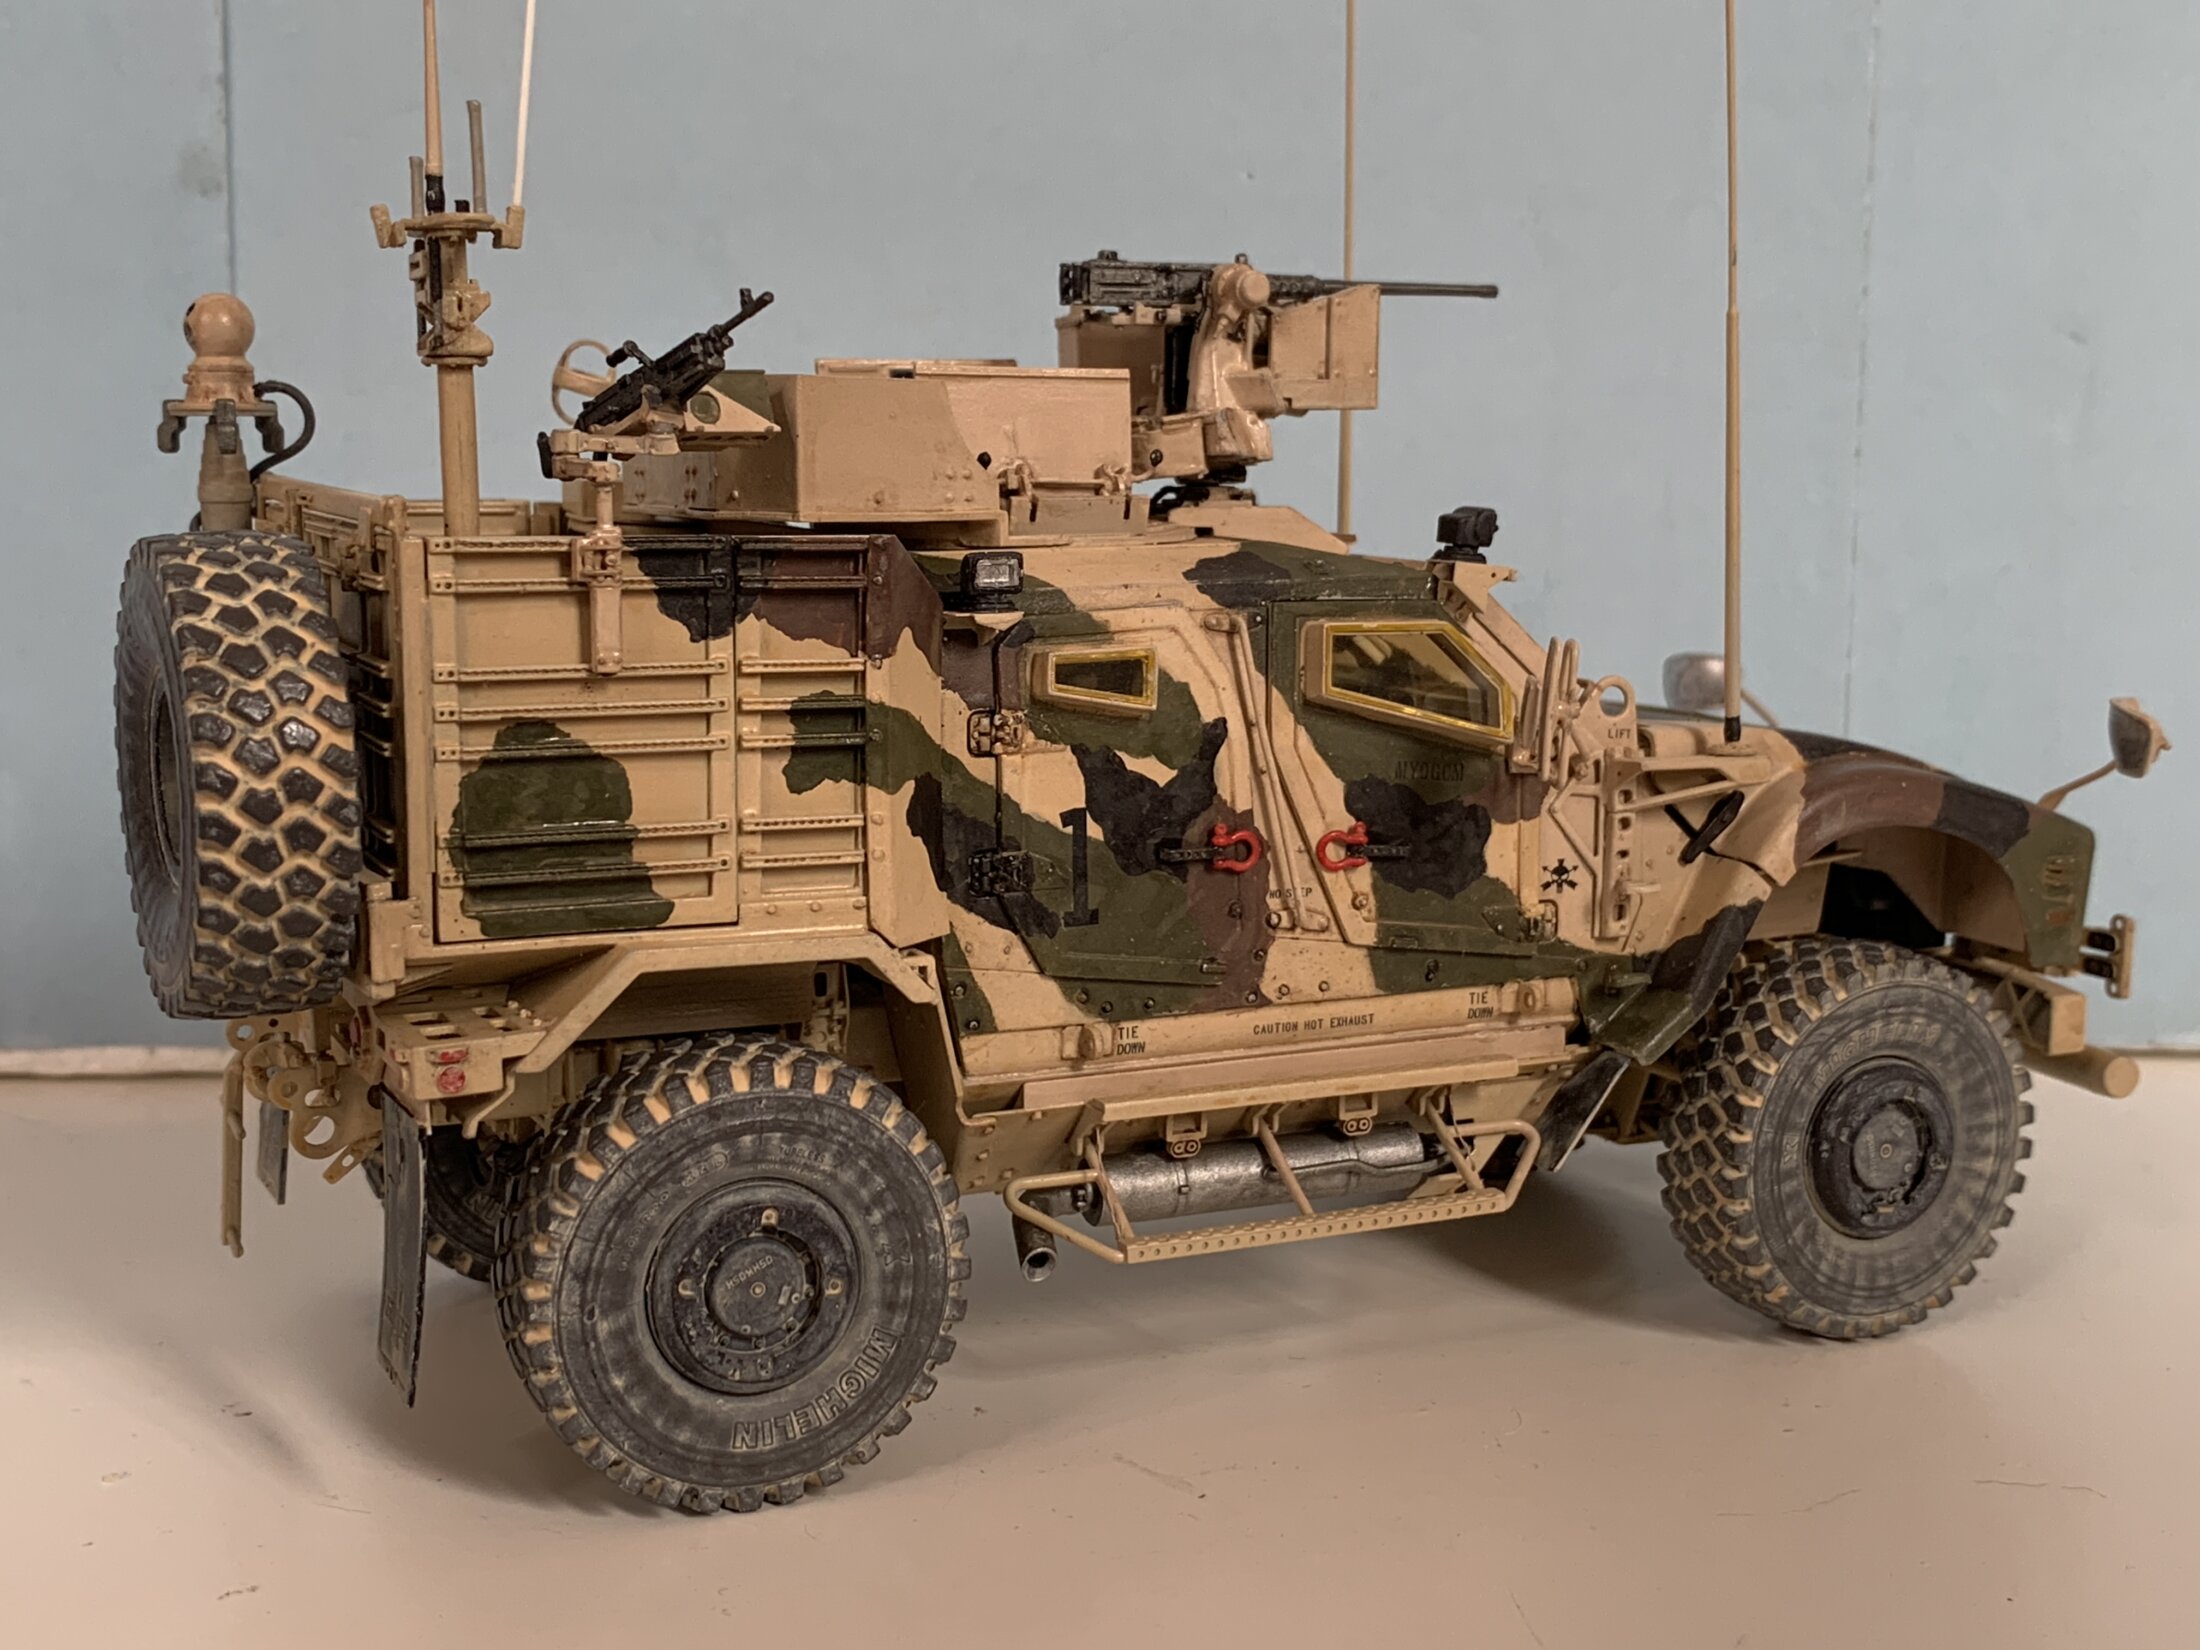
Final assembly
I completed the model adding doors, glasses, hood, mirrors and more ….
Turret and machine guns are by Live Resin.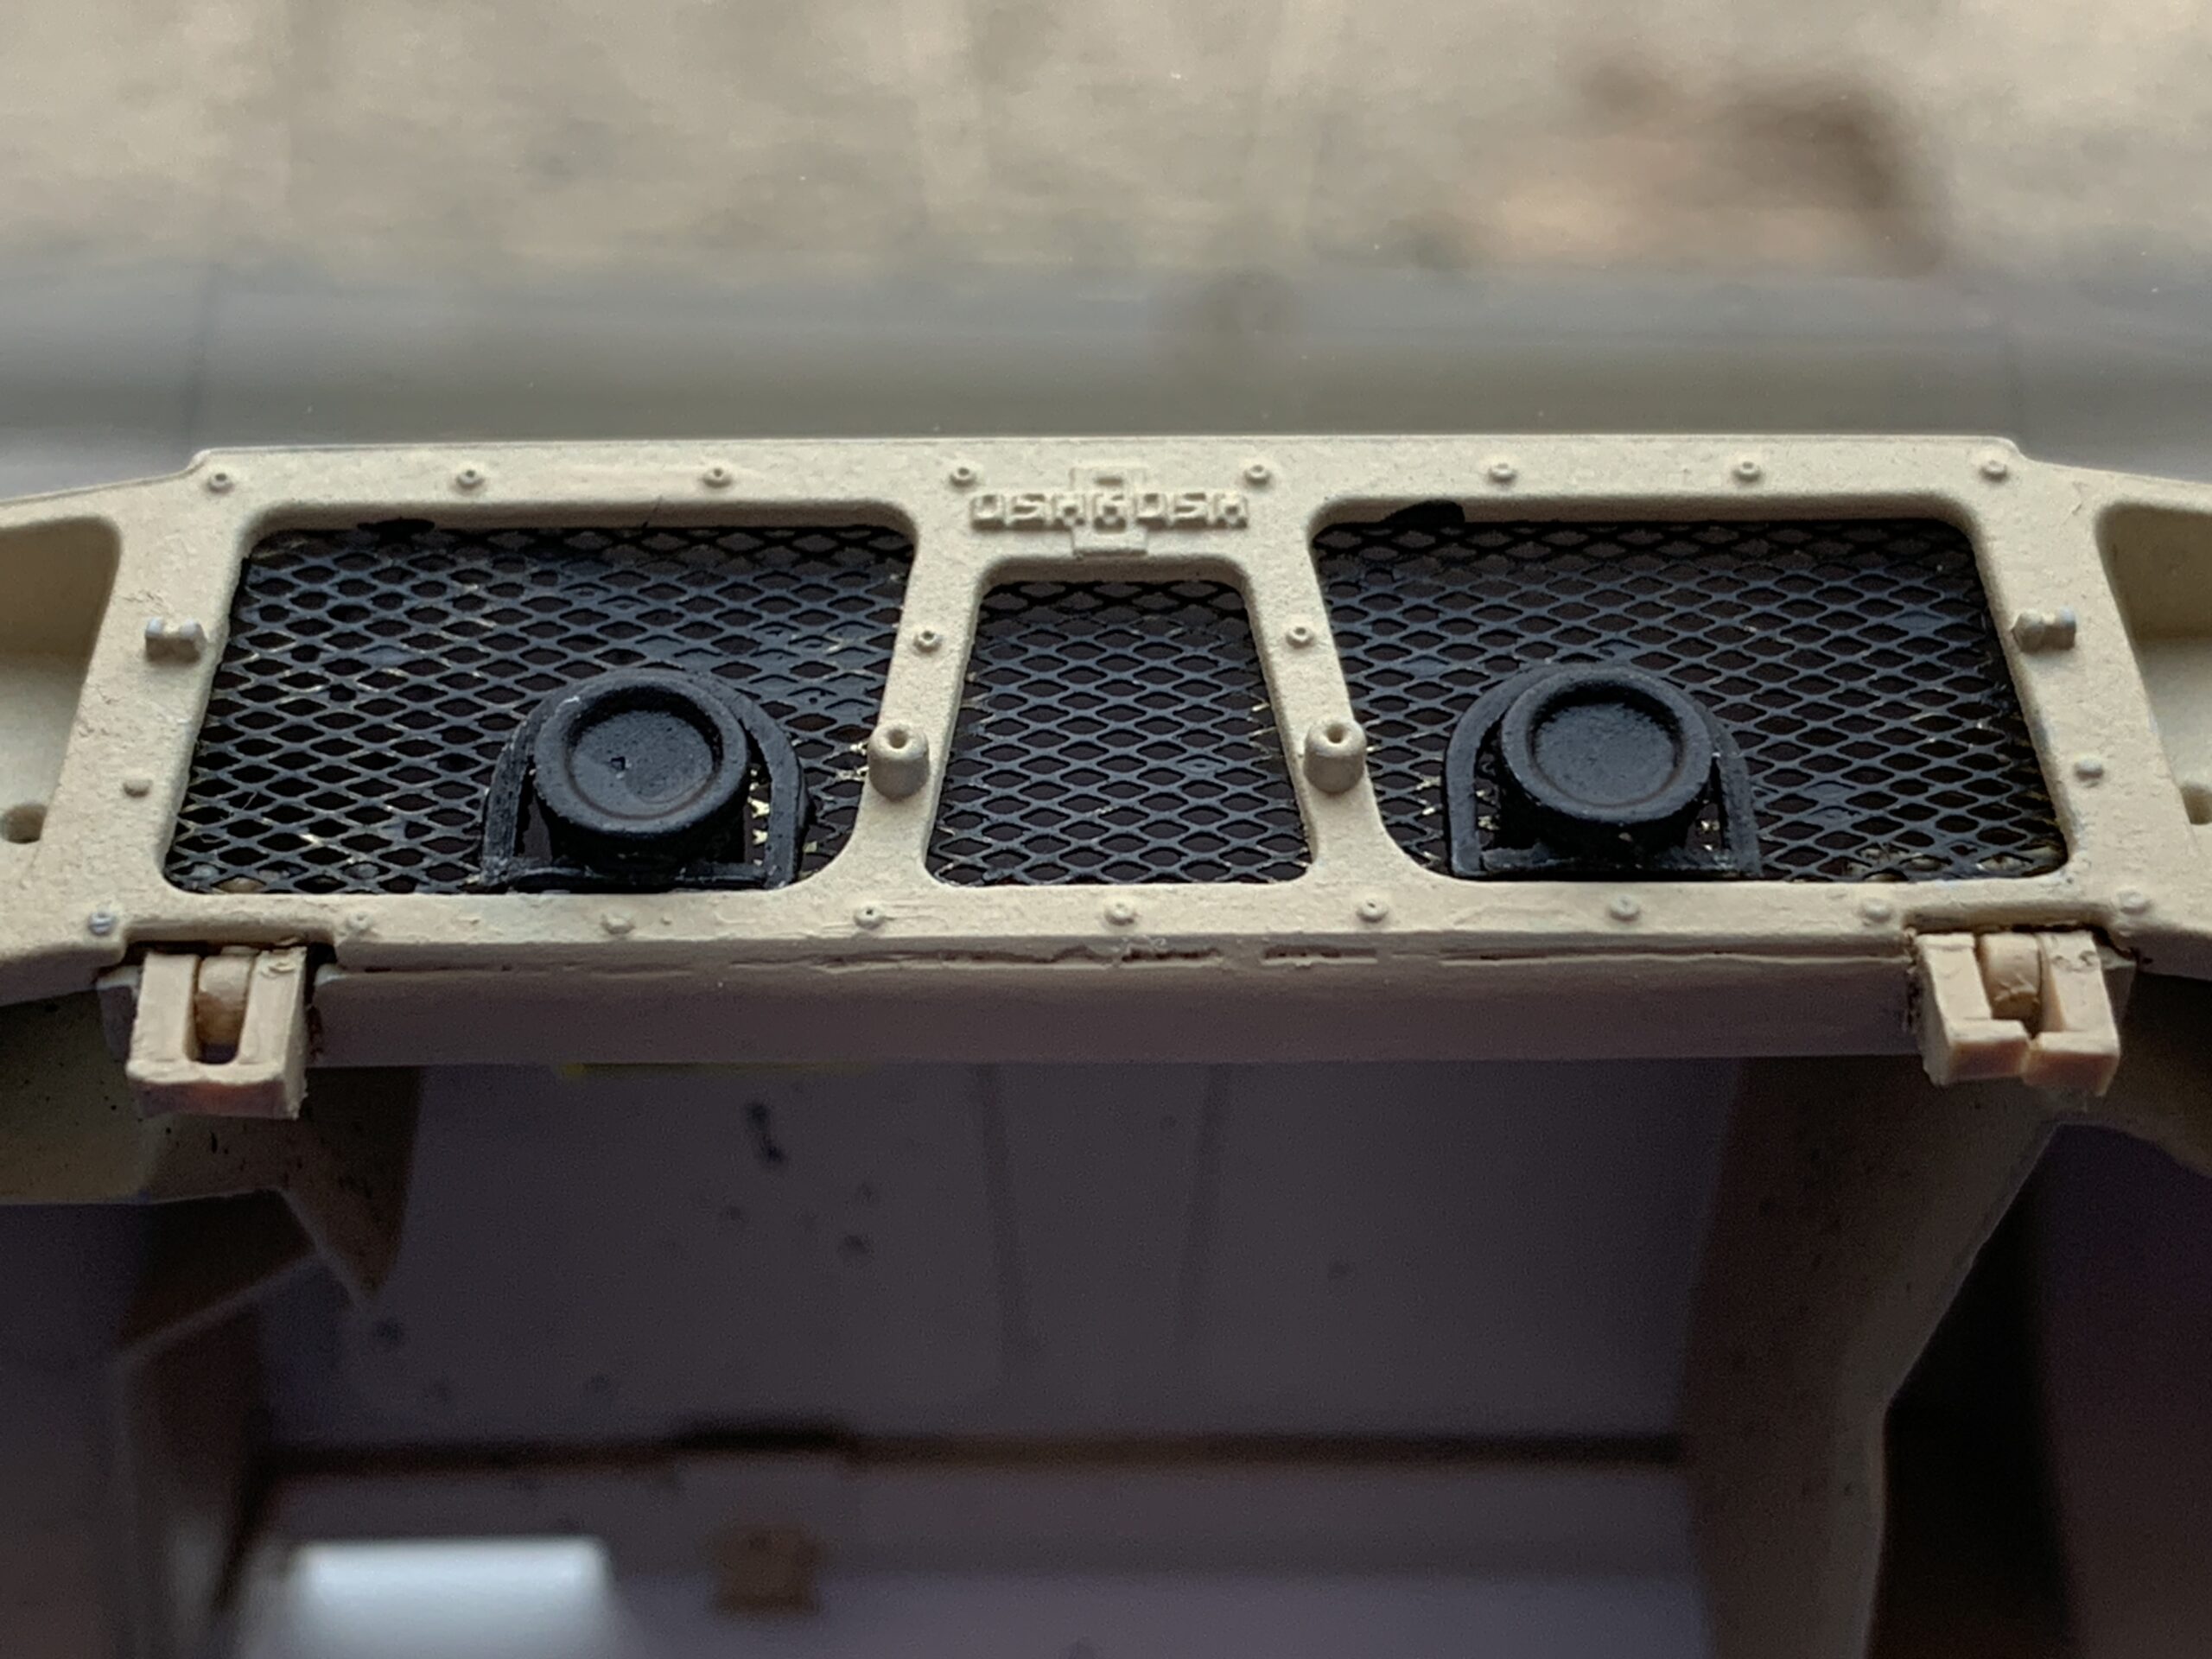
In the hood I modified the grill to accomodate the two additional lights.
I also designed and 3D printed the front right antenna mount which is very different from the one in the M1240 and the cargo bay antenna mount.
Additional lights and antenna mounts are included in my set M1245 SOCOM M-ATV conversion set – miscellanea.
Finally I designed and 3D printed the TacFLIR unit that you can find at this Shapeways page.
Model completed in June 2022