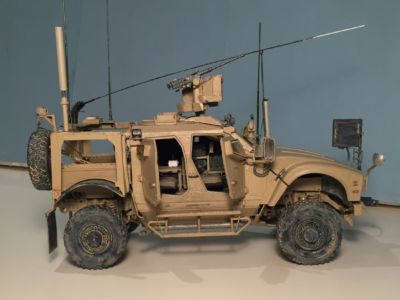
M-ATV with CROW II
by Panda, 1/35 scale
with Pro Art Models “Update Set for Interior” and
Priamide Models add-ons
The model is based on the M-ATV with CROW II RWS Panda kit (PH35007).
The Panda kit is very tough to build, many parts don’t fit the way they 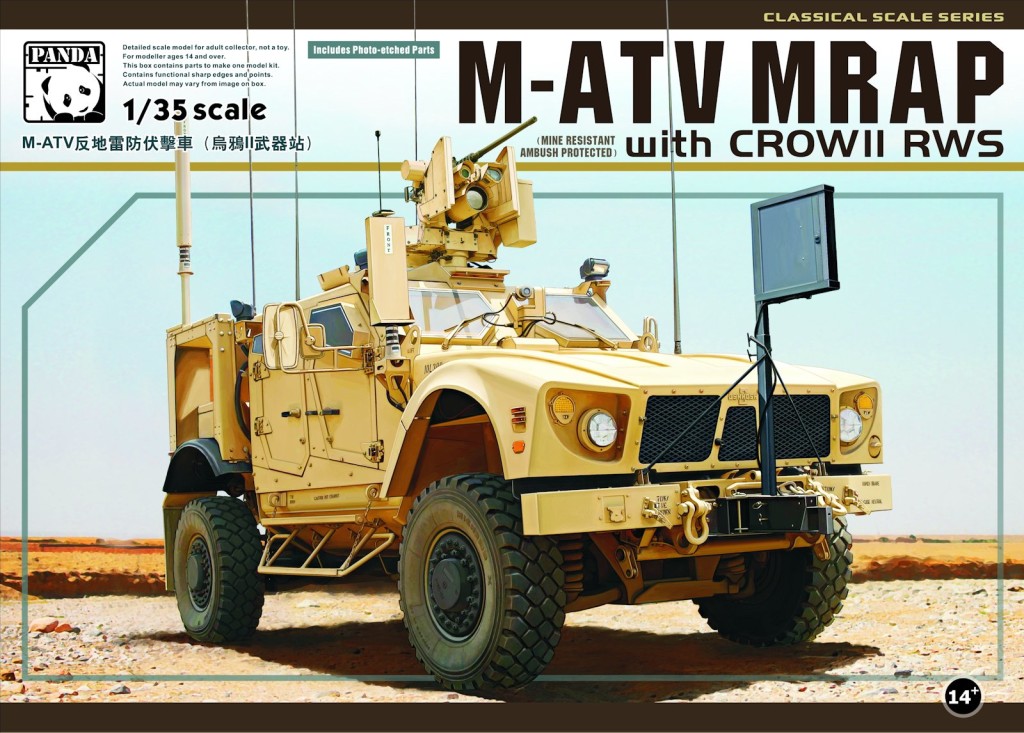 should, therefore a lot of additional work is necessary.
On the positive side, the model has very good details.
Aside from the base kit I have used many add-on’s:
- Pro-Art Models Update Set for Interior (PAU-35053)
- Real Model wheels
- 3D printed parts that I have designed and then printed at shapeways.com
References
There are many construction and picture threads, mainly on armorama.com and elsewhere that I referred to; here below a list:
- Panda M-ATV WIP (very clear and useful, while in Korean)
Additional references that I used extensively are: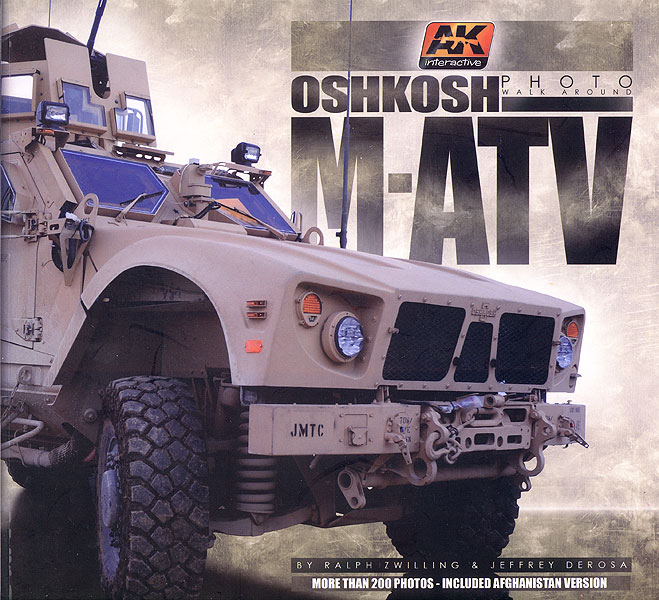
– the book published by AK Interactive “Oshkosh M-ATV – Photo Walk Around” by Ralph Zwilling and Jeffrey DeRosa;
– the “M-ATV Photo Reference CD-ROM” by Robert Skipper (18bravo);
both includes a lot of very useful pictures with close views above and below the vehicle.
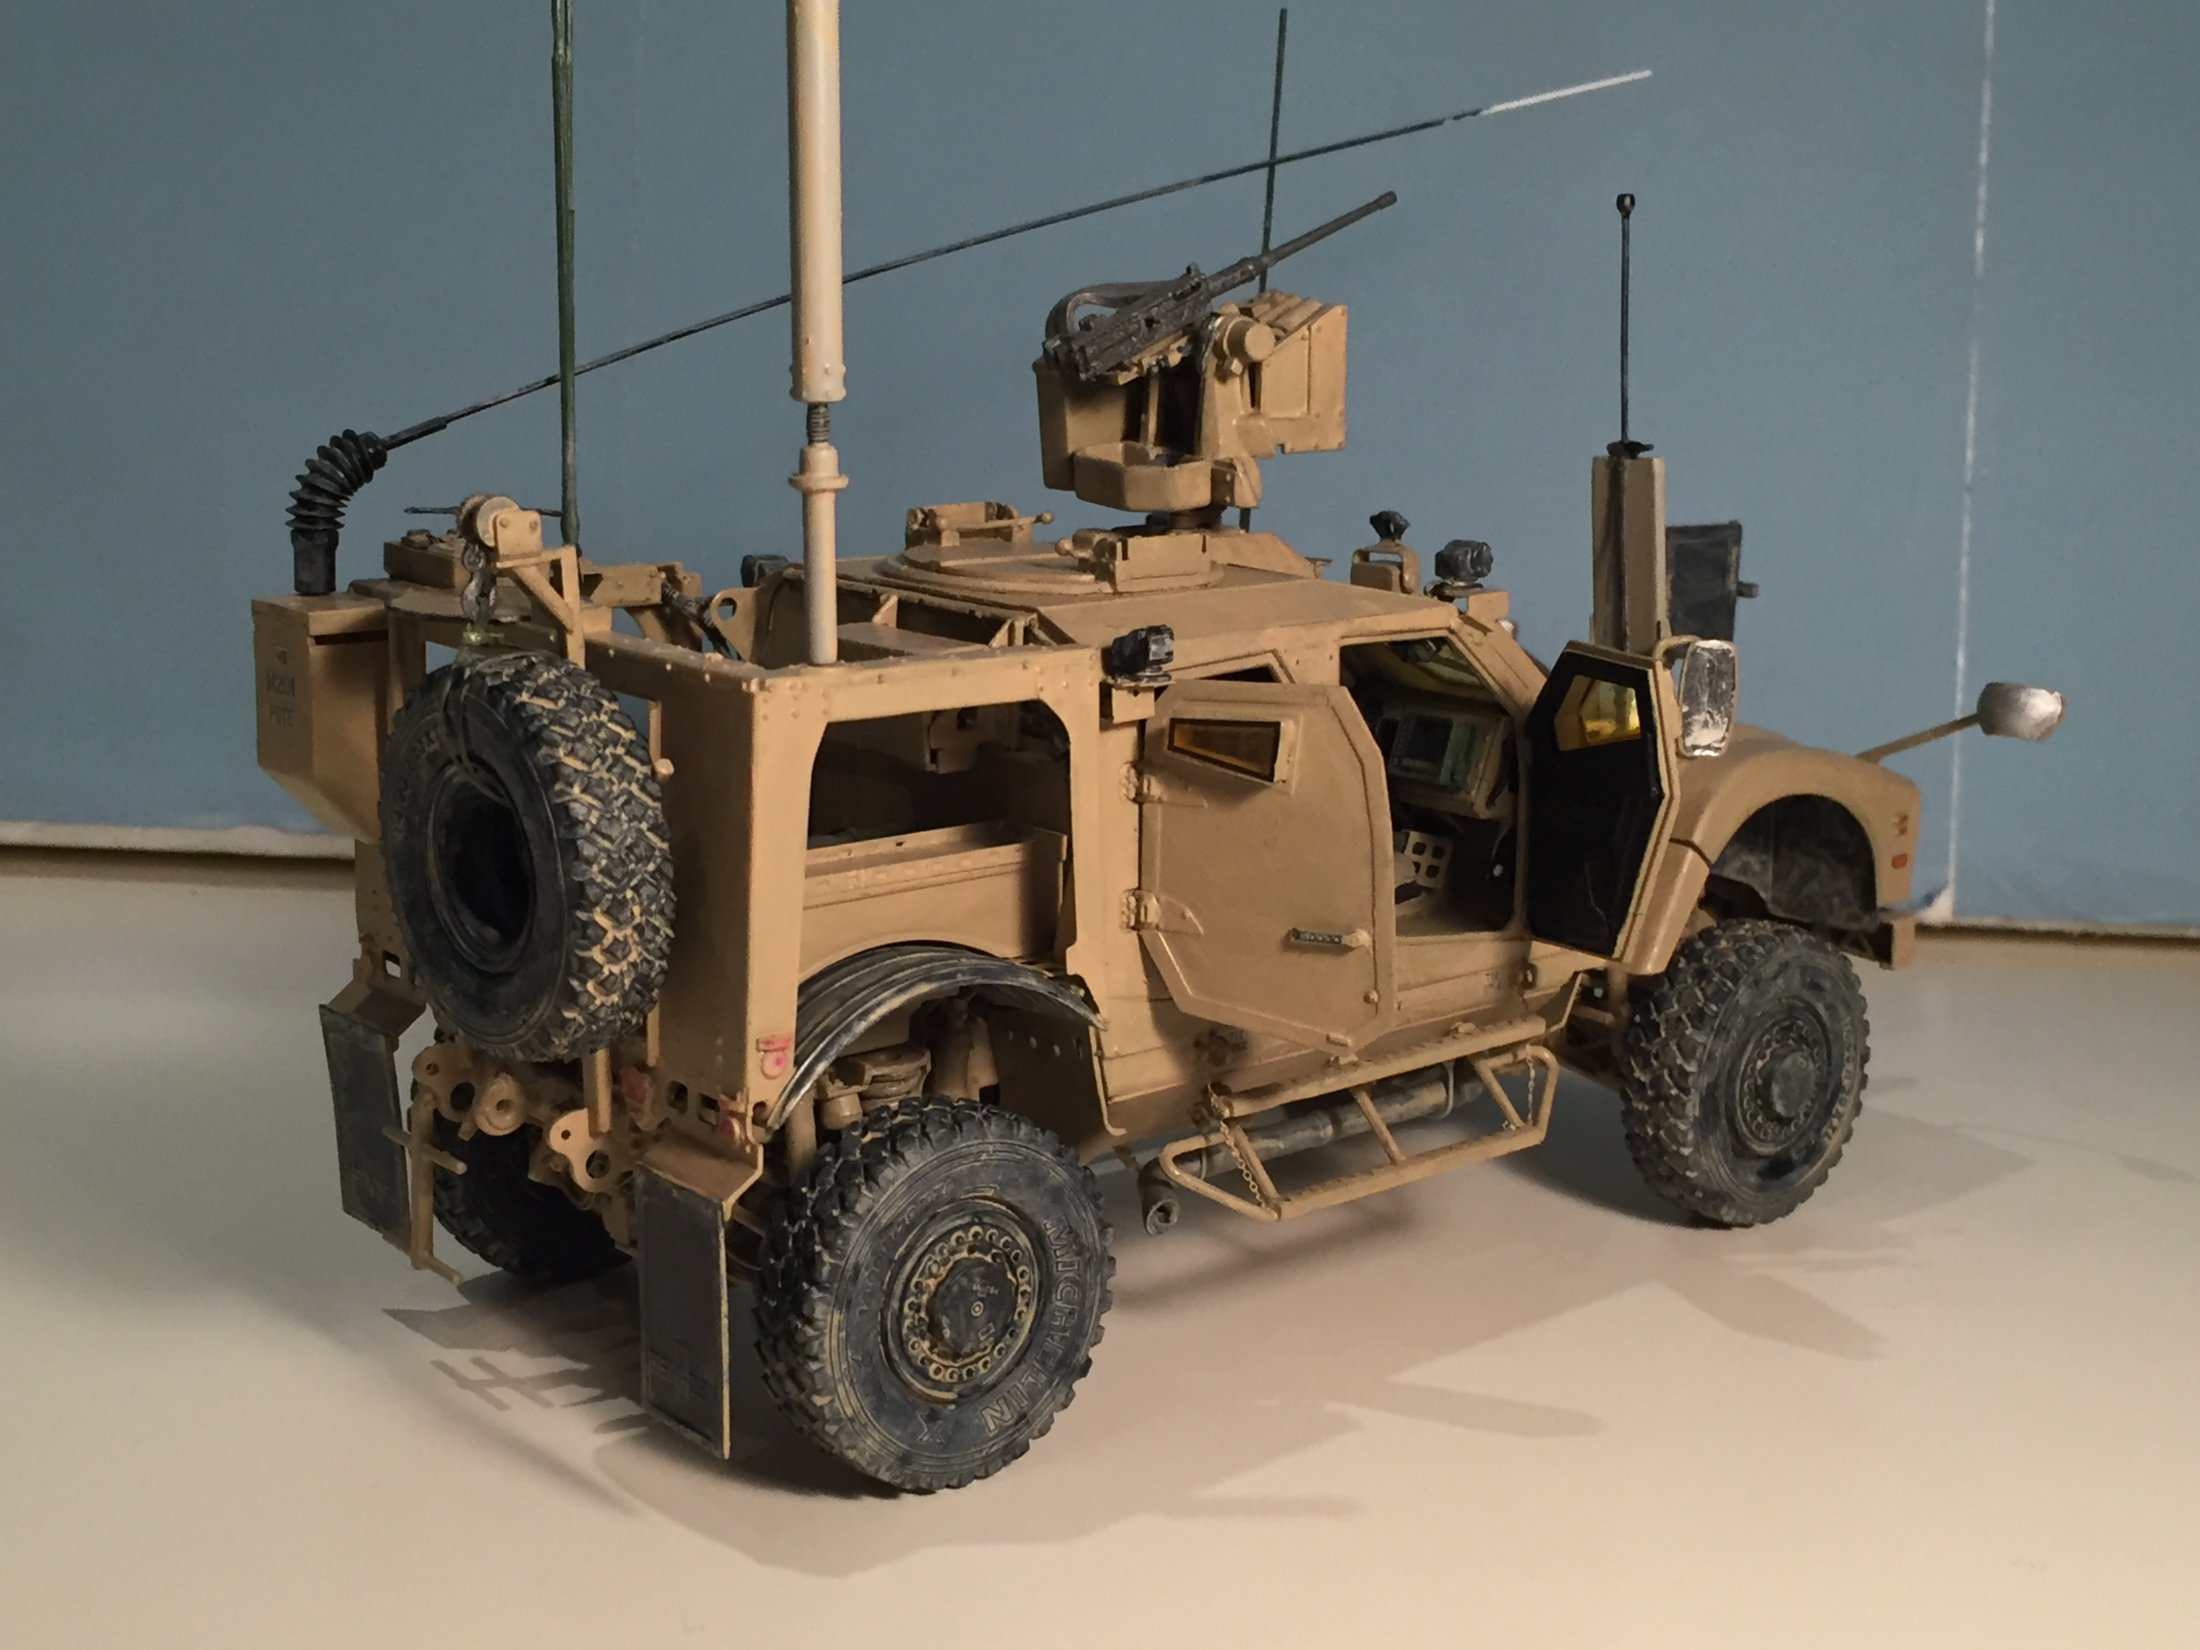
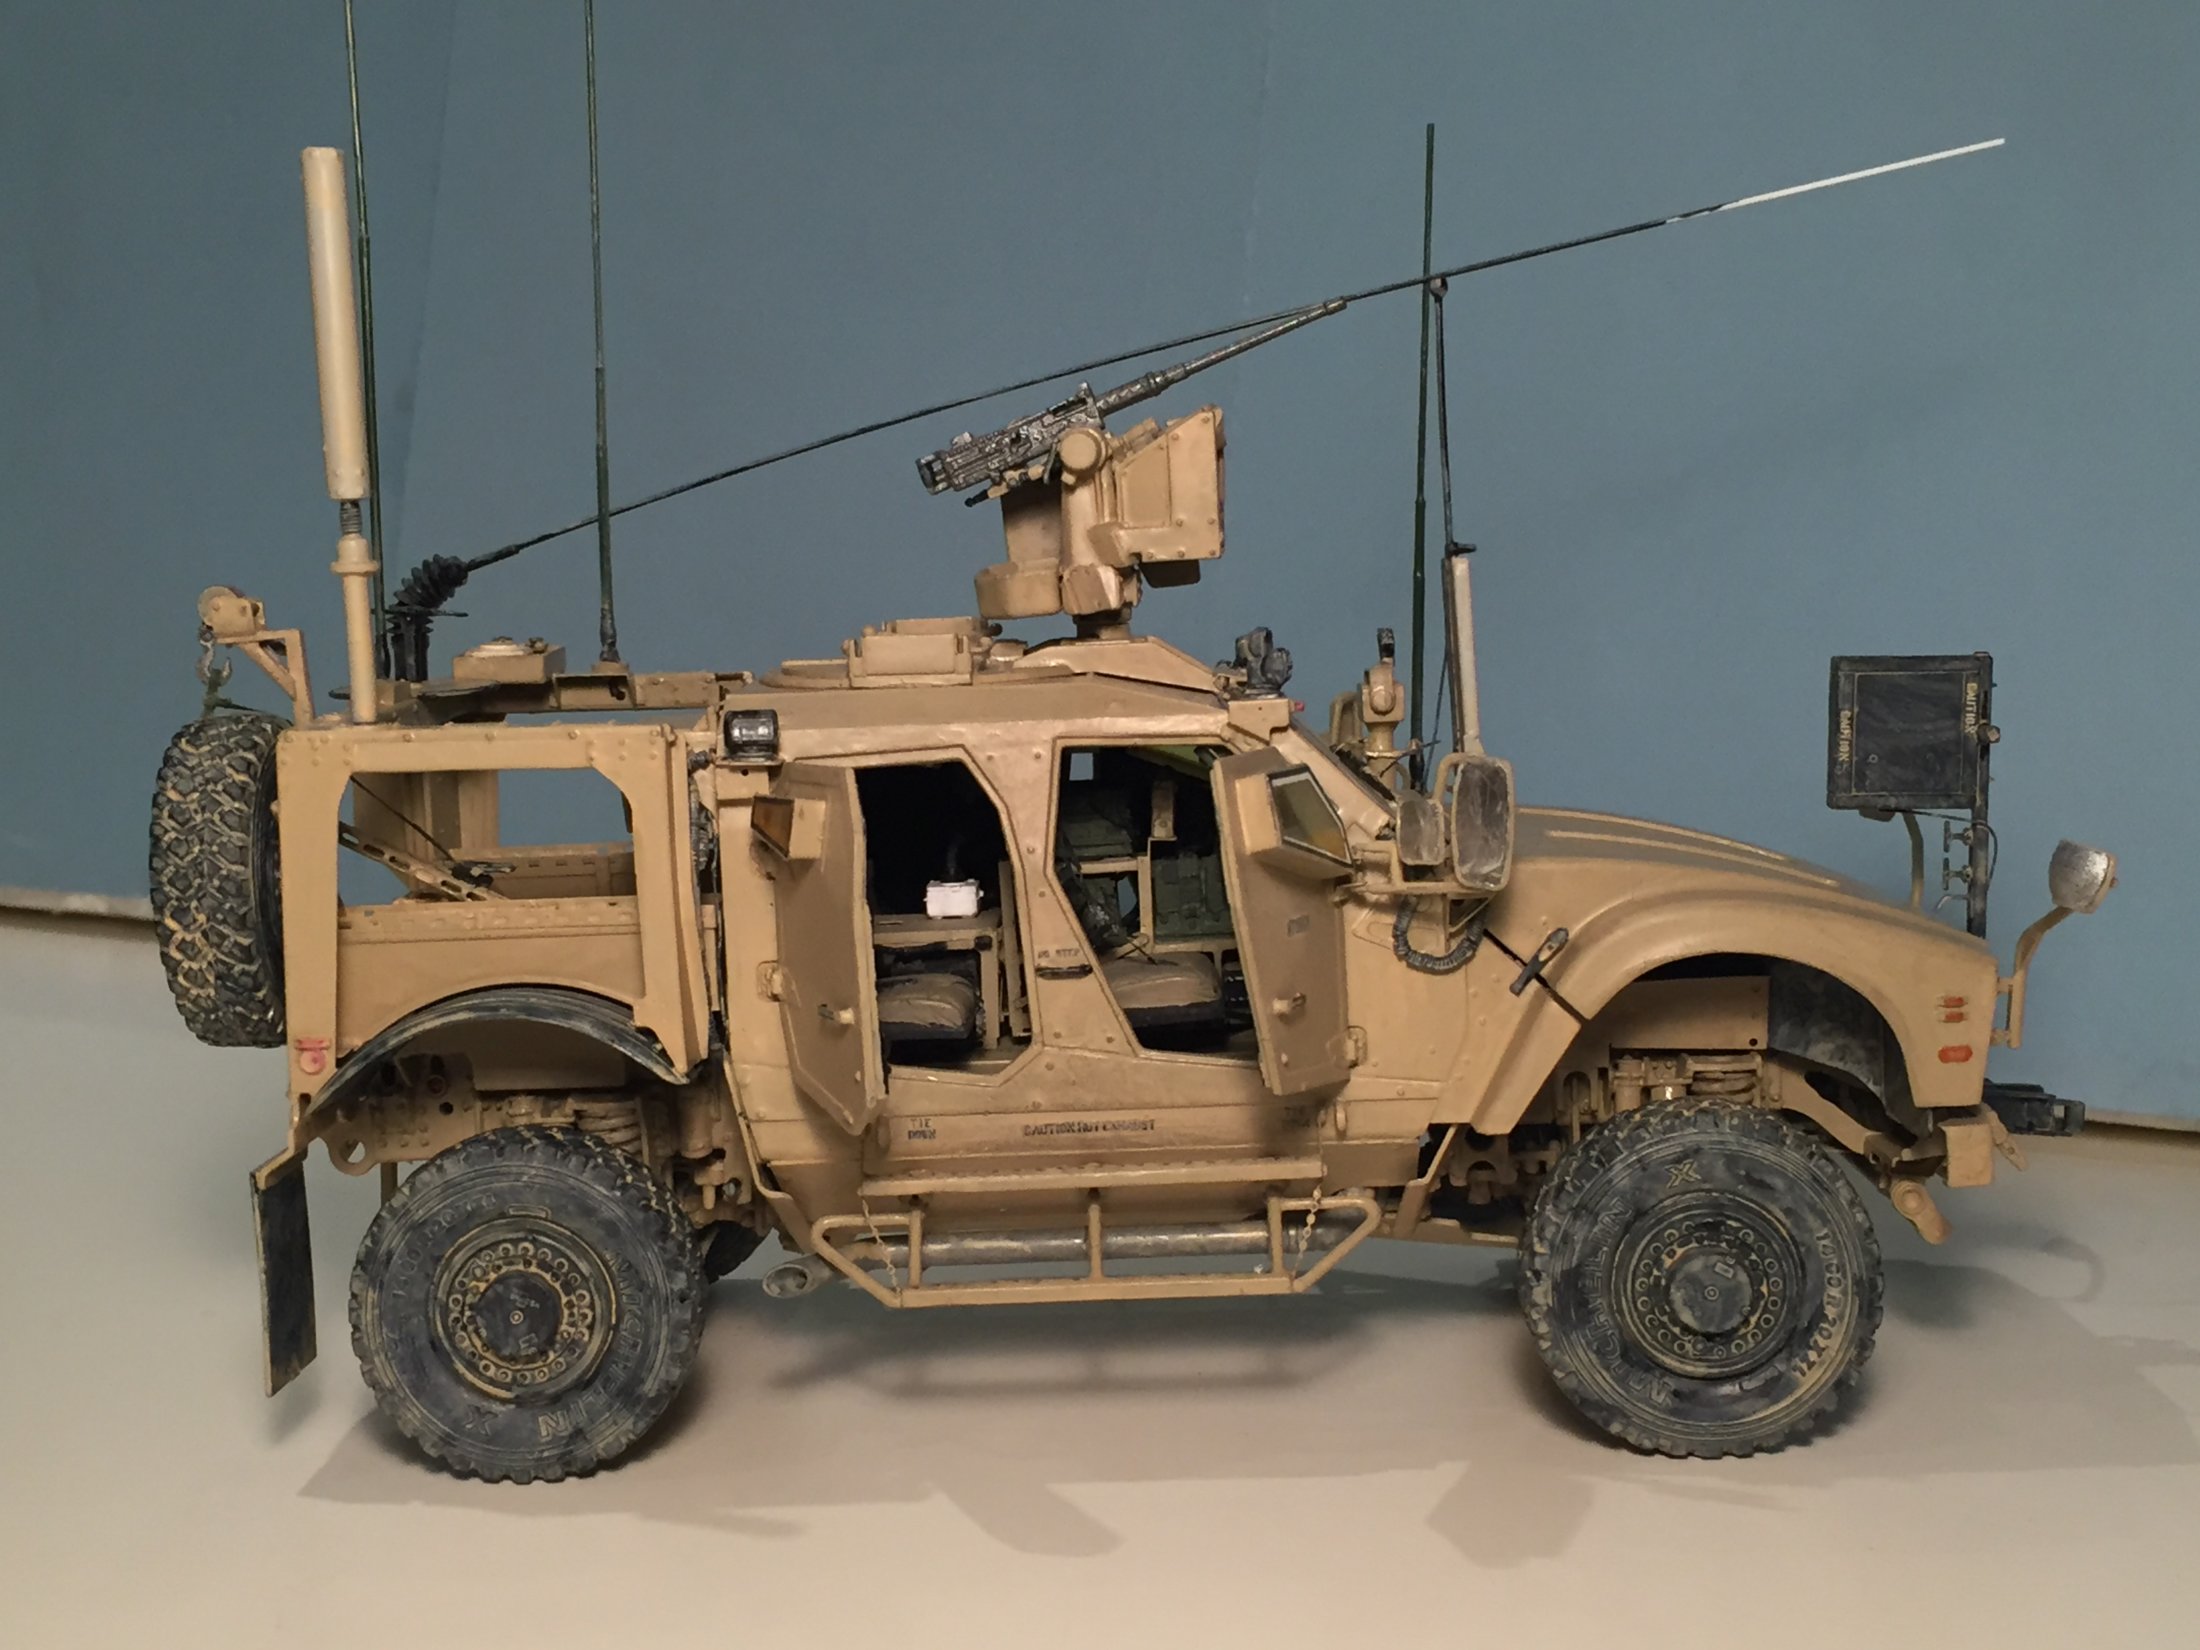
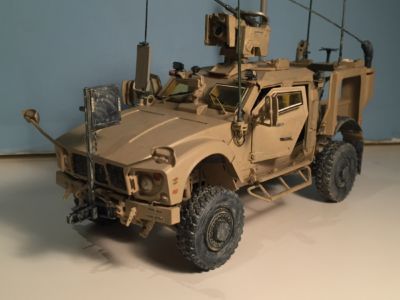
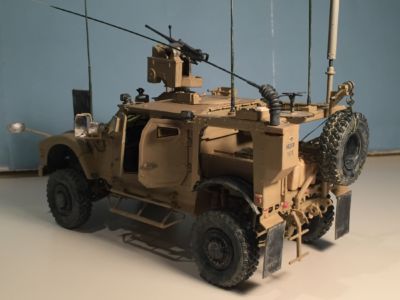
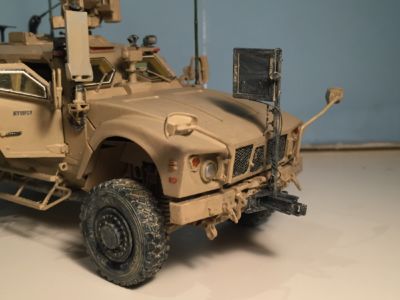
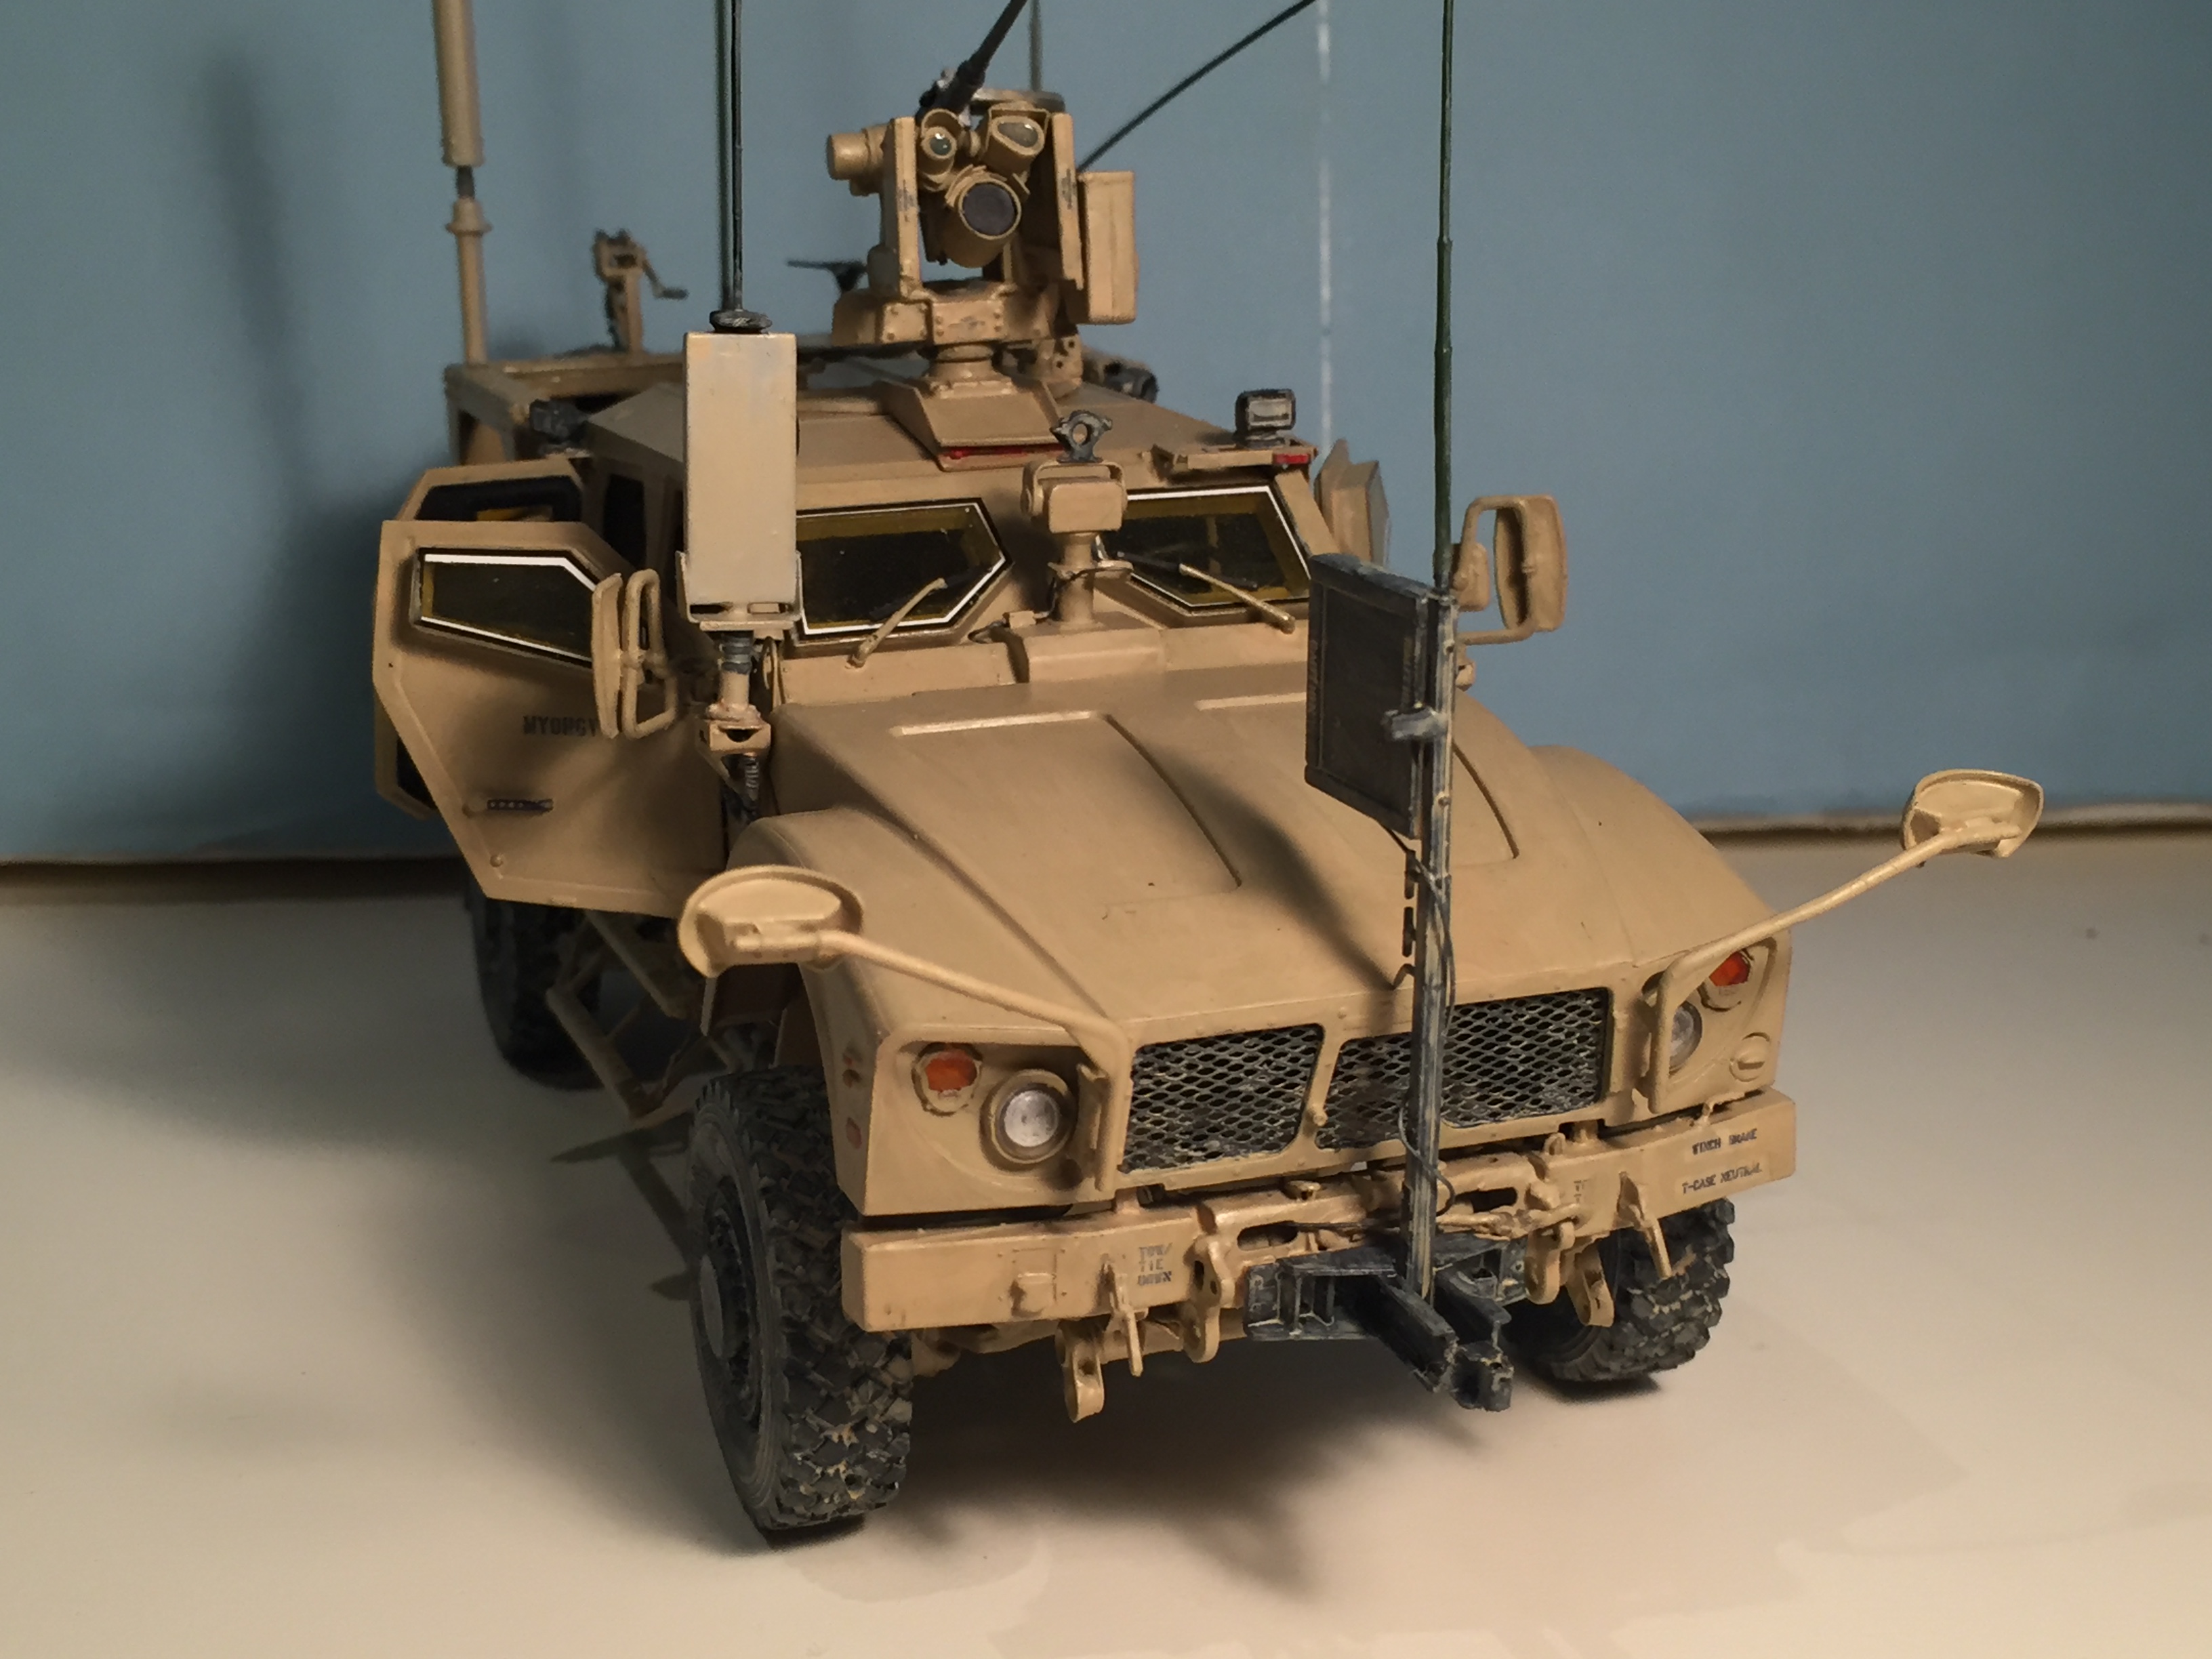
I start with a few pictures of the final output, the I will go into details of some of the building steps.


Construction History
In the following there are a few highlights of the construction steps of this M-ATV with CROW II RWS by Panda.
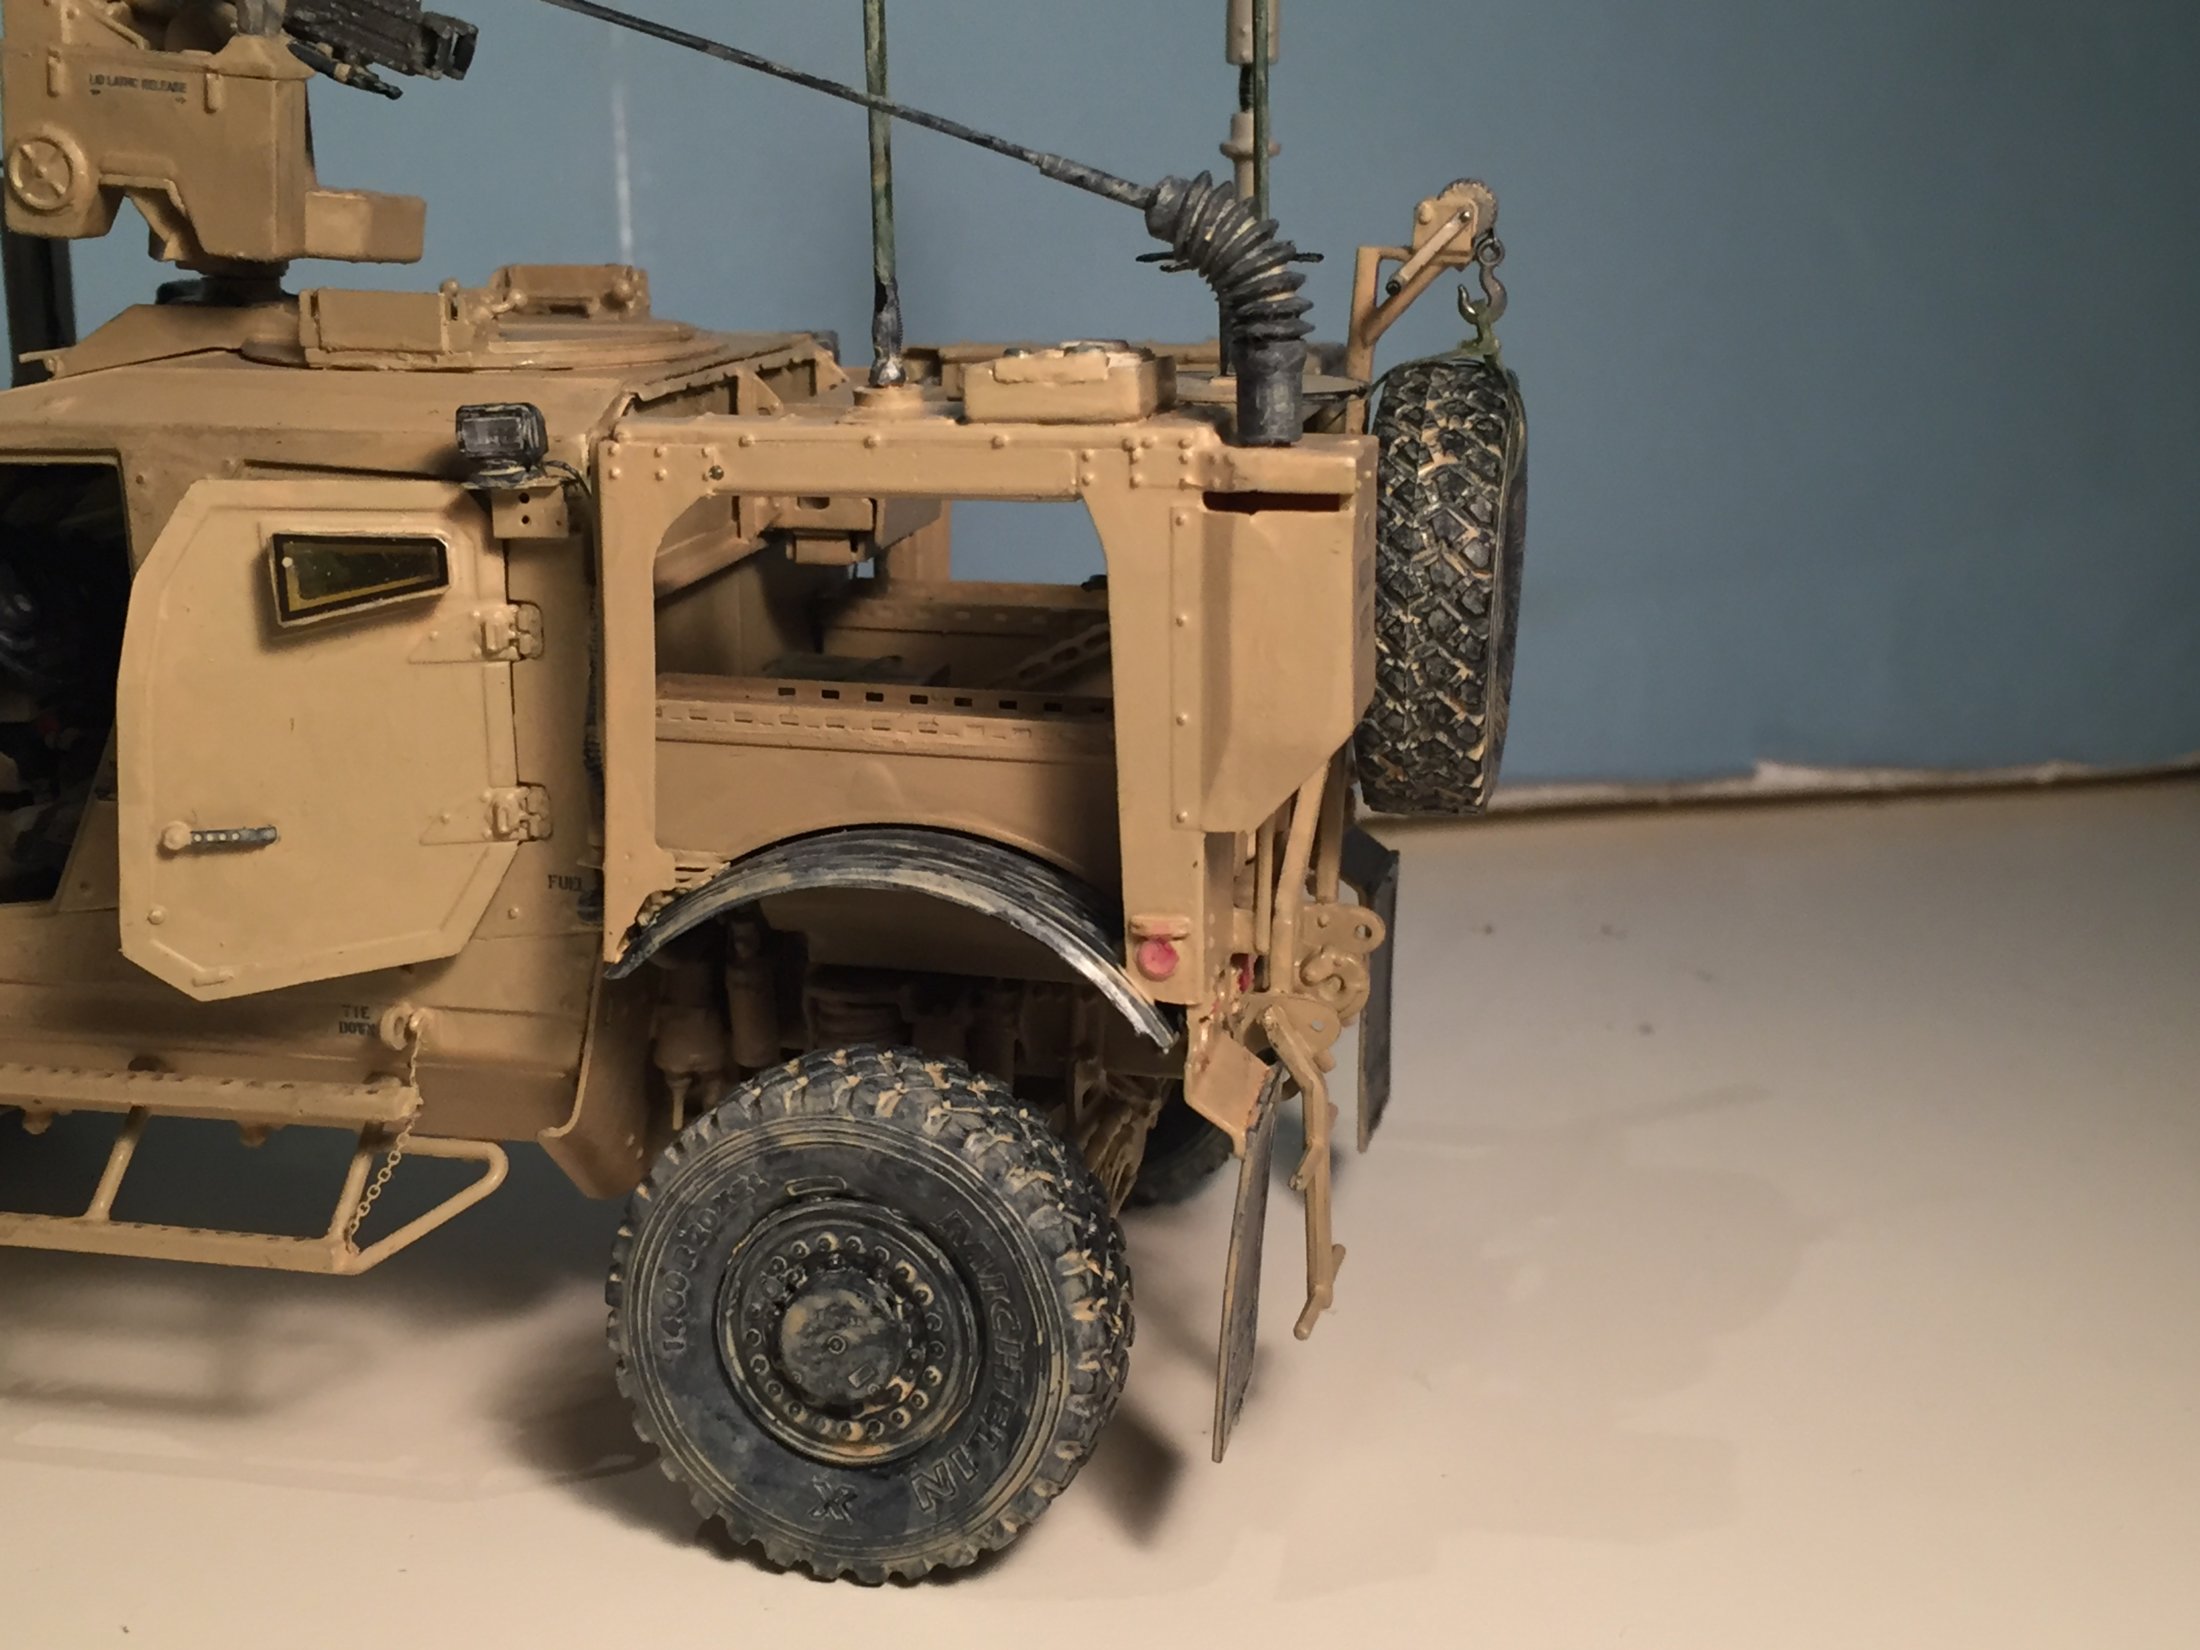
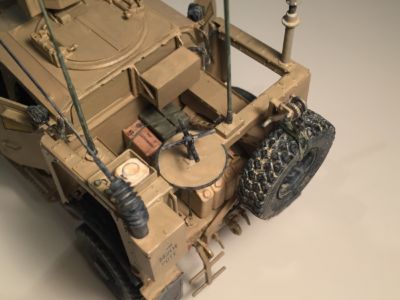
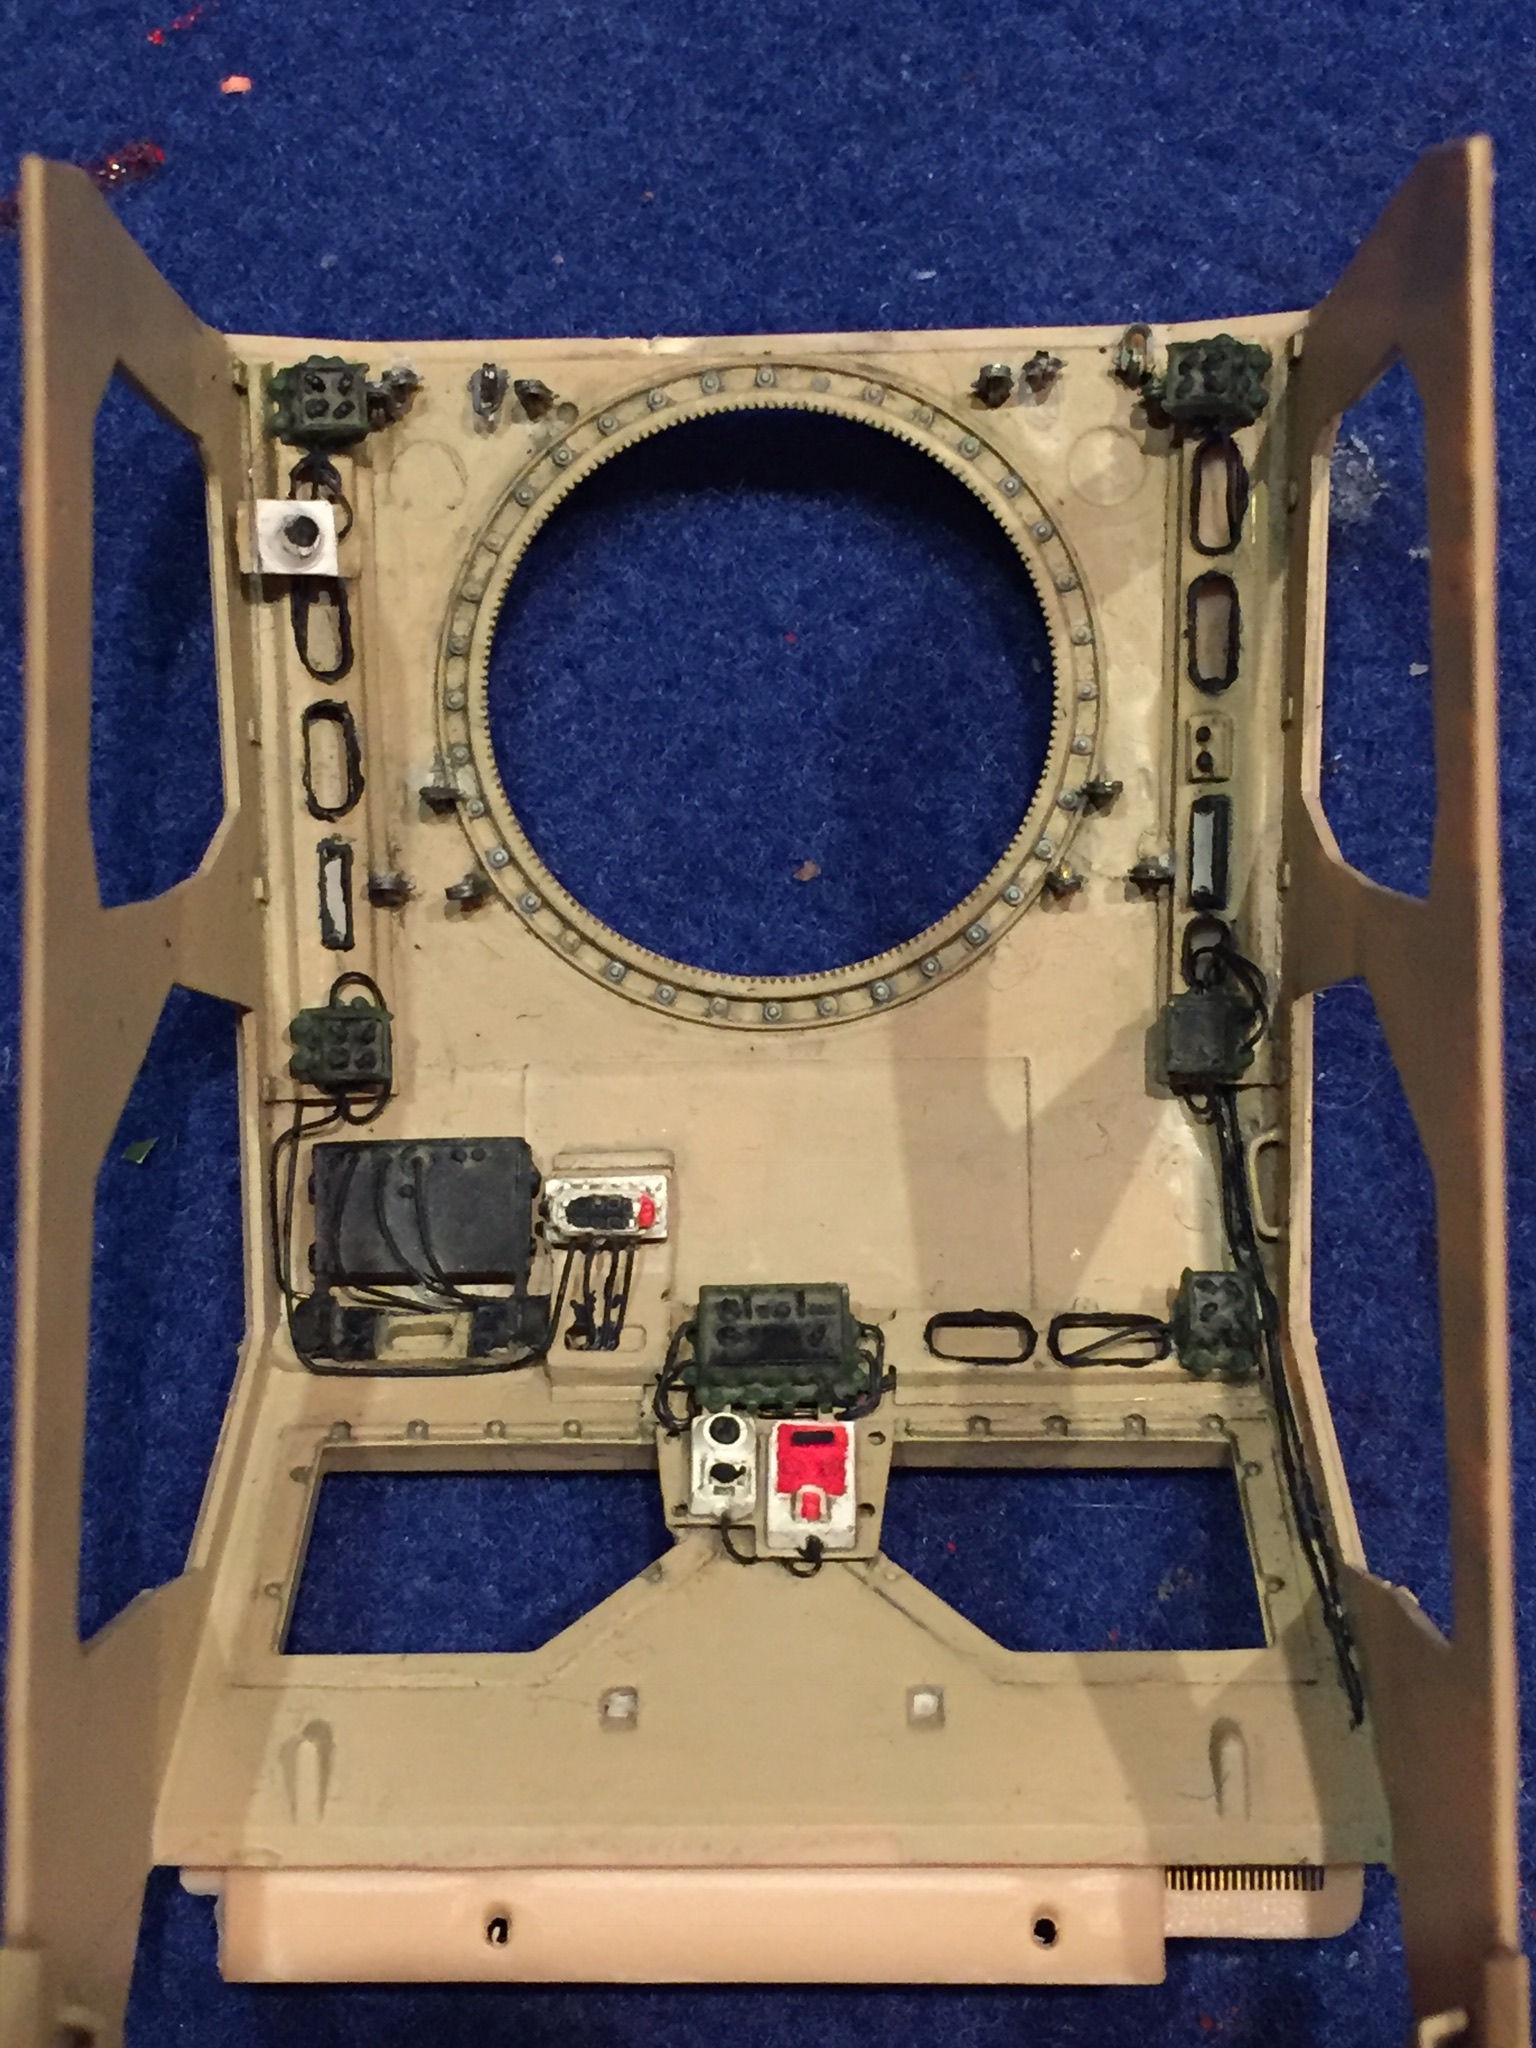
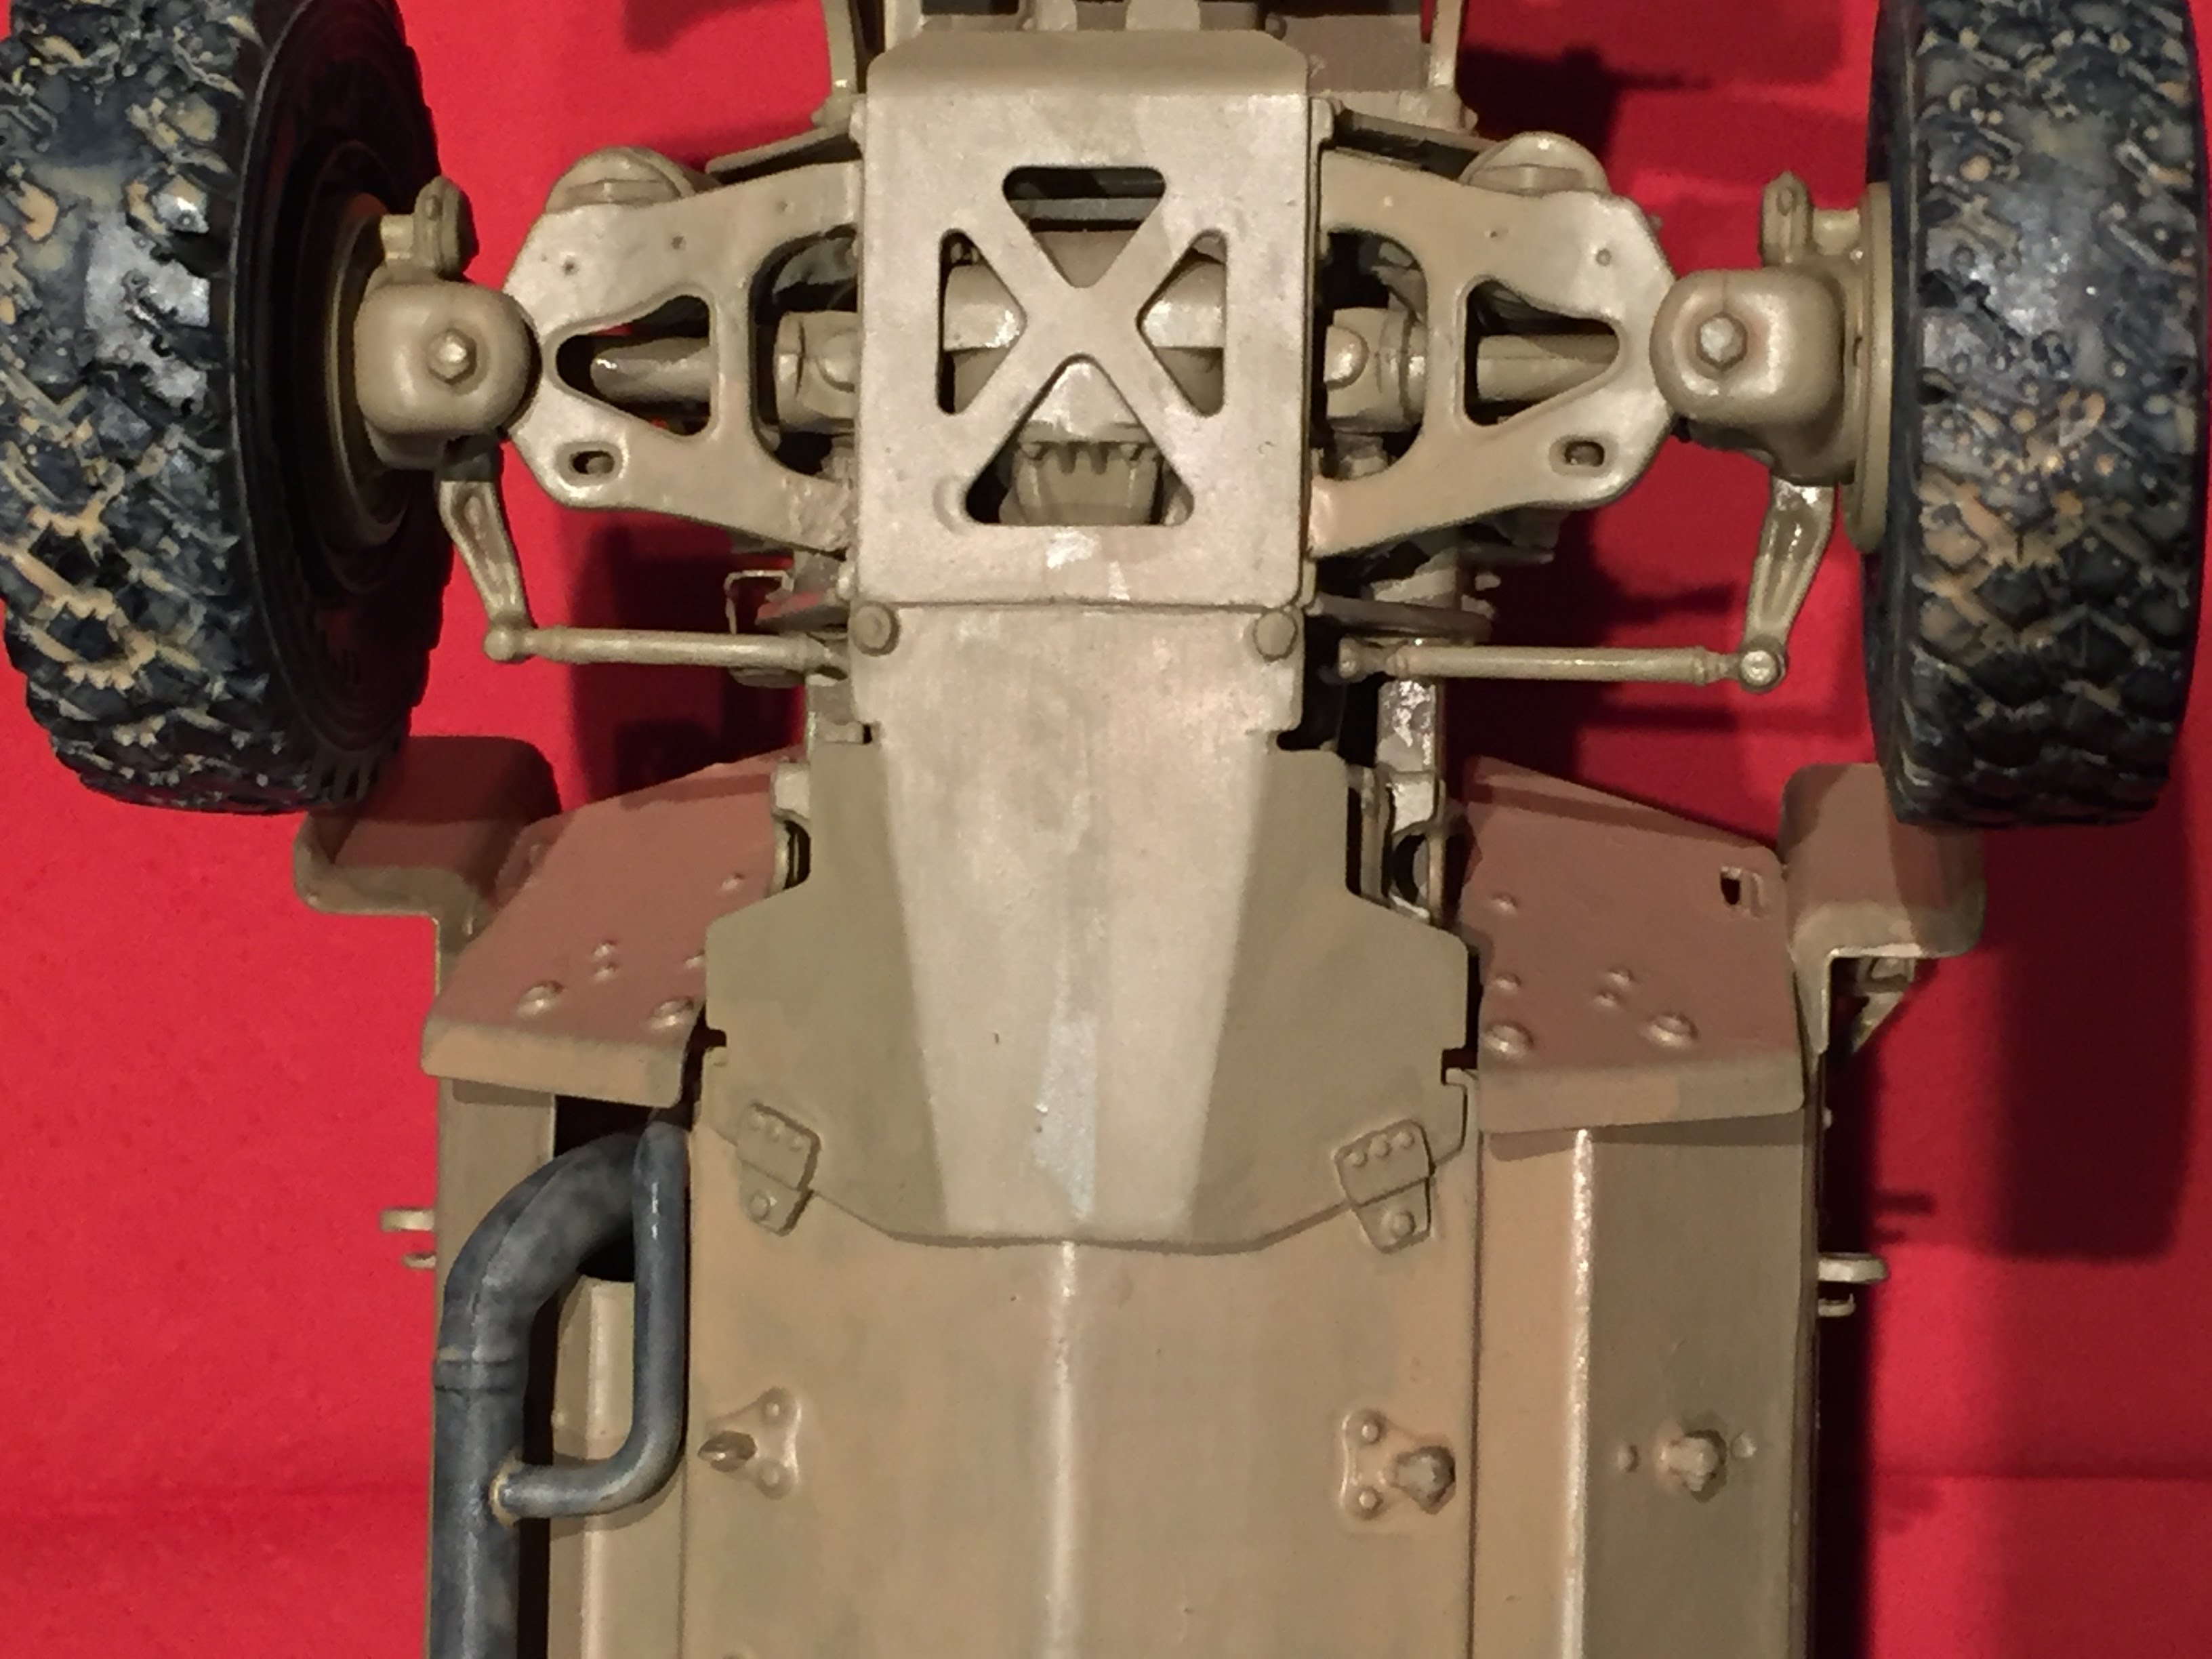
Brake and suspensions wiring: the back of the M-ATV shows a lot of wires that, after a deep look at the pictures available, I have added to the model.

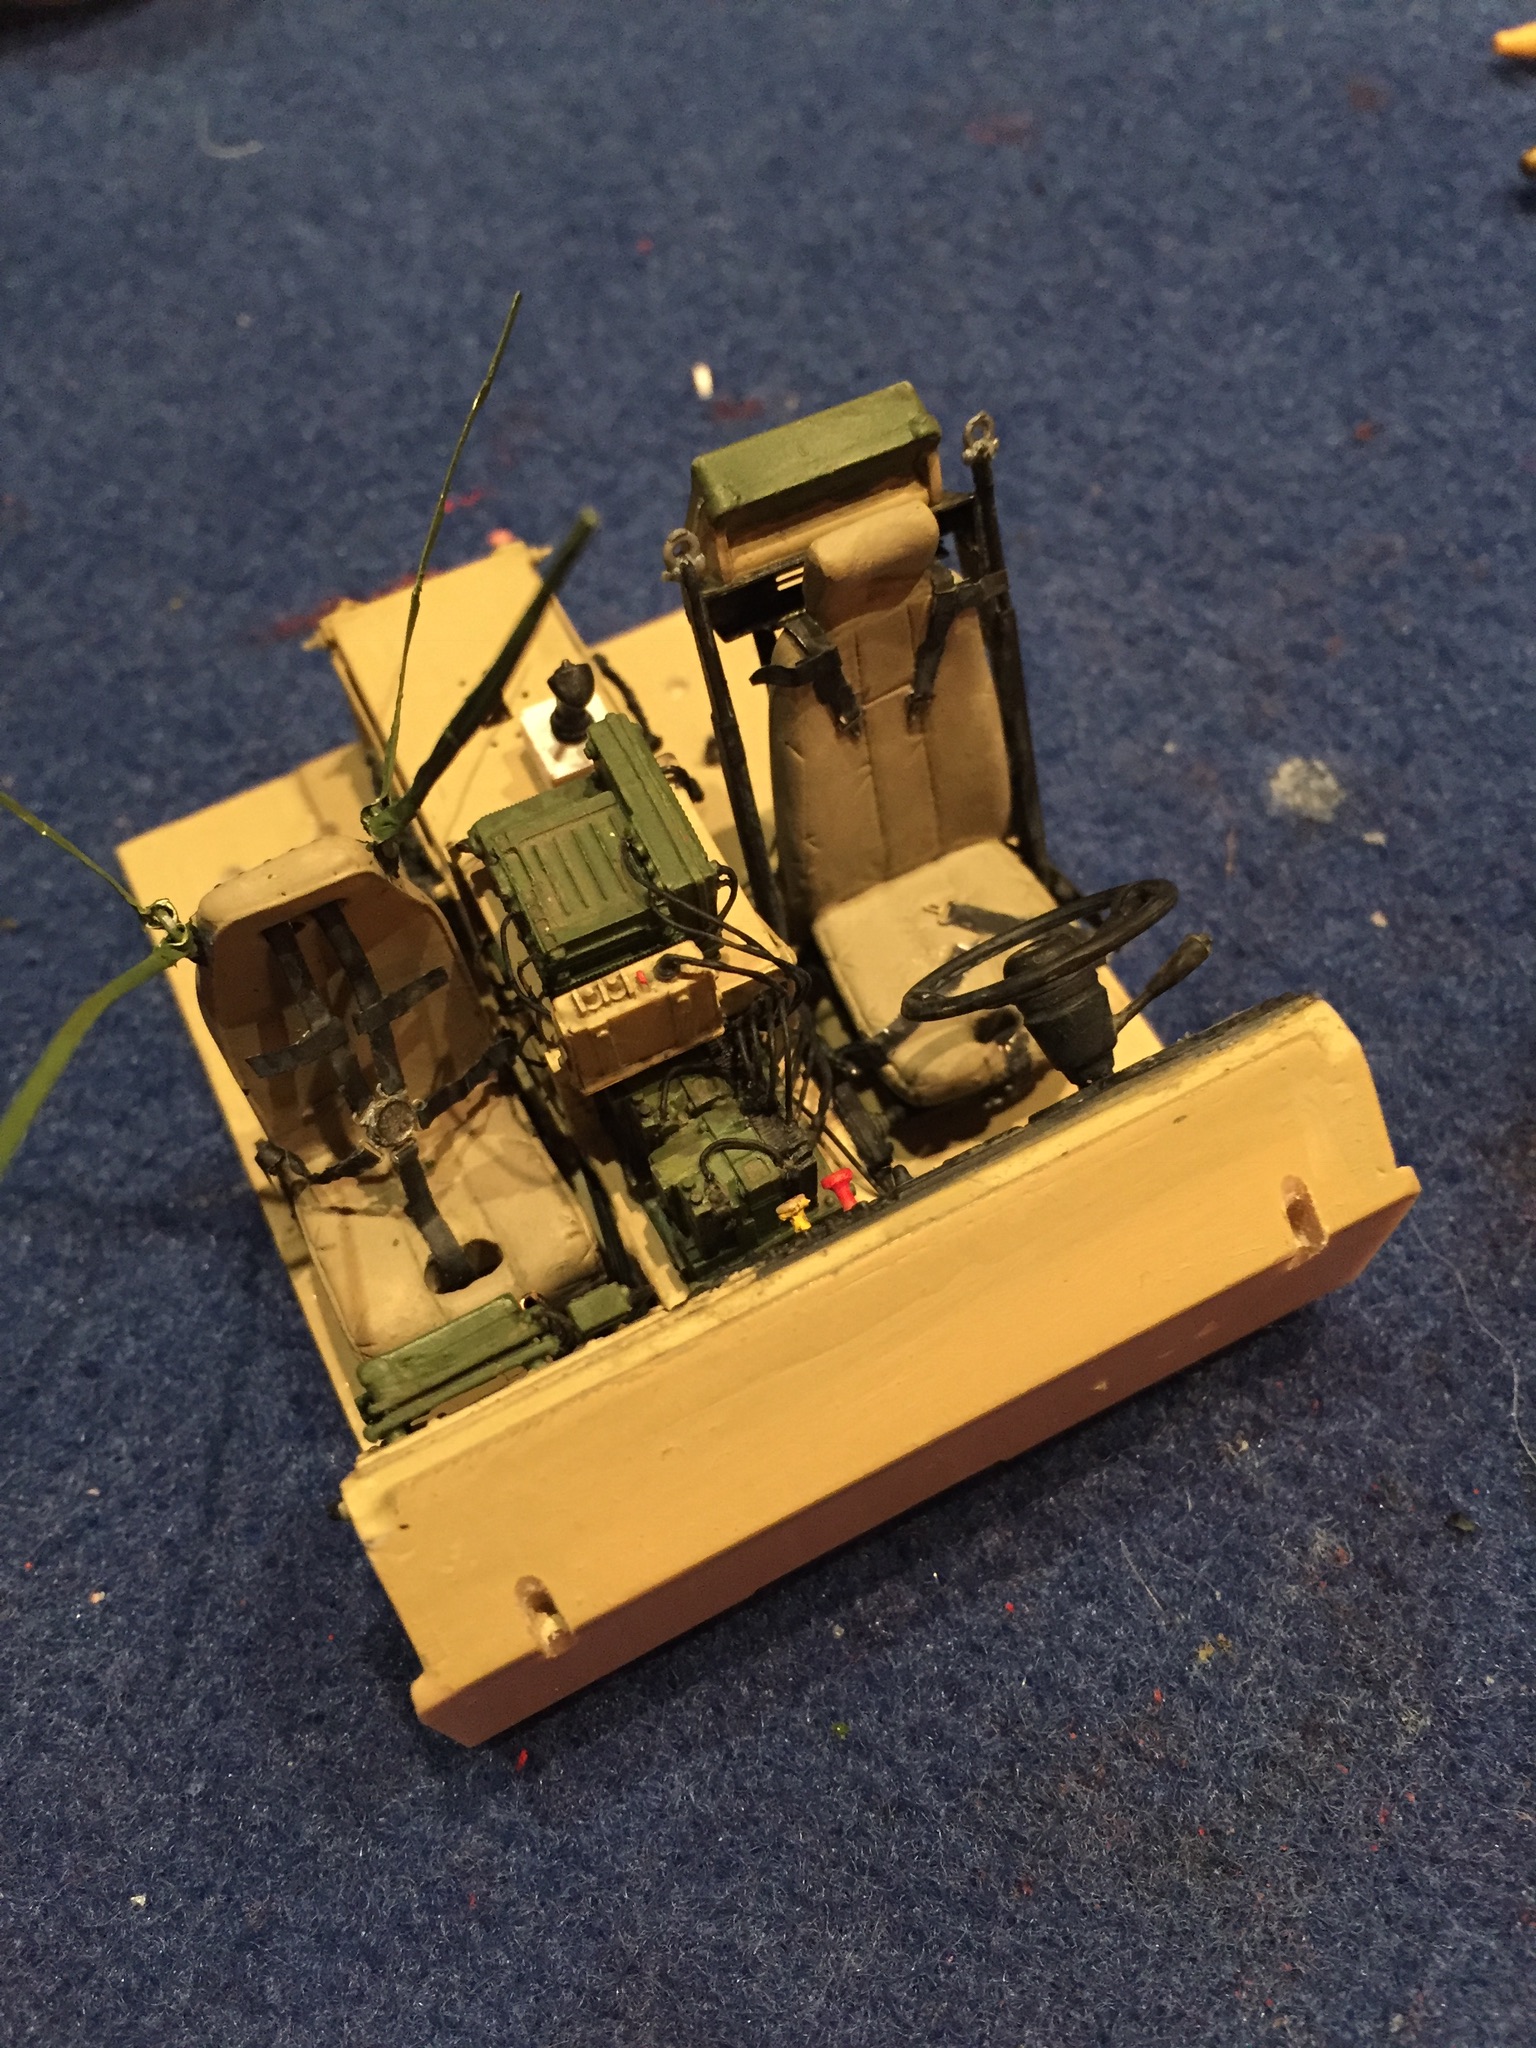
Interiors
Now, an immersion into the interiors.
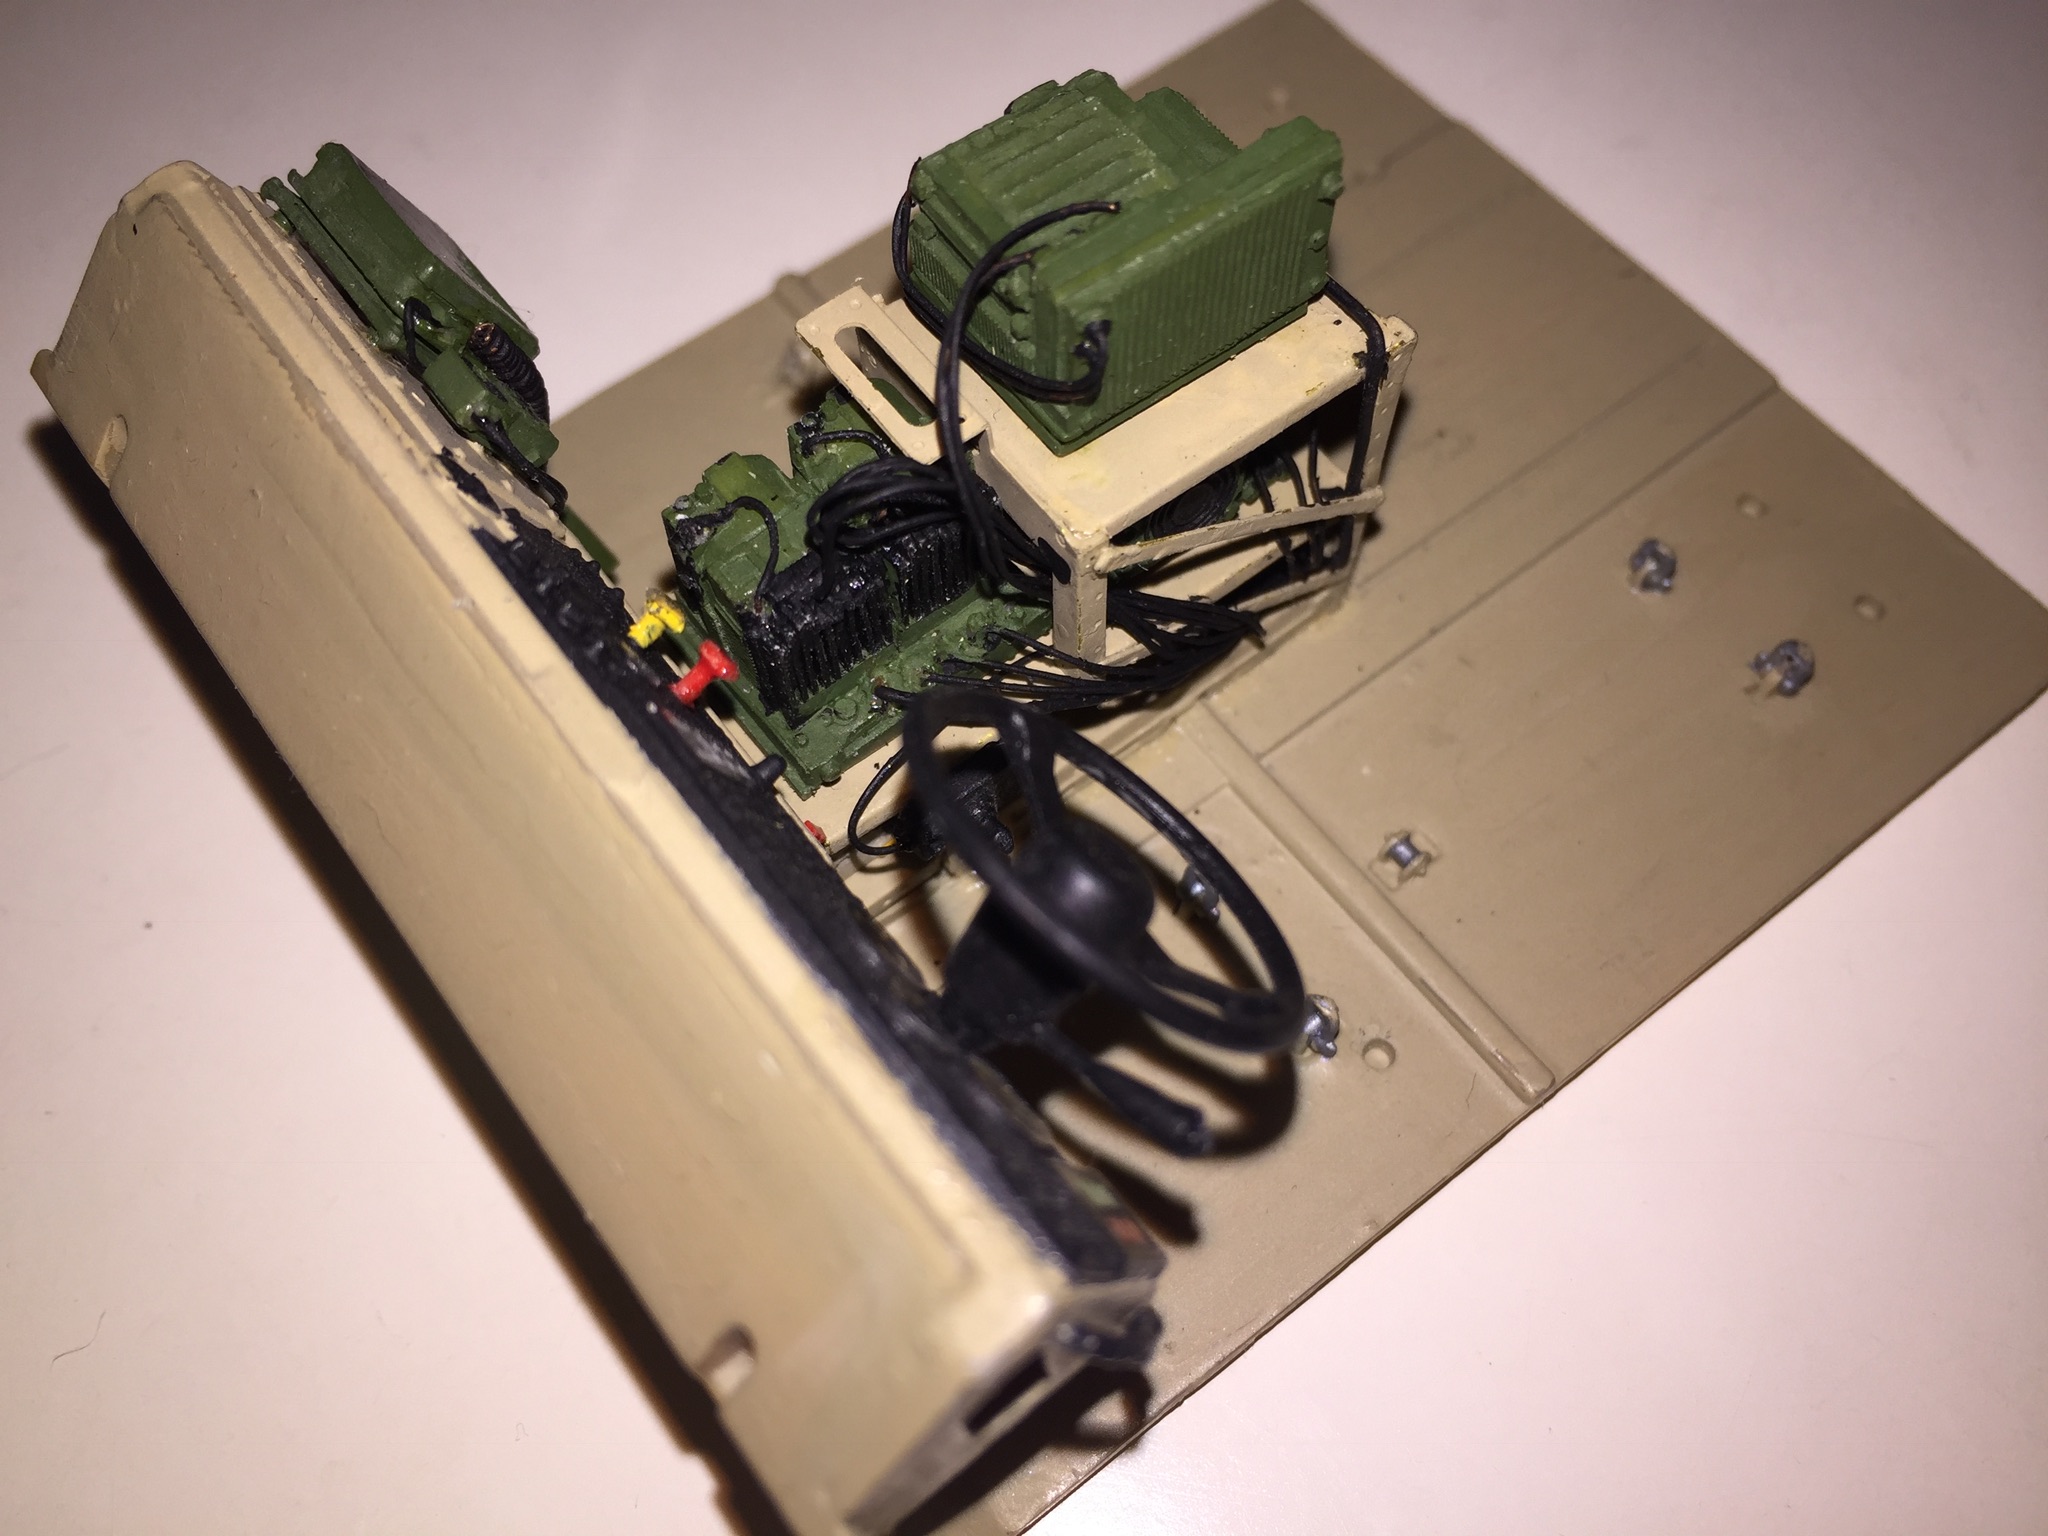
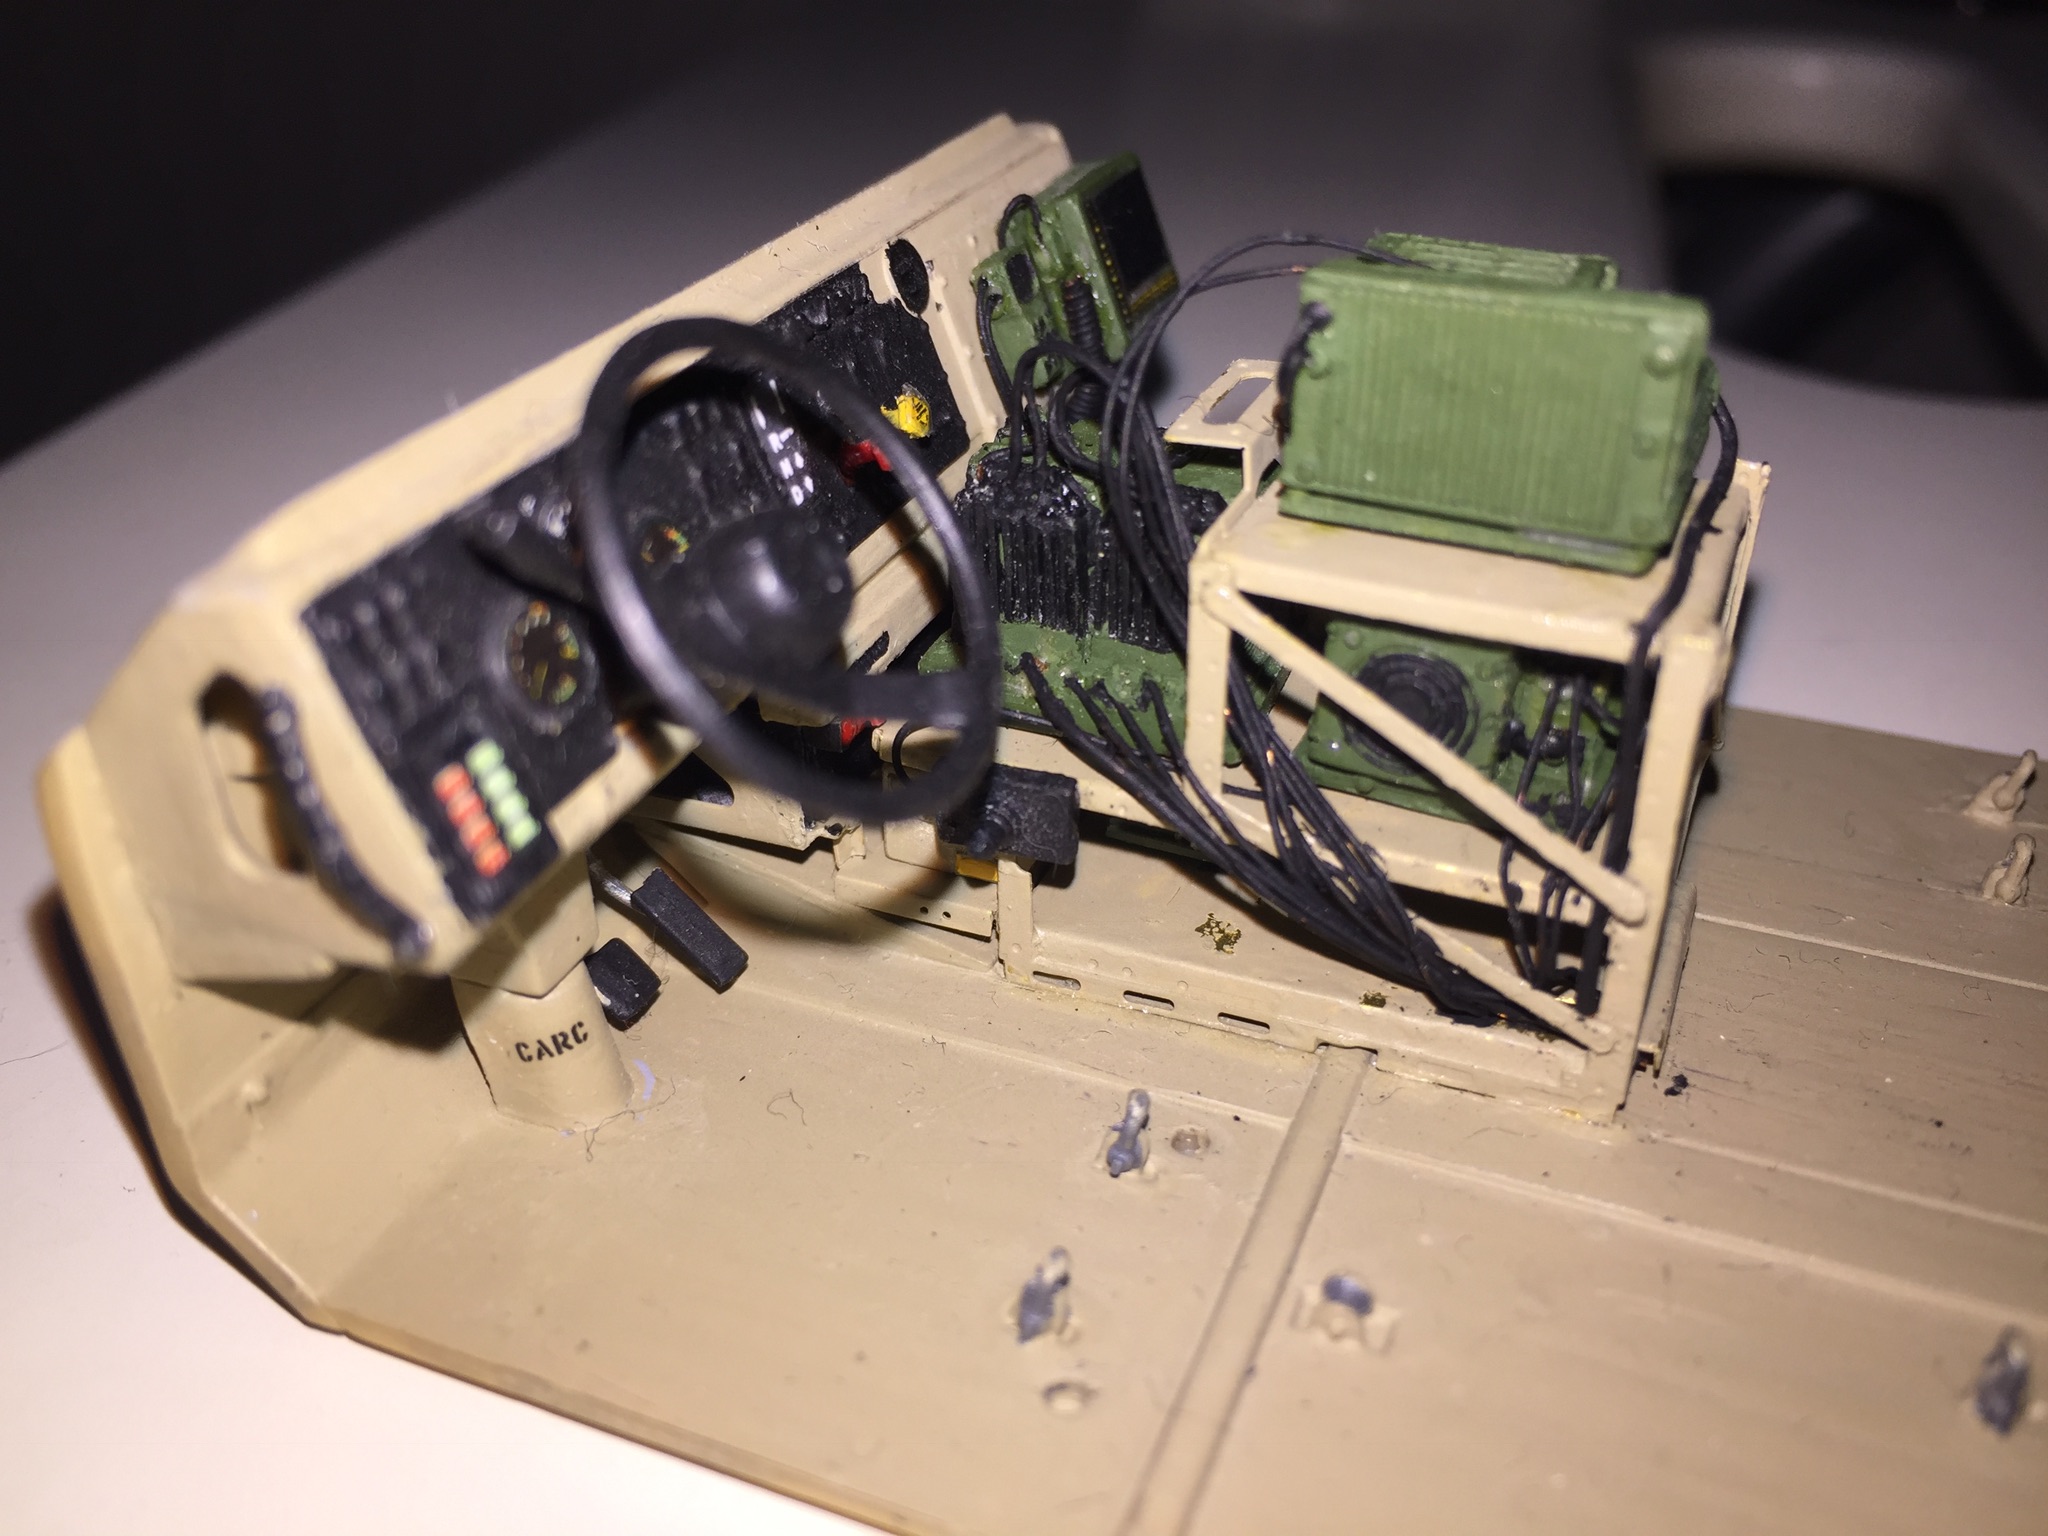
The Panda model includes a fotoetch radio rack, very complex to build but a good replica of the original one.
Unfortunately all the radios are missing in the kit.
I used the only aftermarket kit available that includes all the different radios usually
found in an M-ATV: “Update Set for Interior” by Pro-Art Models (p/n PAU-35053).
It’s a real pity that Pro-Art Models closed production because this kit is no longer available.
To make things more challanging I decided to wire all the radios: I can assure you that it has been a tough job, but the result was worth the effort.
As a reference for wiring I used the photo references mentioned above and product material by Harris, the manufacturer of the radios.
Here some pictures of the first rack
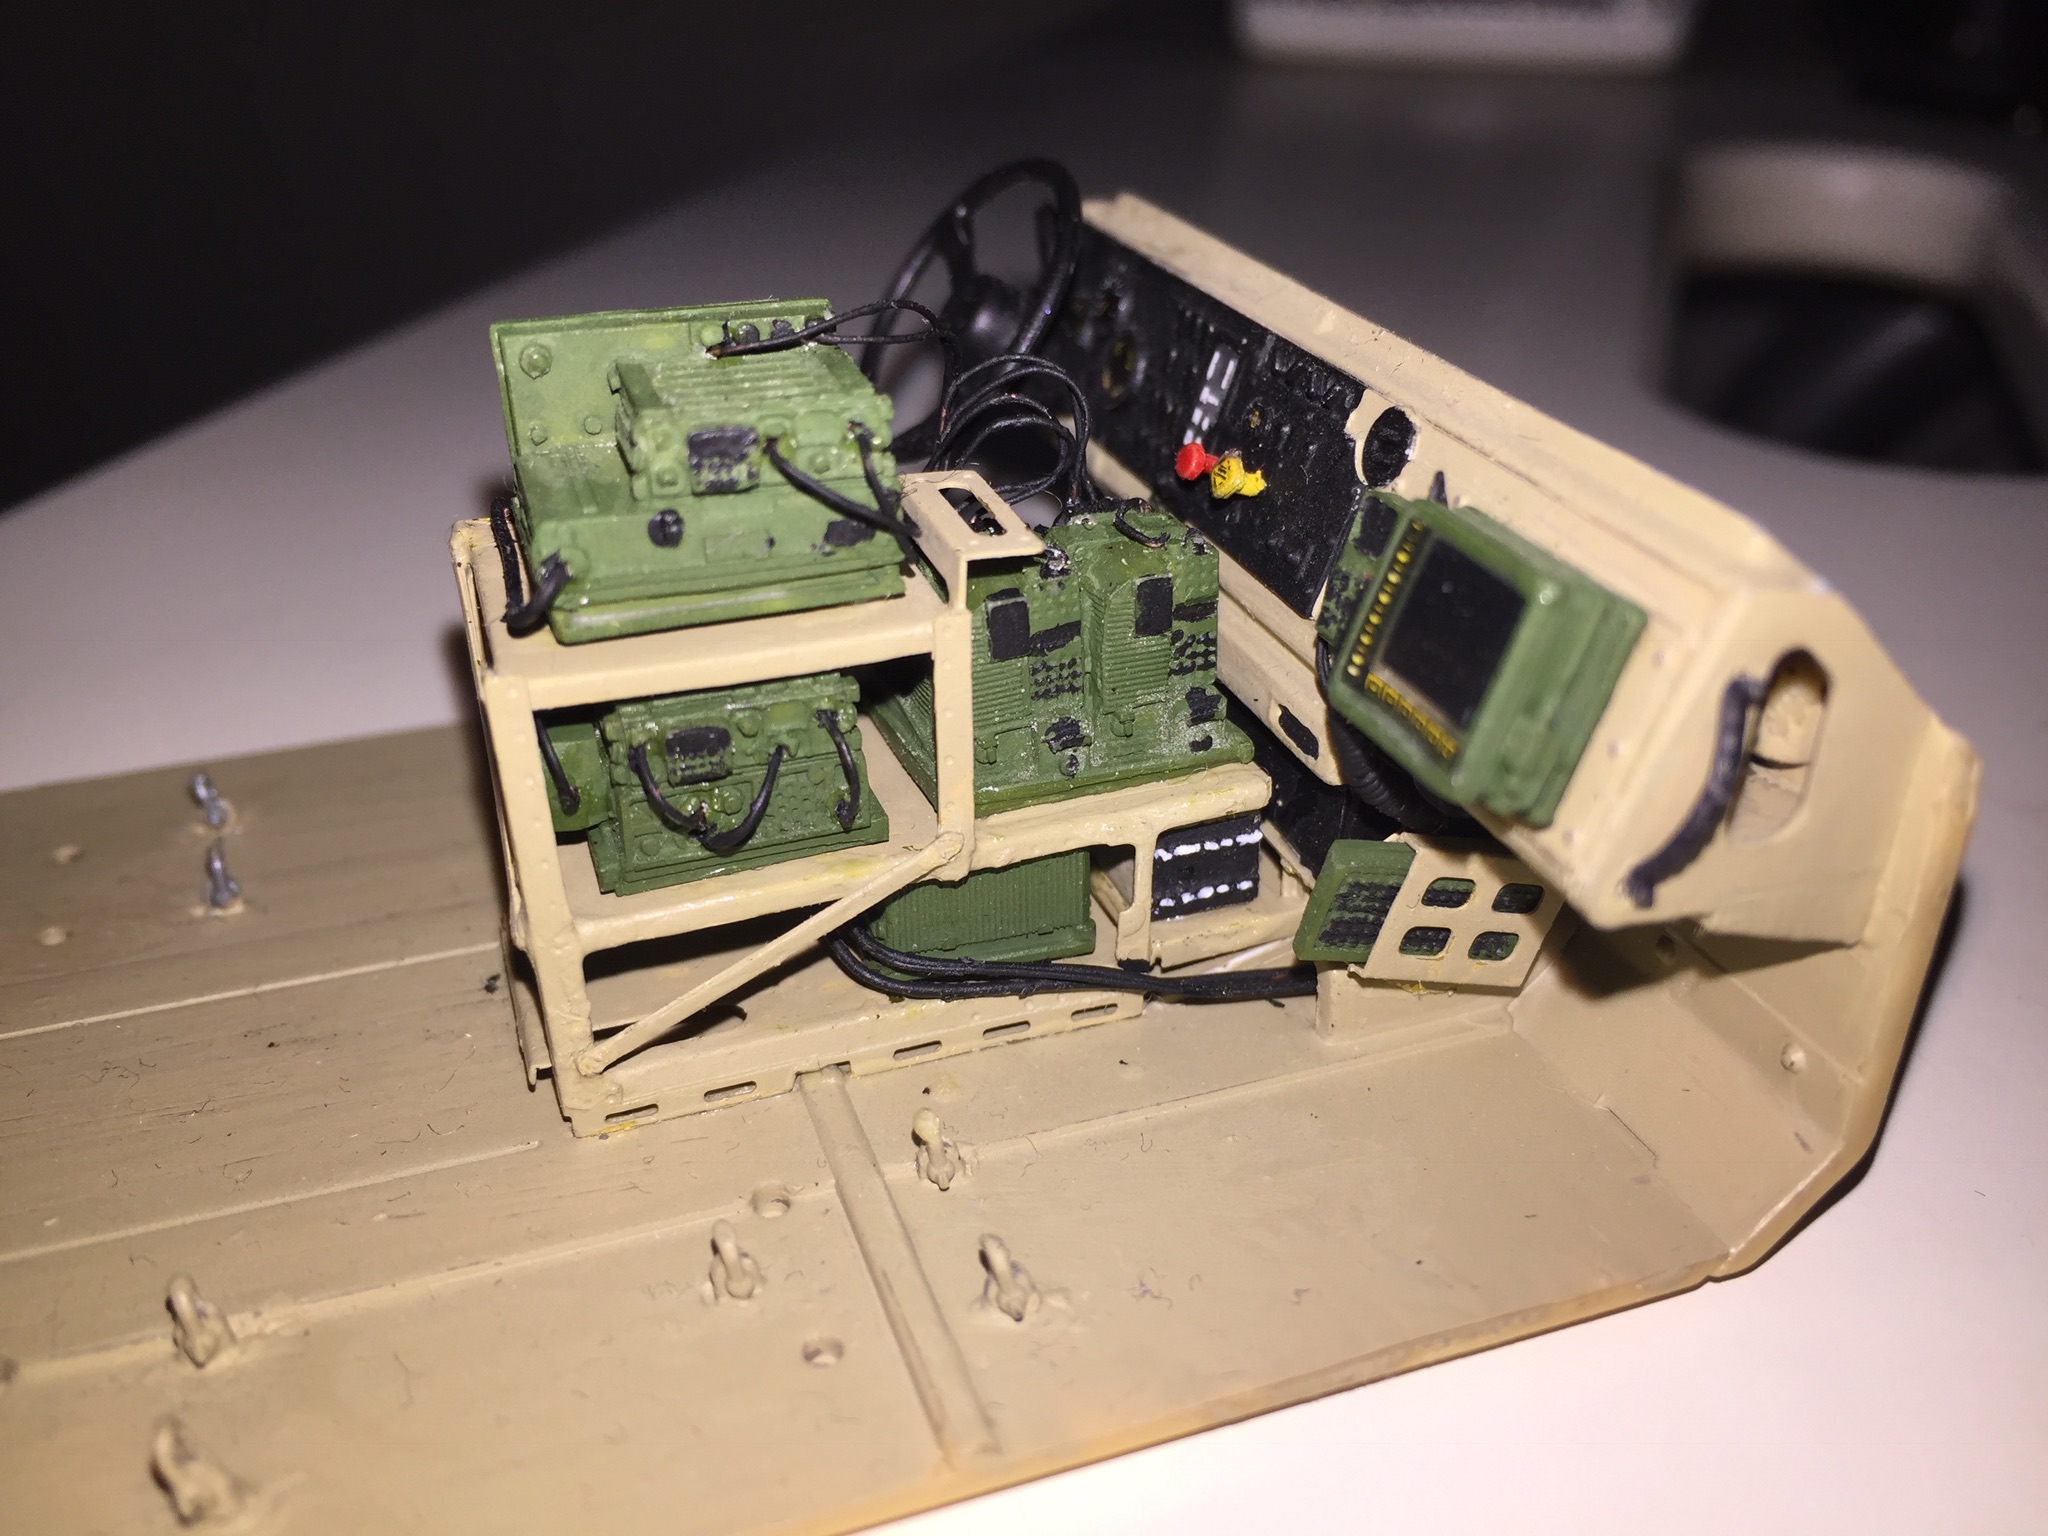
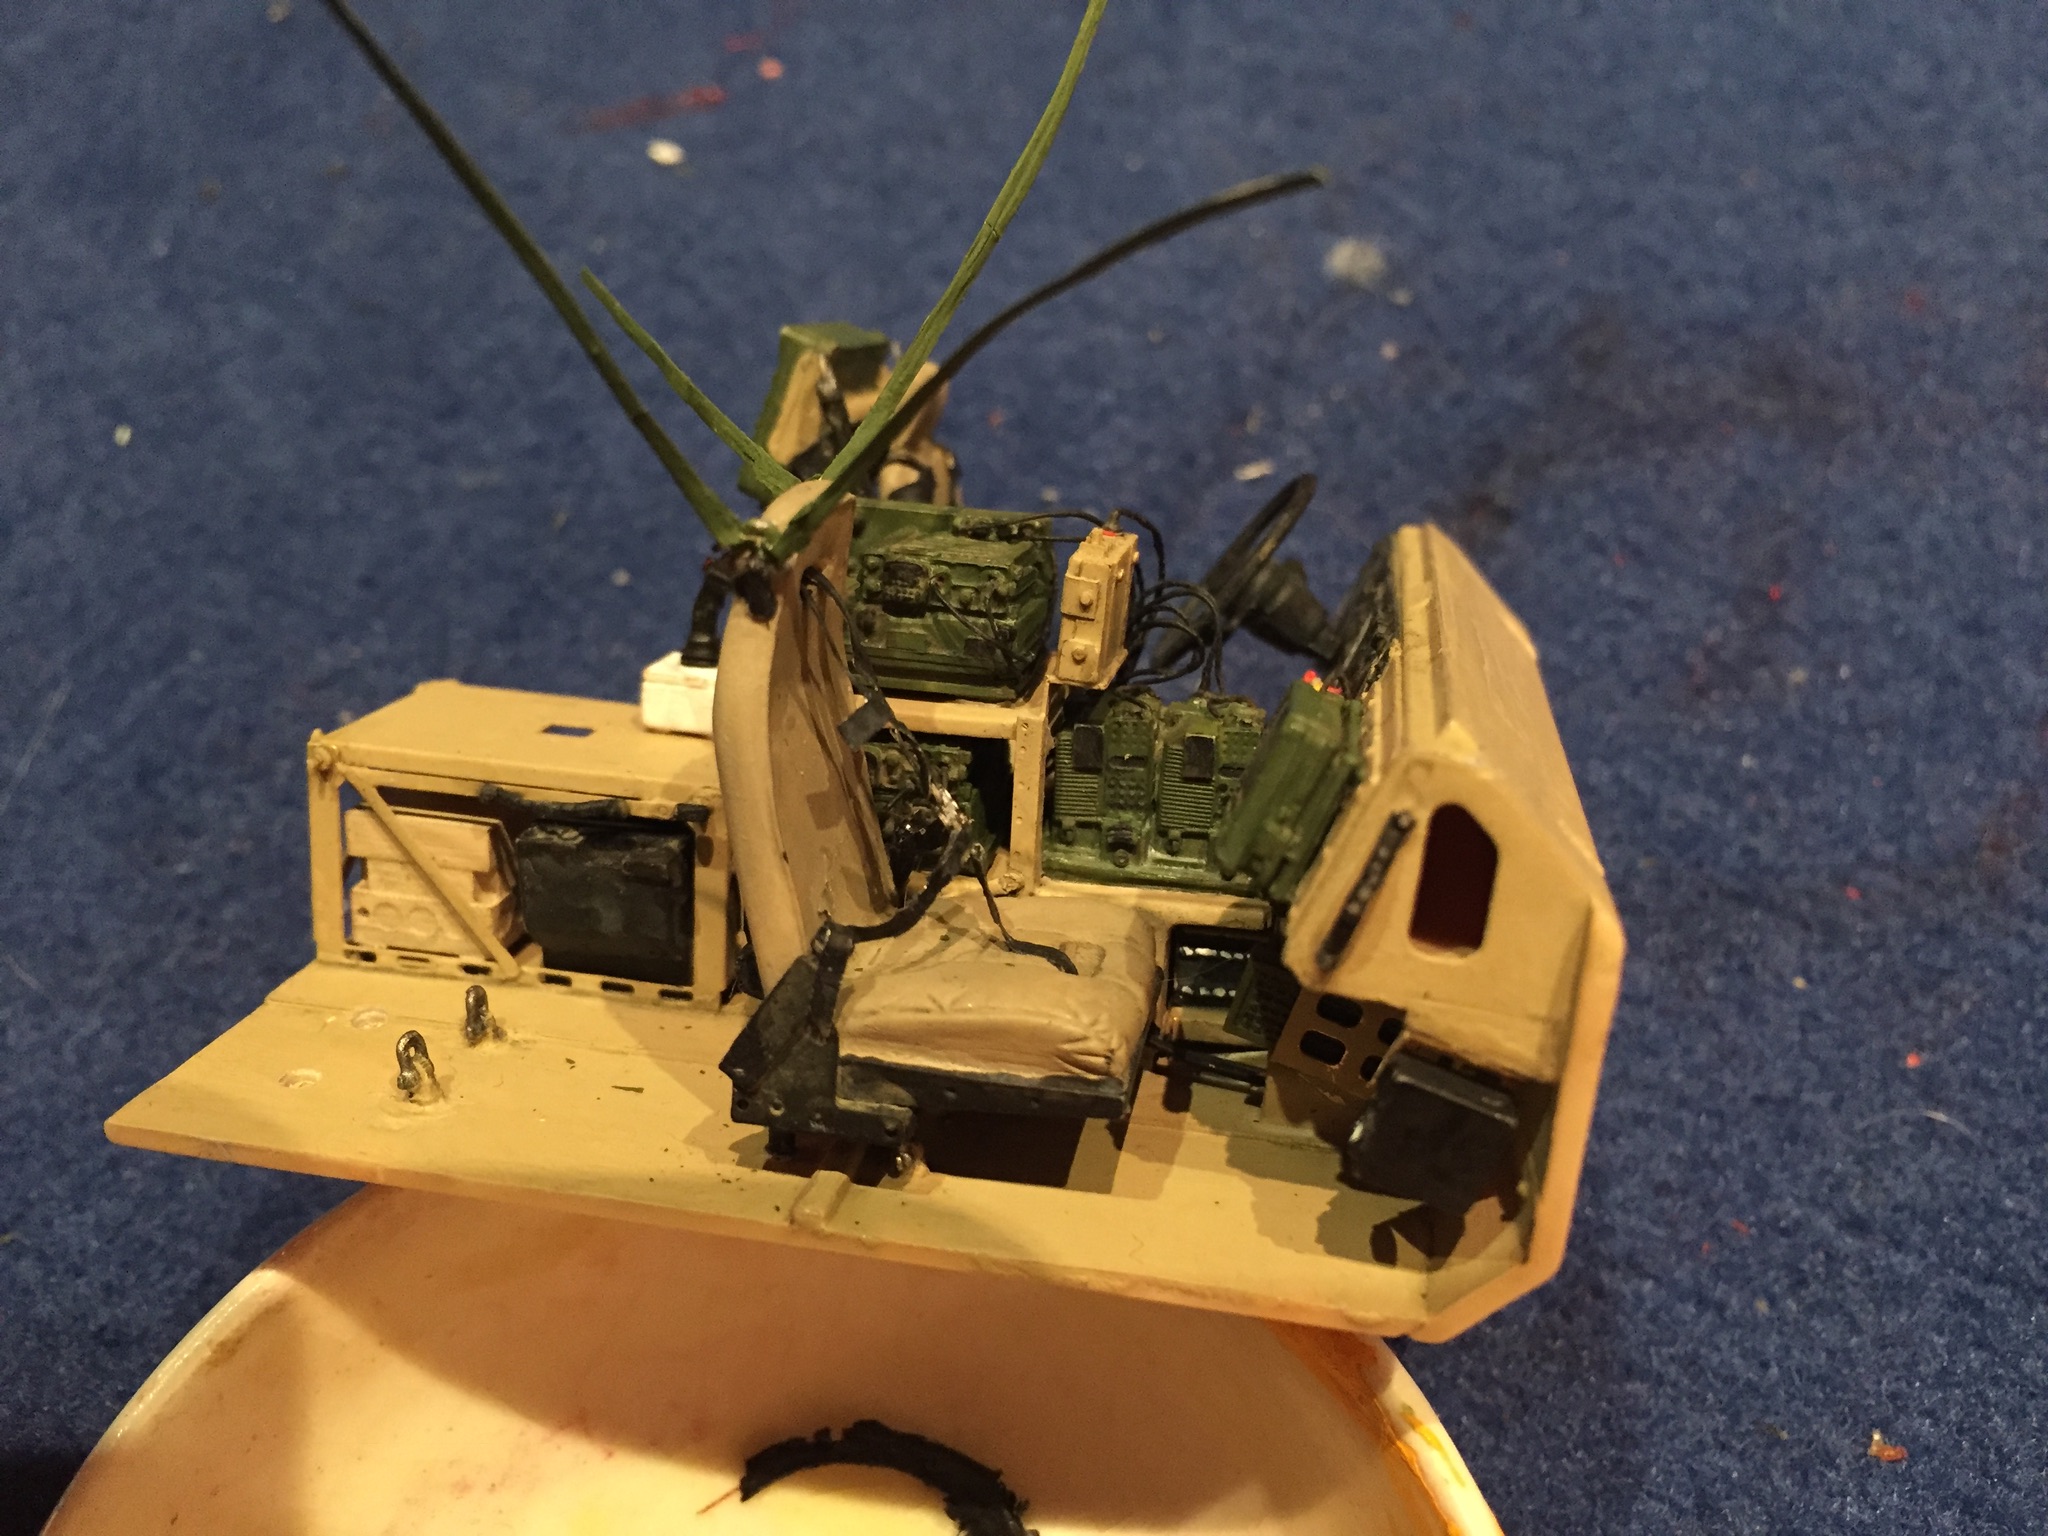
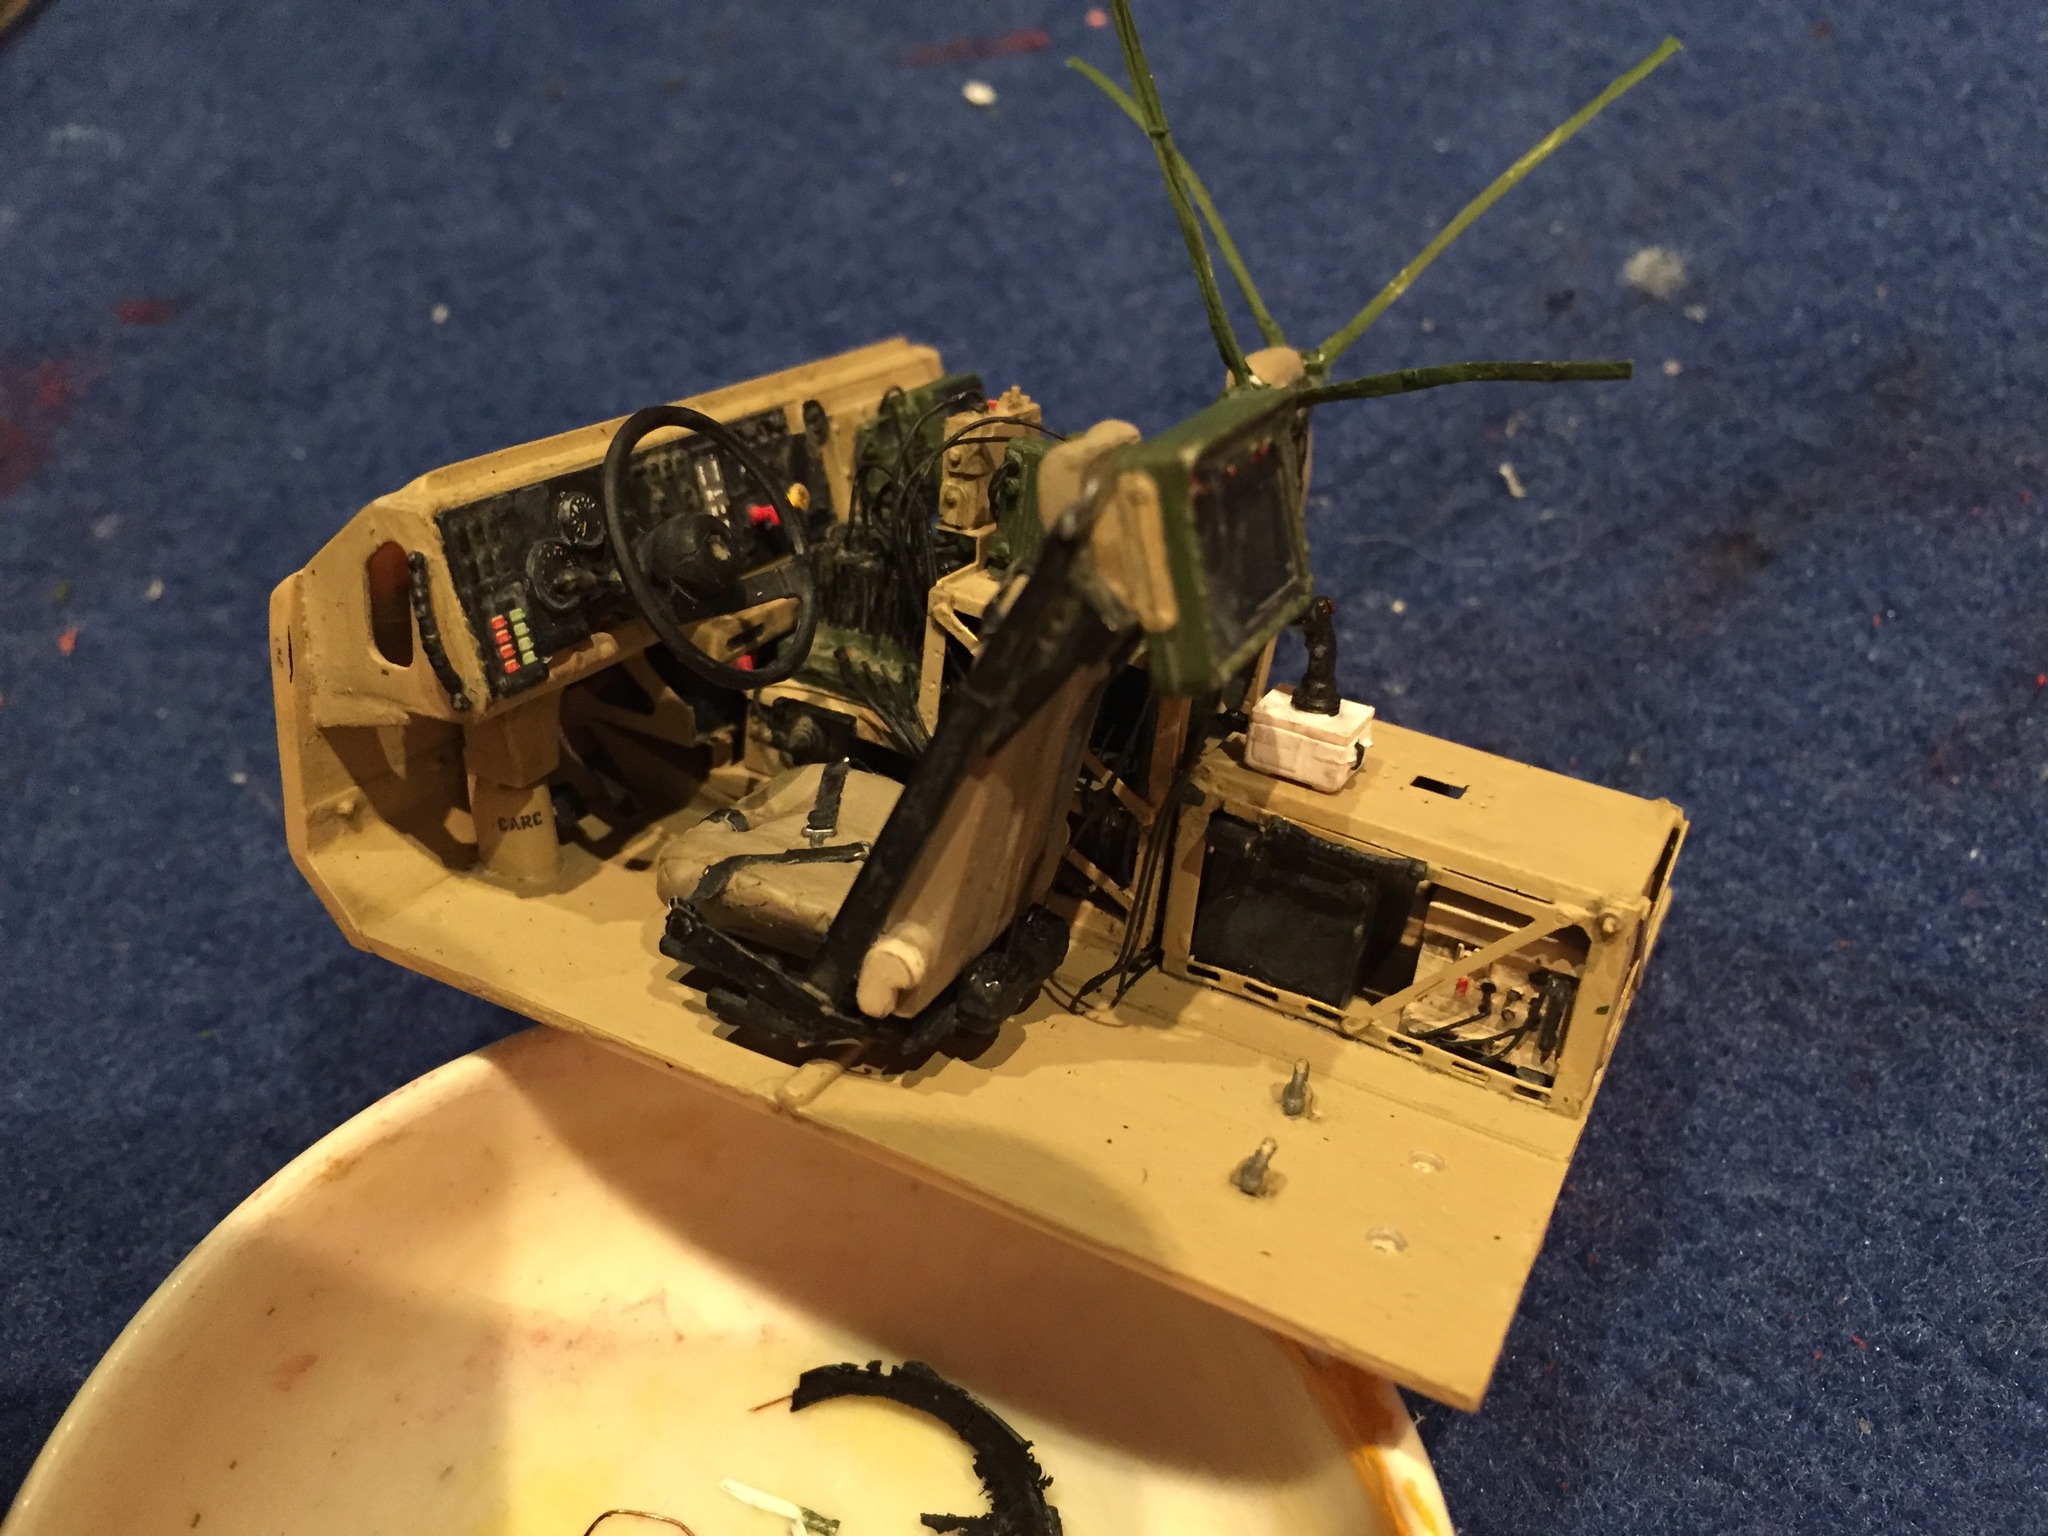
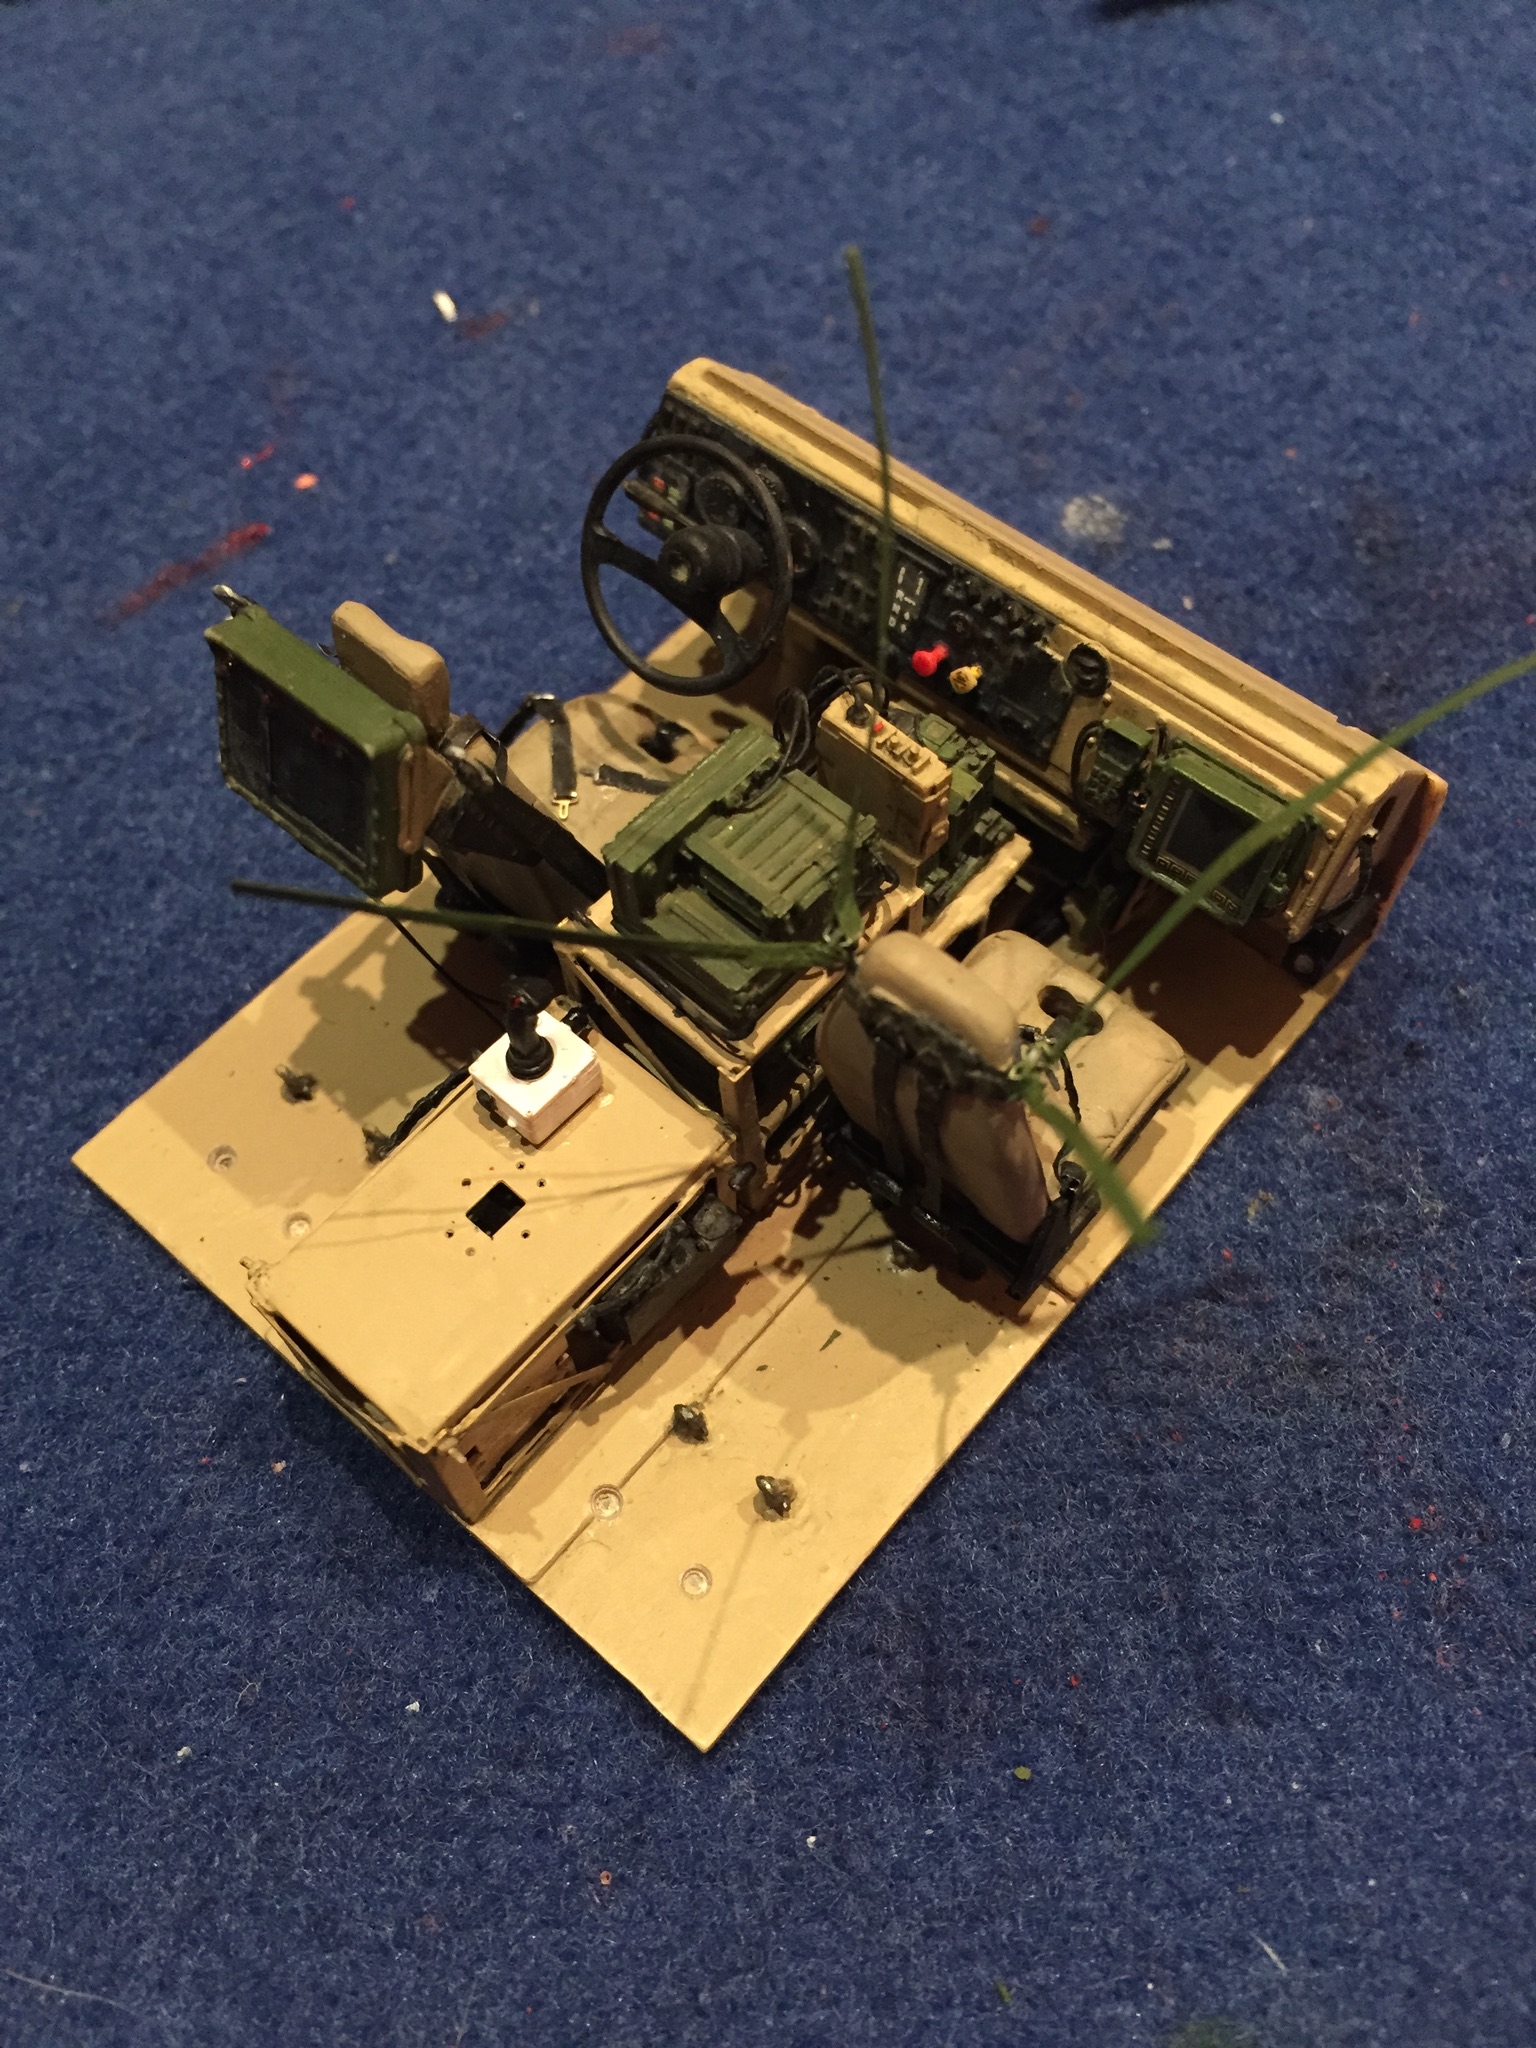
A look at the ceiling.
Here again the Pro-Art upgrade kit comes to help, because Panda provides no intercom units nor the other control devices found in the forepart of the cockpit.
Here again a lot of cabling was necessary.
More work on the interiors.
Second rack added.
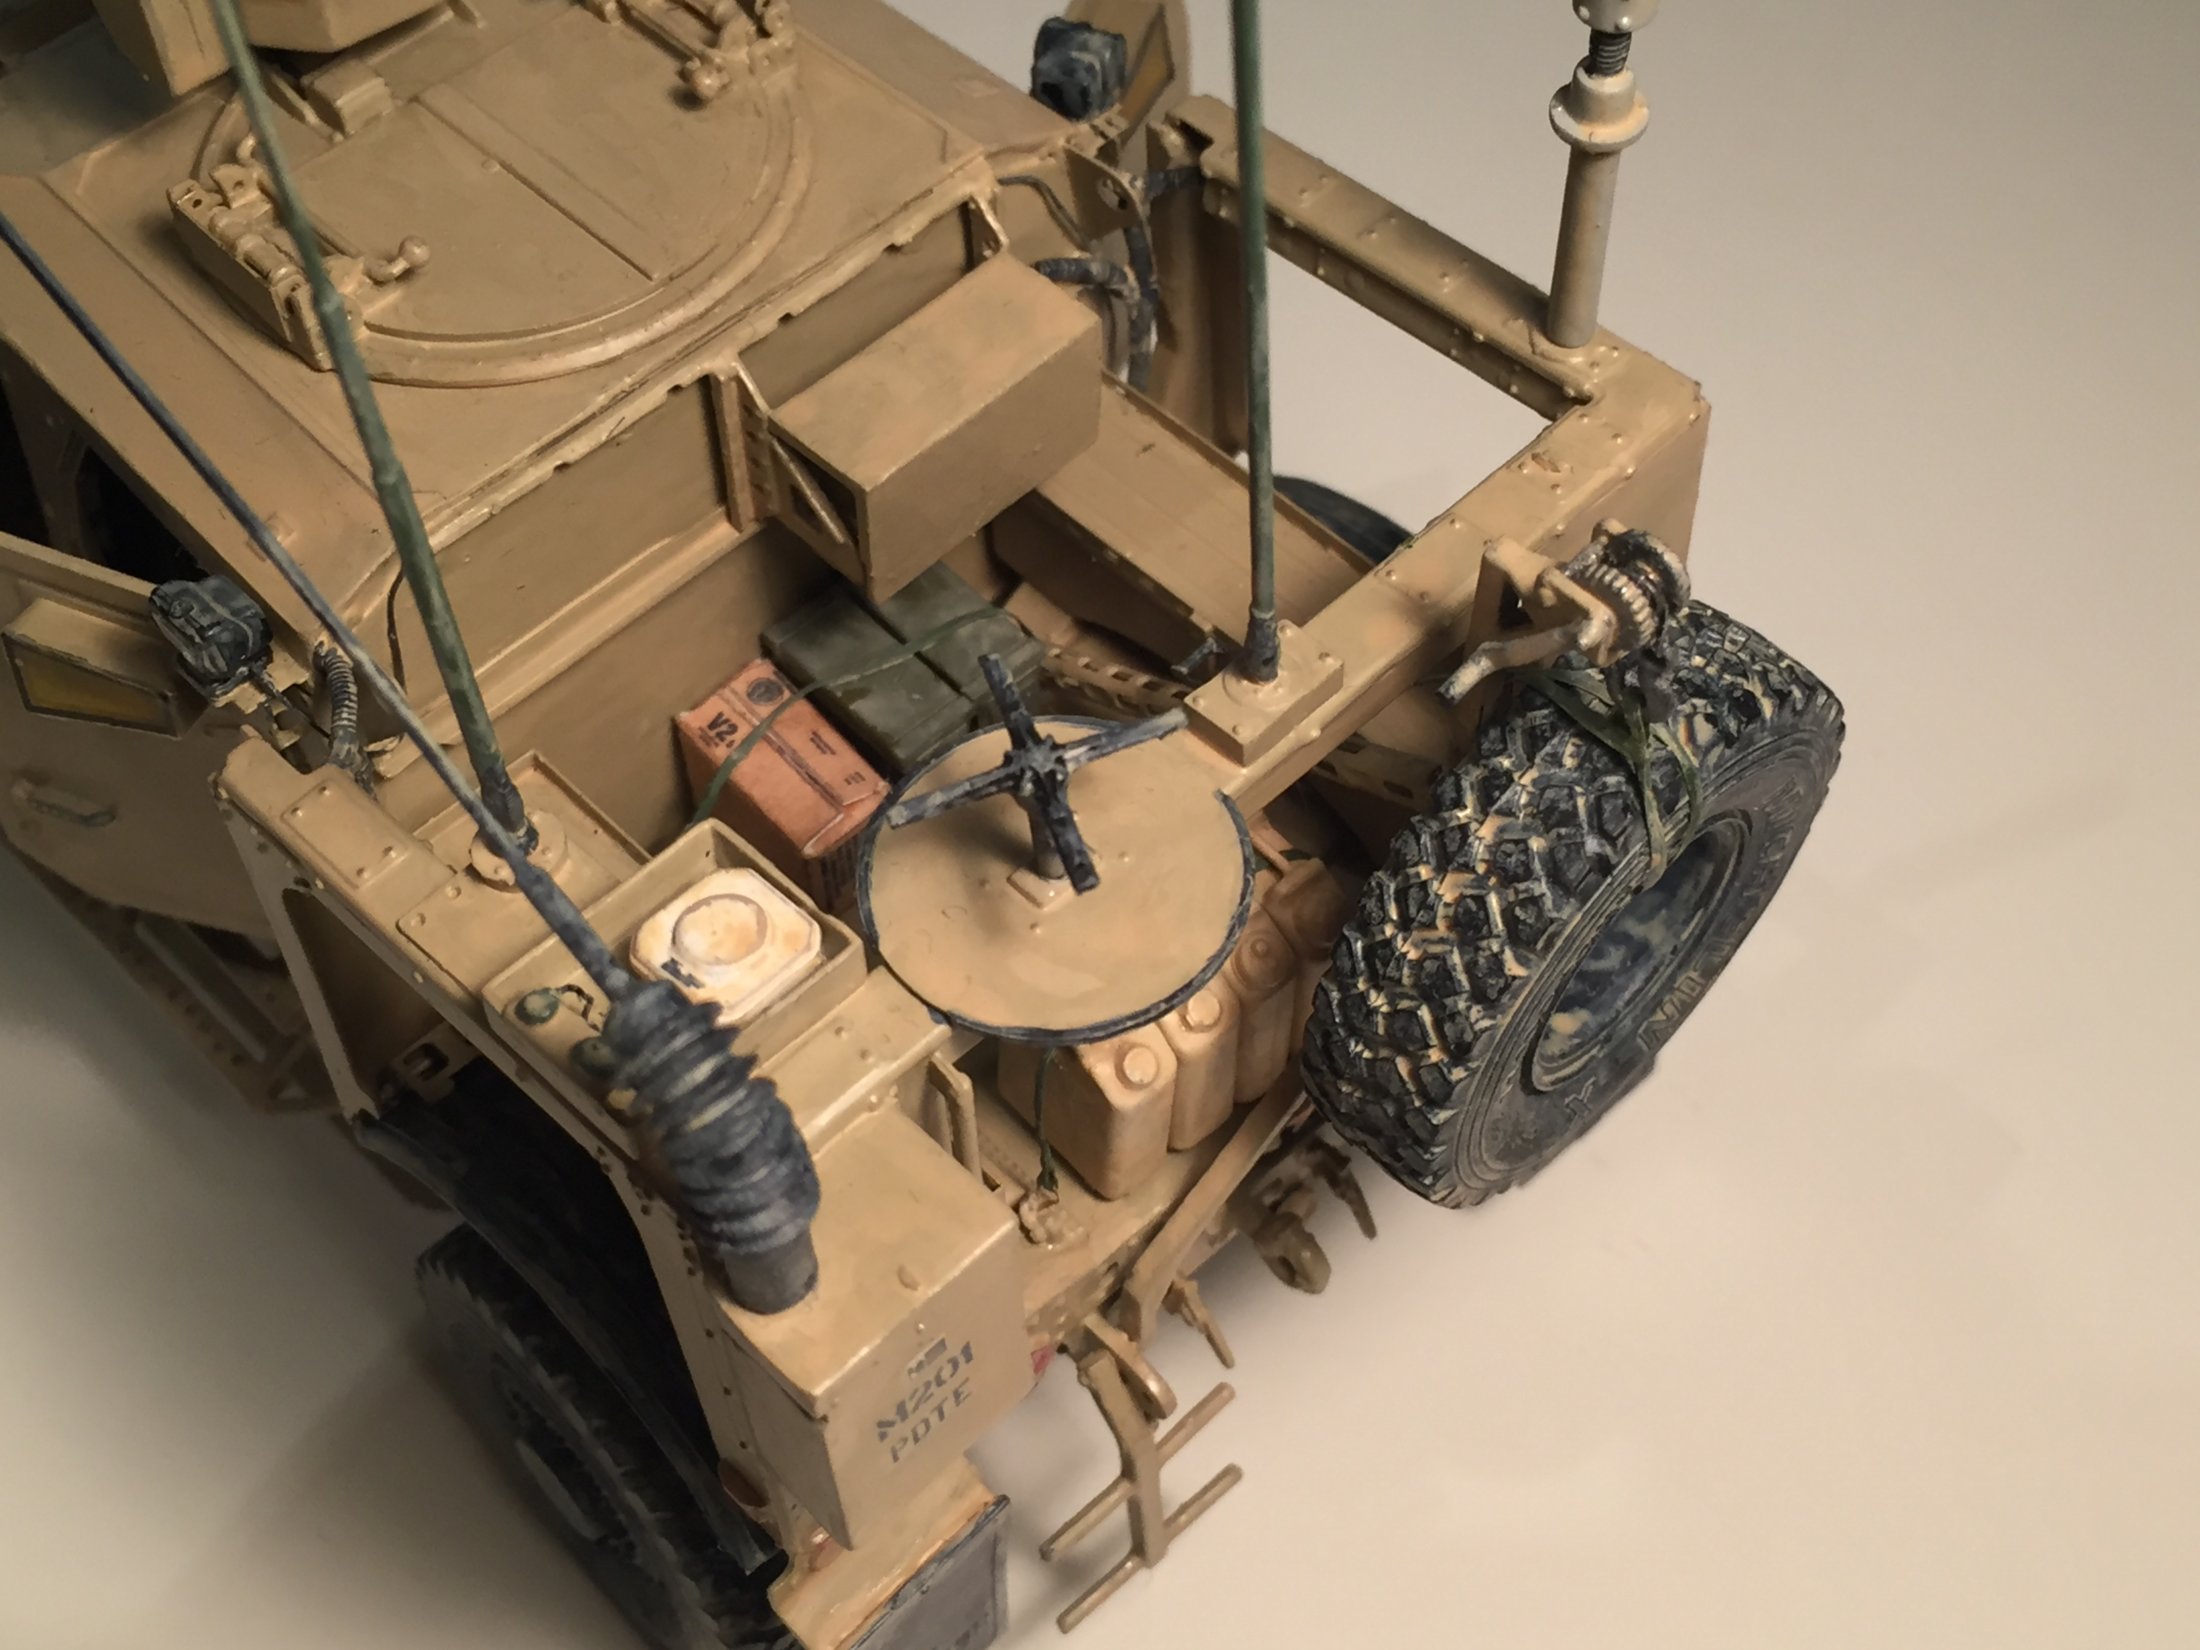
Duke CREW control unit is one of the 3D printed parts designed by myself (available in Priamide Models shop page at Shapeways.com).
Front seat are by Pro-Art. I have added seat belts and suspension belts that will be later attached to the ceiling.
Some light weathering was added.
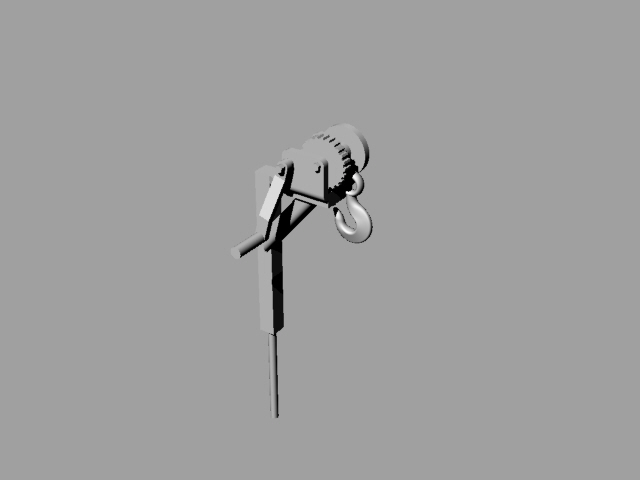
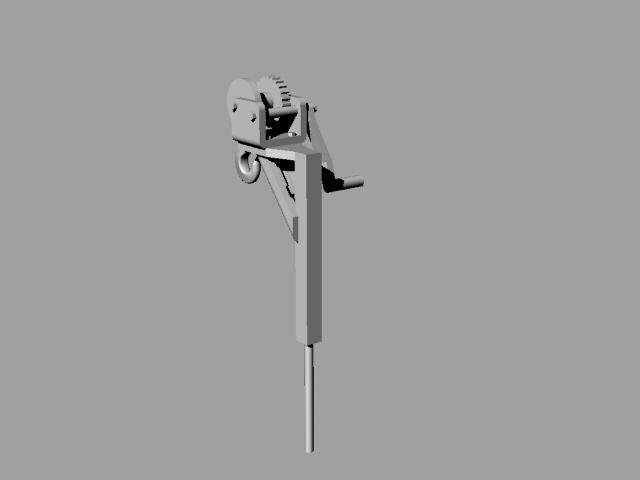
3D printed parts by Priamide Models
I have also designed and 3D printed the under belly shield (available in Priamide Models shop page at Shapeways.com)..
I made this piece because it is depicted in the instruction booklet of the kit (part number F20, in assembly paragraph 21) but it is missing in the box (indeed the entire F sprue is missing).

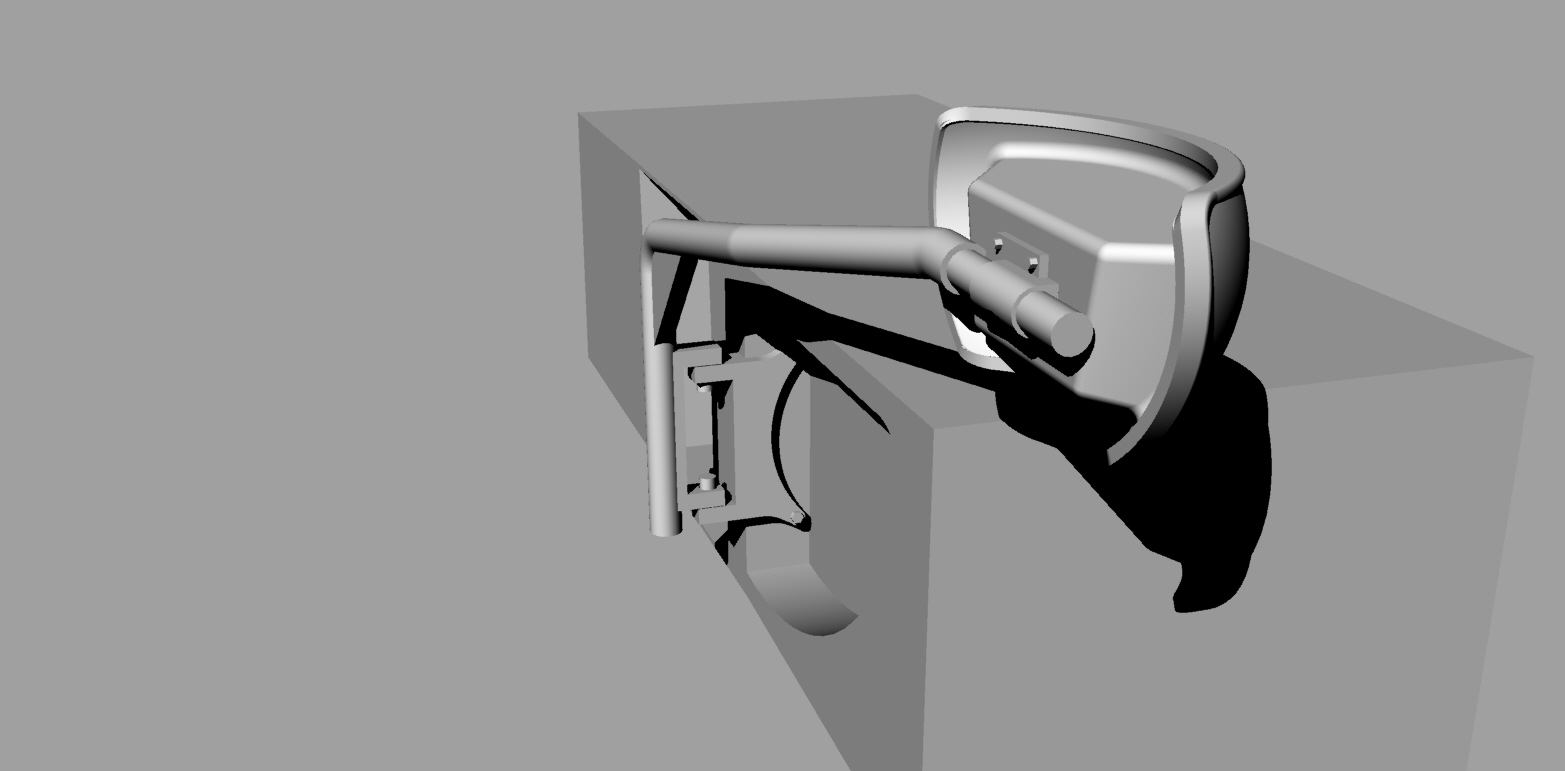
For this model I have also designed and 3D printed:
- spare tire winch
- CREW Duke cage (located on the cargo wall)
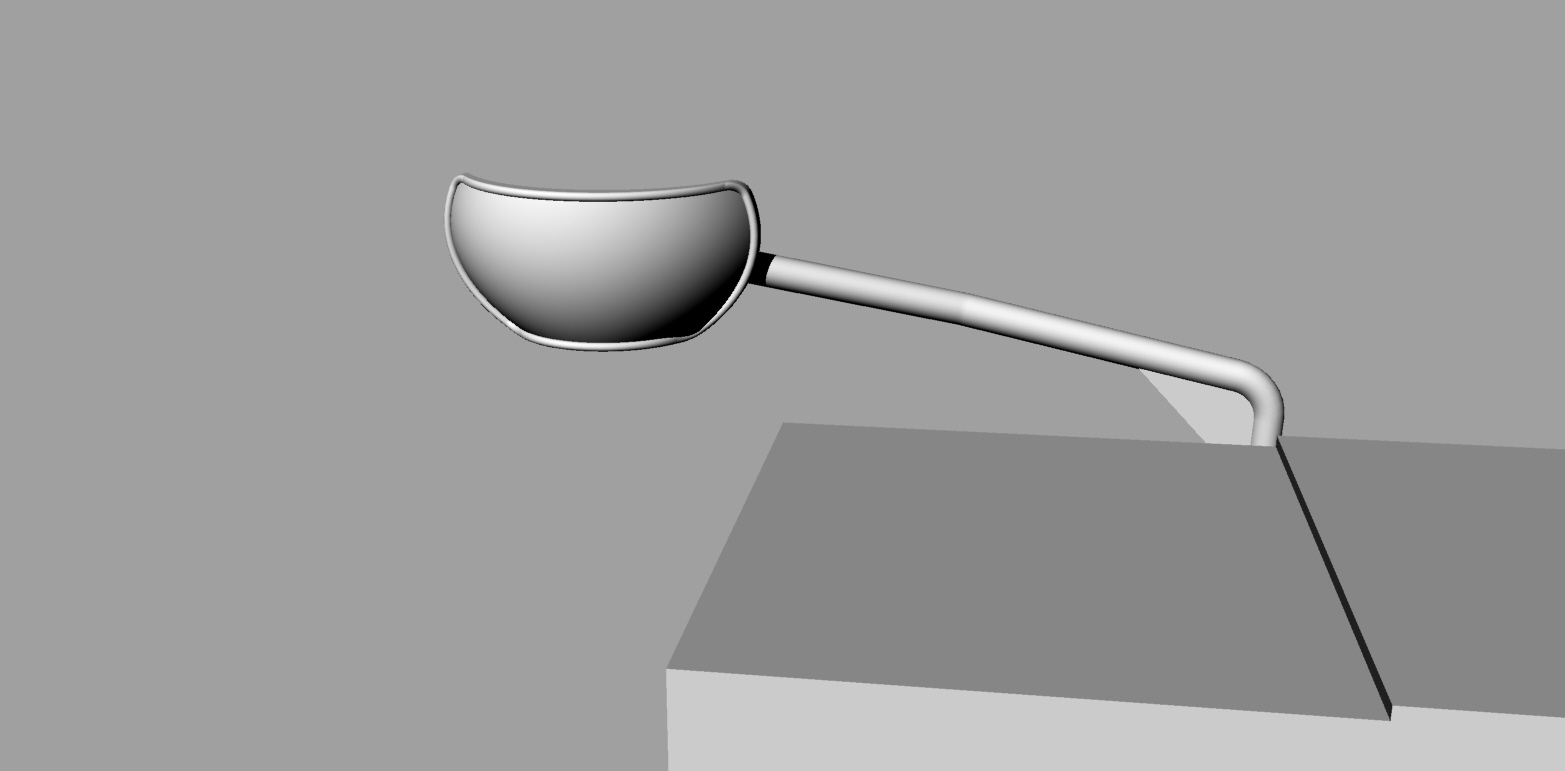
- additional front mirrors
available in Priamide Models page at Shapreways.com.

Model completed in December 2017